Amazon Relational Database Service allows us to create, run, and manage relational databases in the cloud. With RDS, you can choose from six well-known relational database engines:
- Aurora (AWS's relational database)
- MySQL
- PostgreSQL
- SQL Server
- MariaDB
- Oracle Database
Why would you choose to use AWS RDS? RDS abstracts the complex tasks and lets you focus on the most important ones. For instance, RDS manages backups, patching, failure detection, and recovery by itself.
Thus, instead of spending time to do all those, you can focus on more critical tasks. As you can see, AWS RDS provides us with more than a database.
RDS Backups
One of the most important topics is the database backup. The reason is that if something bad happens to our database, we do not want to lose all the data. First of all, RDS enables backups by default. Secondly, there are two ways we can backup data in RDS:
- Automated Backups
- Manual Snapshots
Automated Backups
With automated backups, the data is stored up to seven days, which you can increase it to a maximum of 35 days. Also, you can define a window when you want the backup process to run. During the backup process, the storage I/O might get suspended. Besides that, AWS RDS backups the transaction logs every 5 minutes. The transaction logs represent all the database modifications.
Therefore, with automated backups, you can restore your database to any point in the past.
Manual Snapshots
With manual snapshots, the user has to take them. Also, you can store the manual snapshots for as long as you want (there is no limit).
Thus, manual snapshots are useful when you want to store the database backup for an extended period.
Encryption
All database engines from AWS RDS supports encryption at rest. Before moving forward, let us clarify what "at-rest" means. For the purpose of this article, there are two types of encryption:
- at-rest
- in transit
Encryption at-rest refers to encrypting data that "sits" on the database. On the other hand, encryption in transit means encrypting data while moving between different entities. For instance, the data between the two services.
Let us come back to AWS RDS. If you turn on encryption at rest, it also encrypts the automated backups, snapshots, and read replicas. Encryption uses the AWS Key Management Service (KMS), and it allows you to encrypt both the master, and read replicas. The caveats are that:
- you must encrypt them at launch time
- if you do not encrypt the master, you cannot encrypt the read replicas
In transit/flight encryption
To encrypt data moving between various entities, we have to use SSL certificates. What do I mean by that? When connecting to the database, we need to provide SSL options with a trust certificate.
Read Replicas and Multi-Availability Zones
Read Replicas, and Multi-Availability Zones are two different concepts. With read replicas, you can take some of the load from the original database. For instance, applications write on the original database (e.g. adds a new record), and reads the data from a copy. The second copy of the original database is called a read replica, and its only purpose is to allow applications to read data. Why should we do that? We do that when there are too many requests to the database, to avoid slowing it down. There can be up to five read replicas, and they are used solely to read data.
When it comes to Multi-Availability Zones, we have the same database in two different zones. For instance, the write and reads are happening to the database in AZ 1. Then every change in it is replicated to the other database in AZ 2. Multi-AZ is perfect for disaster recovery. In case the primary database goes down, the standby (secondary) database becomes the main one.
Therefore, if you want to take some of the load from the database, create a read replica. On the other hand, if you want to avoid your database becoming unresponsive, use the Multi-AZ option.
How to create and configure a database
First of all, log in to your AWS account, and search for the RDS service in the drop-down menu. Figure 1 illustrates an example.
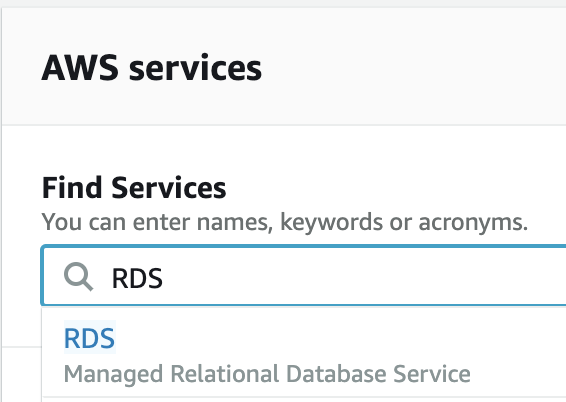
Figure 1
Once you click on the service, you are taken to a new page where you can create the database. You can either go on the left-side, click on the Database option, and then click on Create database. Or, you can scroll down the page and click on the Create database button, as in figure 2. Whatever option you choose is fine.

Figure 2
After that, you are taken to another page where you can choose the database engine, and configure it. As shown in figure 3, we have to select a database creation method firstly. Since the purpose of this tutorial is to learn how to create a database, we choose the option Standard Create. If we choose the other method, AWS is going to do most of the configurations for us.
Then, the next step is to choose a database engine. We can choose any database engine except Aurora. The reason is that it is not included in the free tier. Therefore, I randomly chose MySQL.
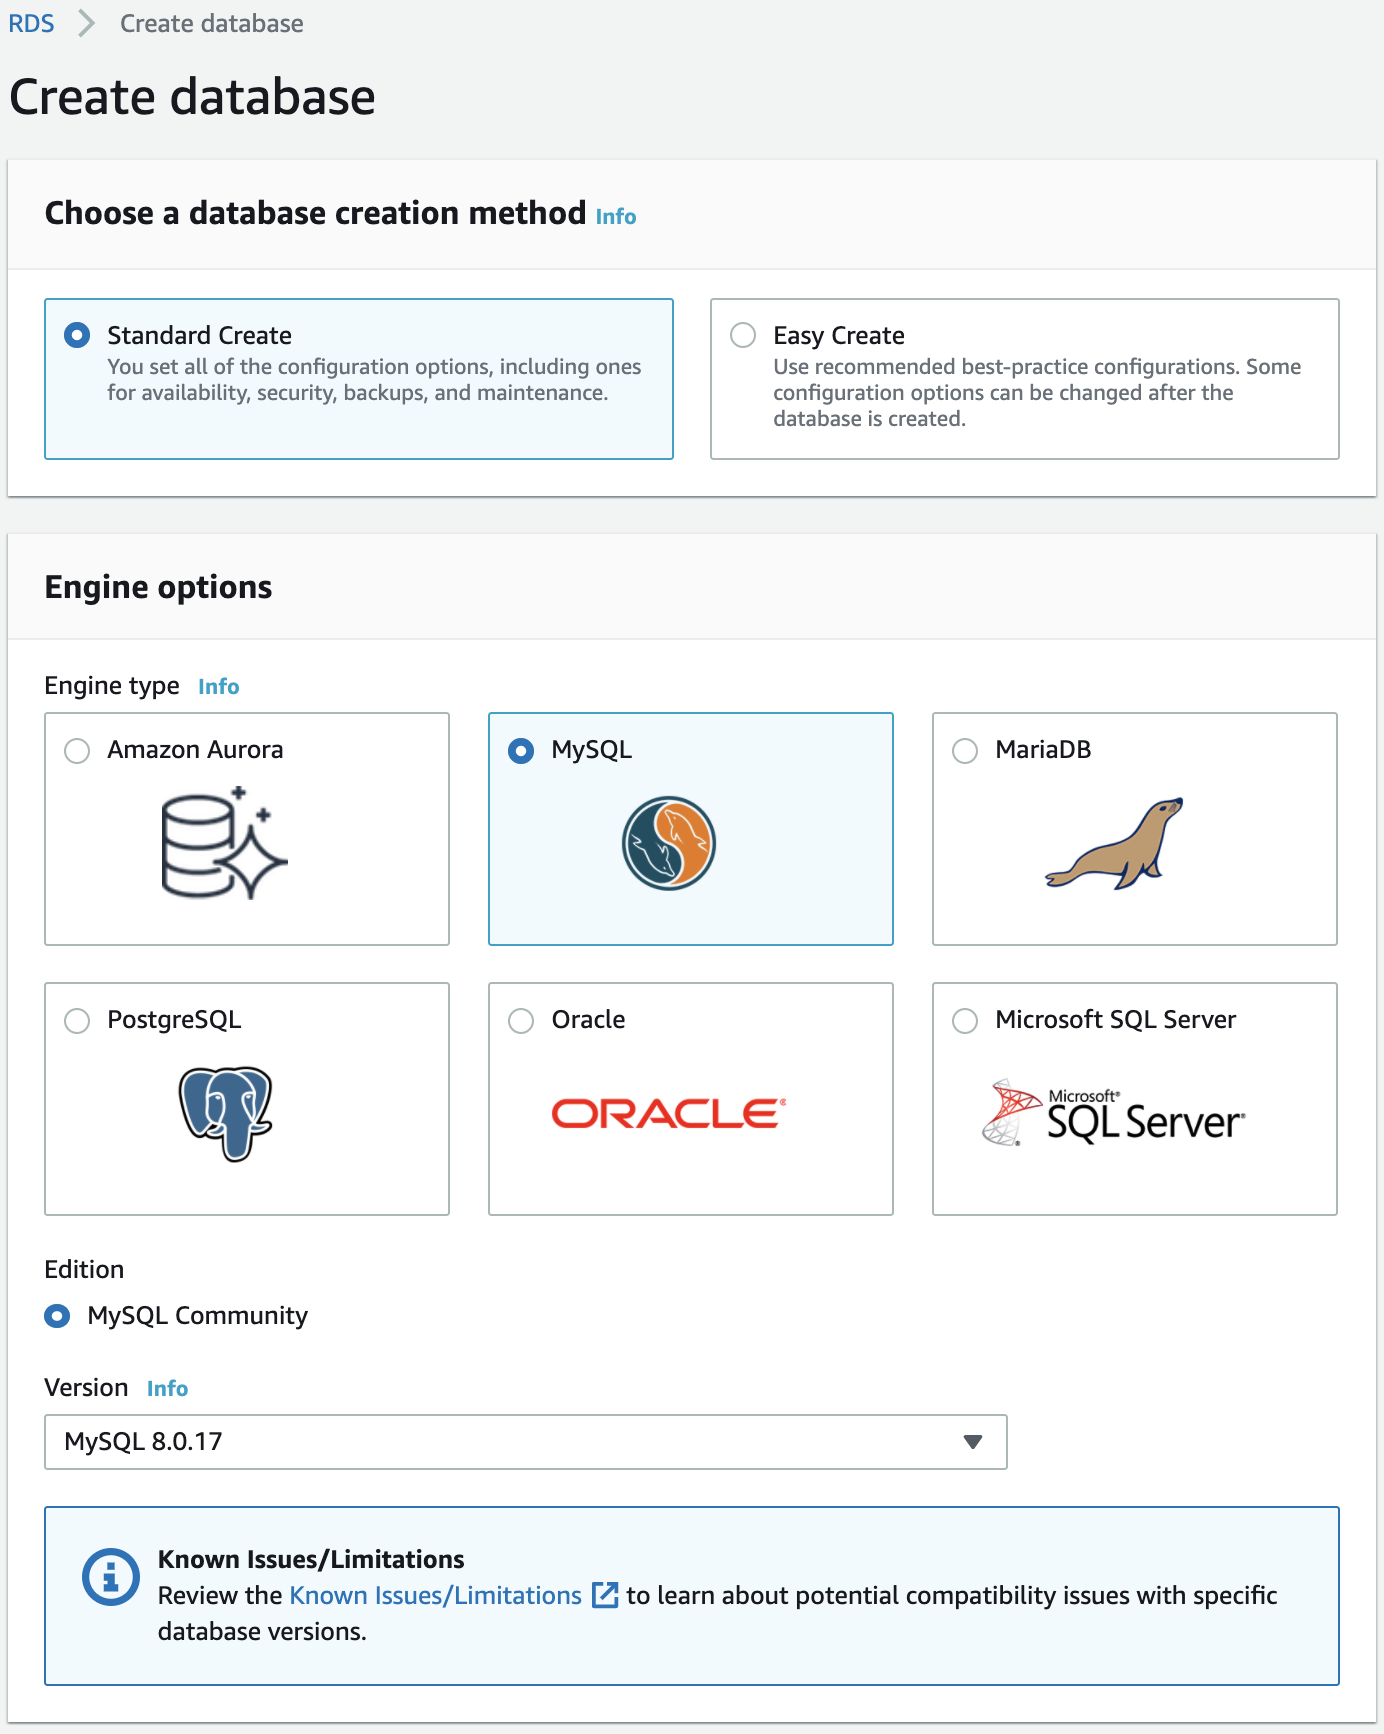
Figure 3
In the next step, we need to choose a template for our database. Since we only want a database to test it, we choose the Free tier option.
Afterwards, we choose a name for the database, a user name and a password, as shown in Figure 4.
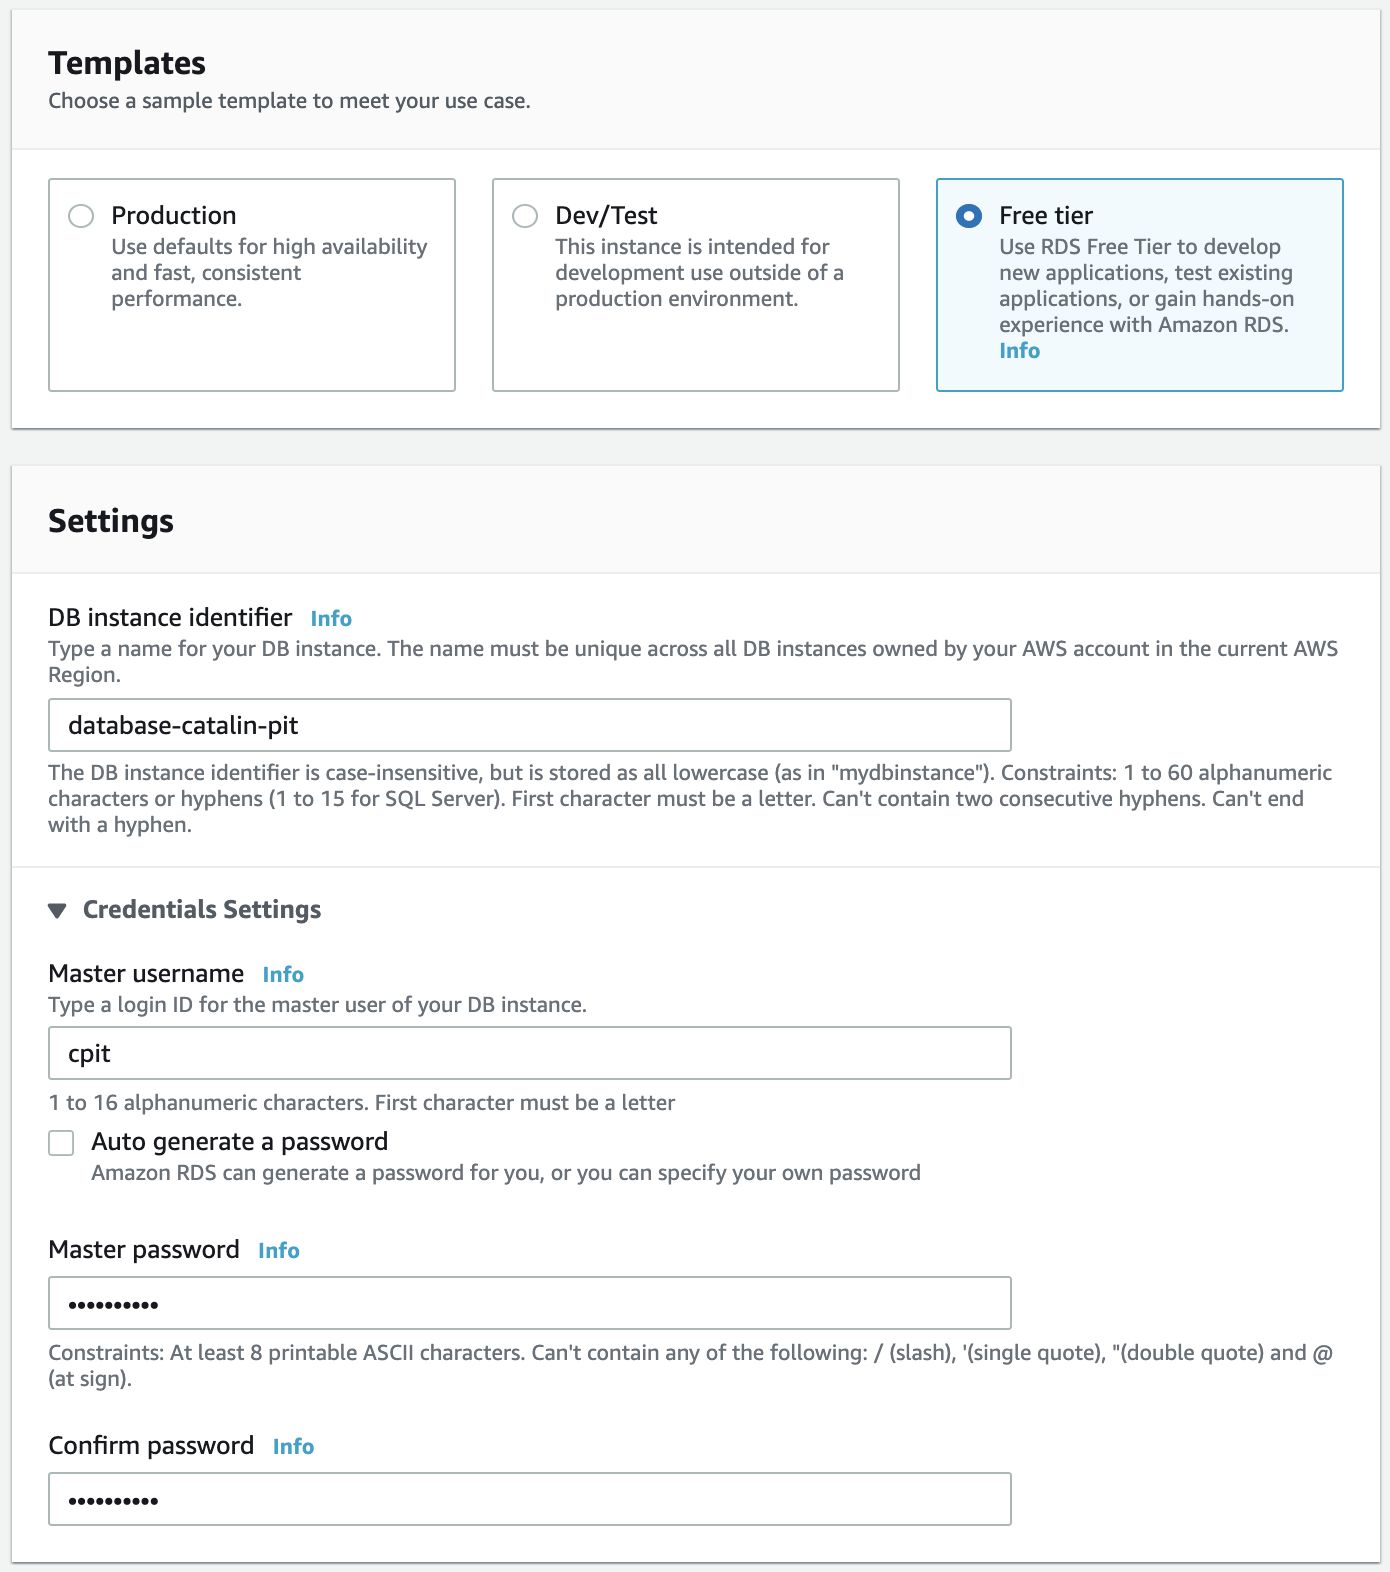
Figure 4
When we proceed to select the database size, as in figure 5, it limits us to only db.t2.micro. The reason is that we are using the free tier. However, if you choose the production or dev/test template from figure 2, you can choose any size.
When it comes to the storage, a 20GB SSD is enough for our database. Also, we left Enable storage autoscaling enabled. That means AWS increases the storage capacity automatically when the storage is full.
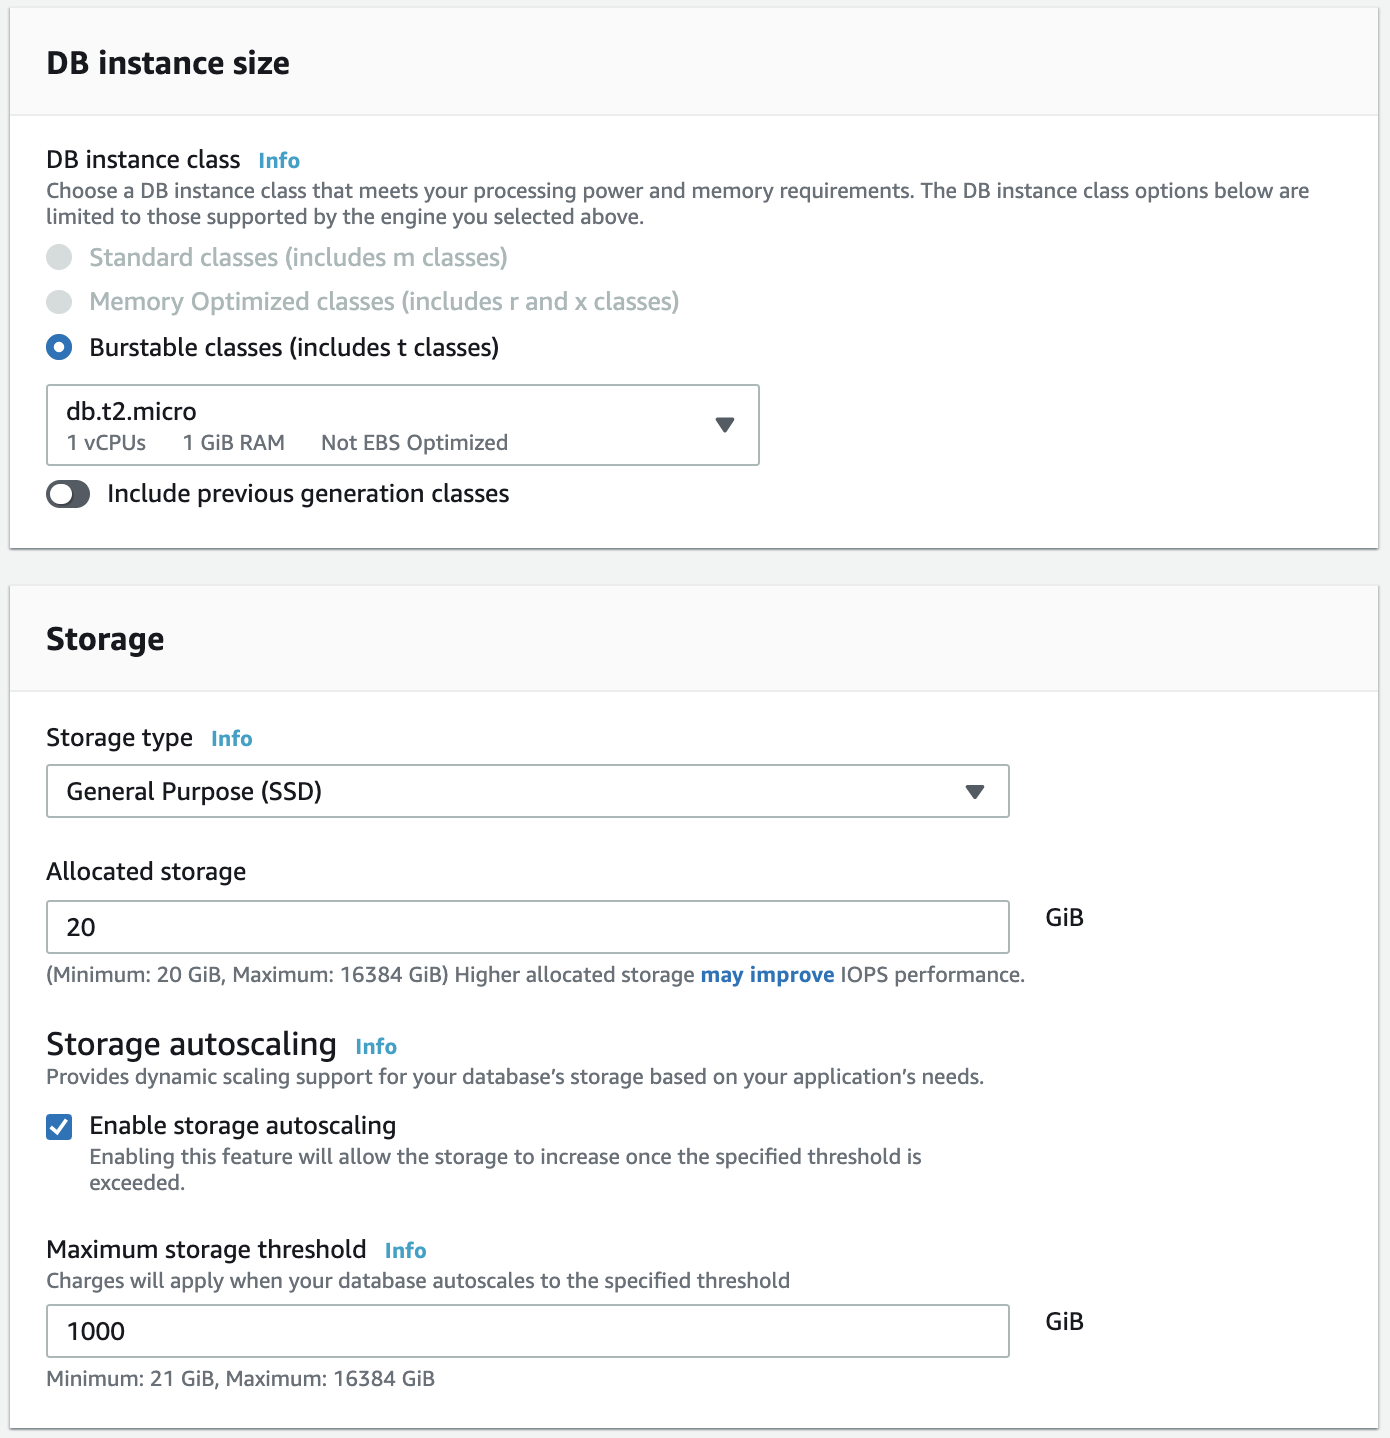
Figure 5
If we would have chosen the production or dev/test, we could have chosen Multi-AZ deployment. It is recommended you choose Multi-AZ for your production database. The reason is that if something happens to your database, a copy is available in another zone. However, since we are using the free tier, this option is not available.
When it comes to connectivity, you can either choose an existing VPC or create a new one. For this tutorial, I left the default option. That is, it created a new VPC. Also, by default, the database is not publicly available. If you want it to be publicly accessible, you have to specify that.
Lastly, you have to choose the database authentication. By leaving the default enabled, it means you authenticate using the database password.
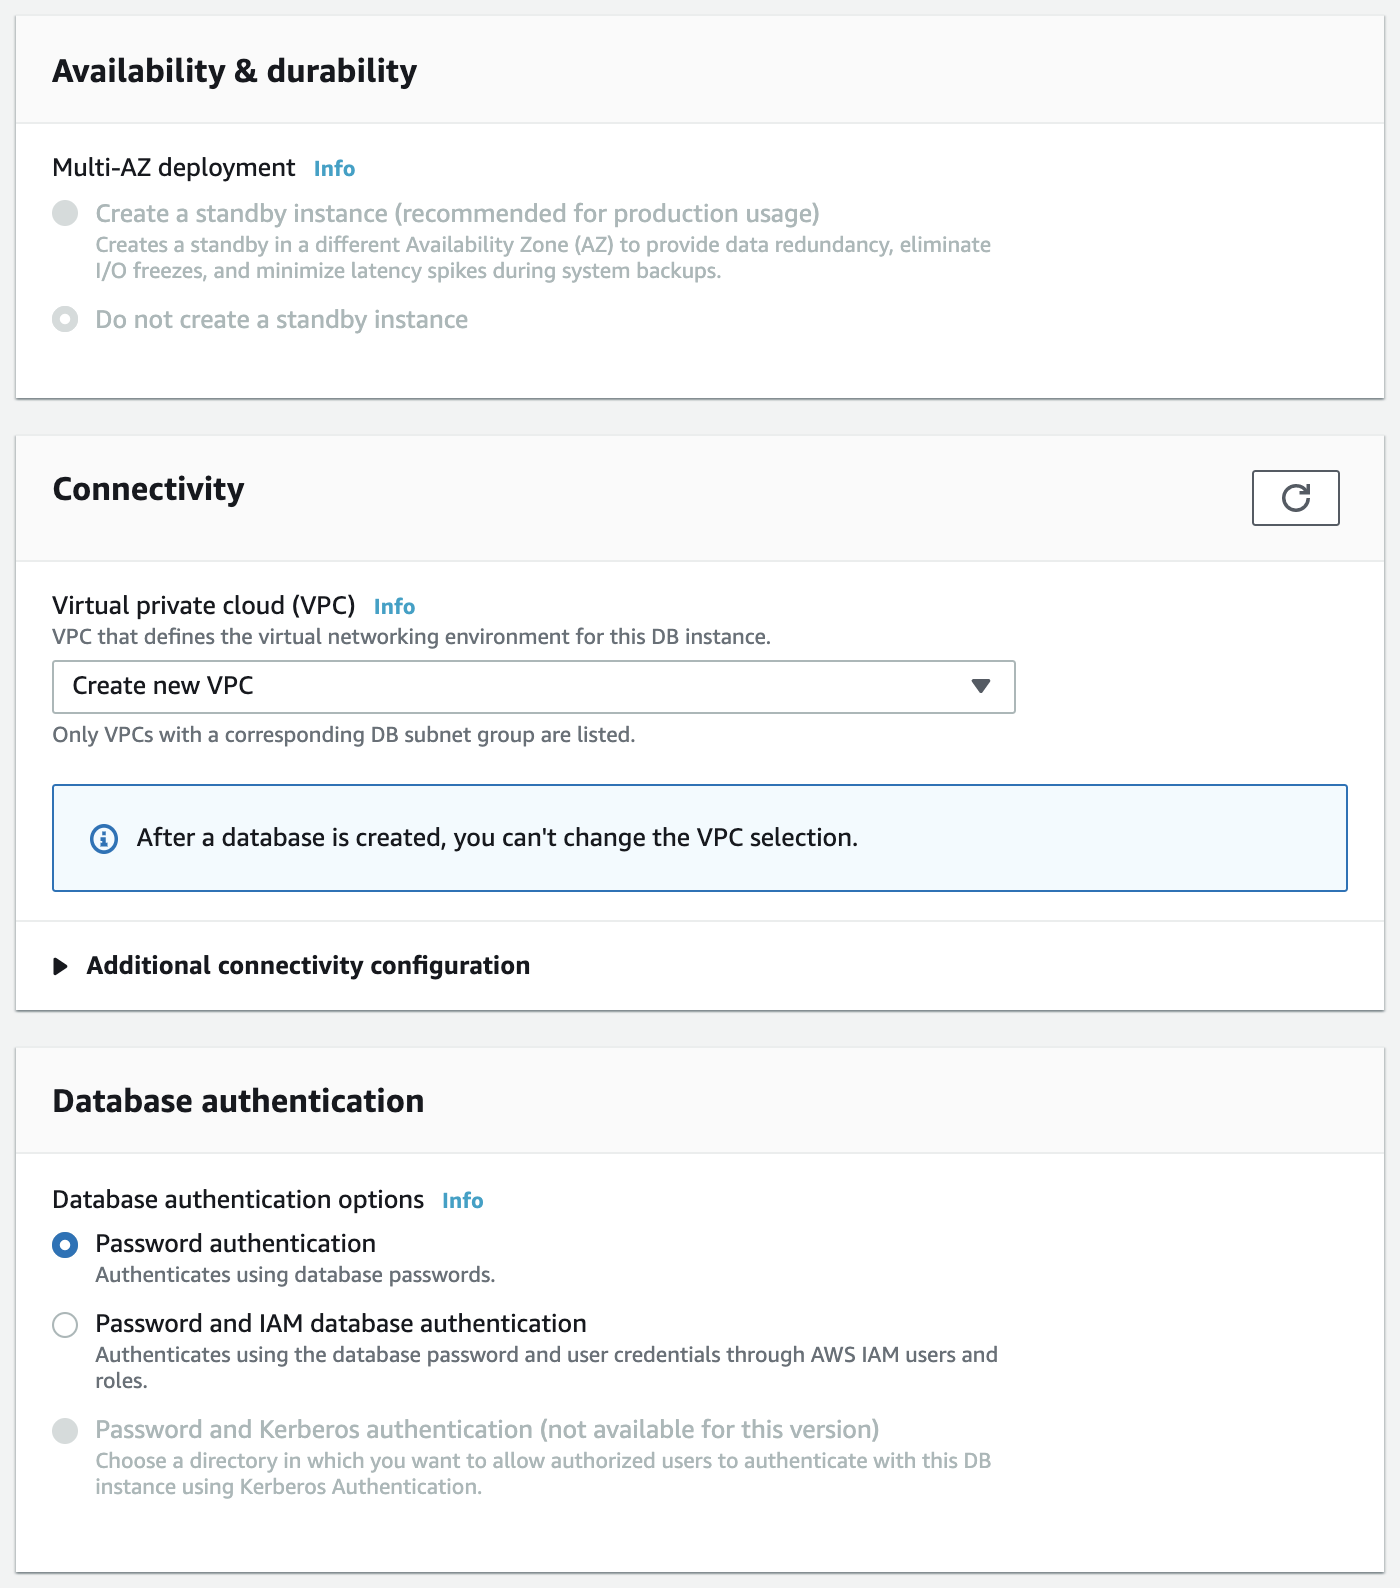
Figure 6
The last step is to click the button saying Create Database, and the database is going to be up and running. Well done for creating your first relational database on AWS!
Conclusion
In this article, you learnt about AWS RDS, which is another important AWS service. You also created a relational database in the cloud. Let us see the main takeaways from the article:
- RDS is a service that allows us to create, run, and manage relational databases in the cloud.
- You can choose between six popular engines: Aurora, MySQL, PostgreSQL, MariaDB, SQLServer, Oracle Database.
- There are two types of backups: Automated Backups and Manual Snapshots.
- There are two types of encryption: At rest and In transition/Flight
- You can run multiple copies of your database with read replicas. It takes the load from the primary database, by directing reads to the replica database.
- Multi-AZ helps with disaster recovery. If you lose the main database, the secondary database becomes the primary one.
Learn AWS from scratch and become a cloud engineer with the AWS Certified Cloud Practitioner course.
