
In this article, you will learn about the Vue Command Line Interface.
Vue CLI allows you to create pre-configured Vue projects. Also, if you prefer graphical user interfaces, you can use the Vue GUI to create and configure your projects.
Prerequisites
Before following the tutorial, you should have basic knowledge about terminals and Vue. Additionally, you should have Vue installed on your machine. You can check whether you have Vue installed or not by running either of the two commands:
vue -V
Or
vue
vue -V outputs the Vue version you have on your machine. On the other hand, Vue tells you the available Vue commands.
If you do not have Vue installed, you will get an error when running any of the above commands. However, you will see later in the article how to install the CLI and how to use it.
What Vue CLI Is
The Vue CLI is a command-line interface that allows you to create and configure new Vue projects from the ground. Instead of starting a project from scratch and configure everything yourself, you can use the CLI.
Using the CLI, you can focus on building the application rather than spending valuable time configuring it. Thus, the CLI does all the work for you, and it allows you to set up a complex project within minutes.
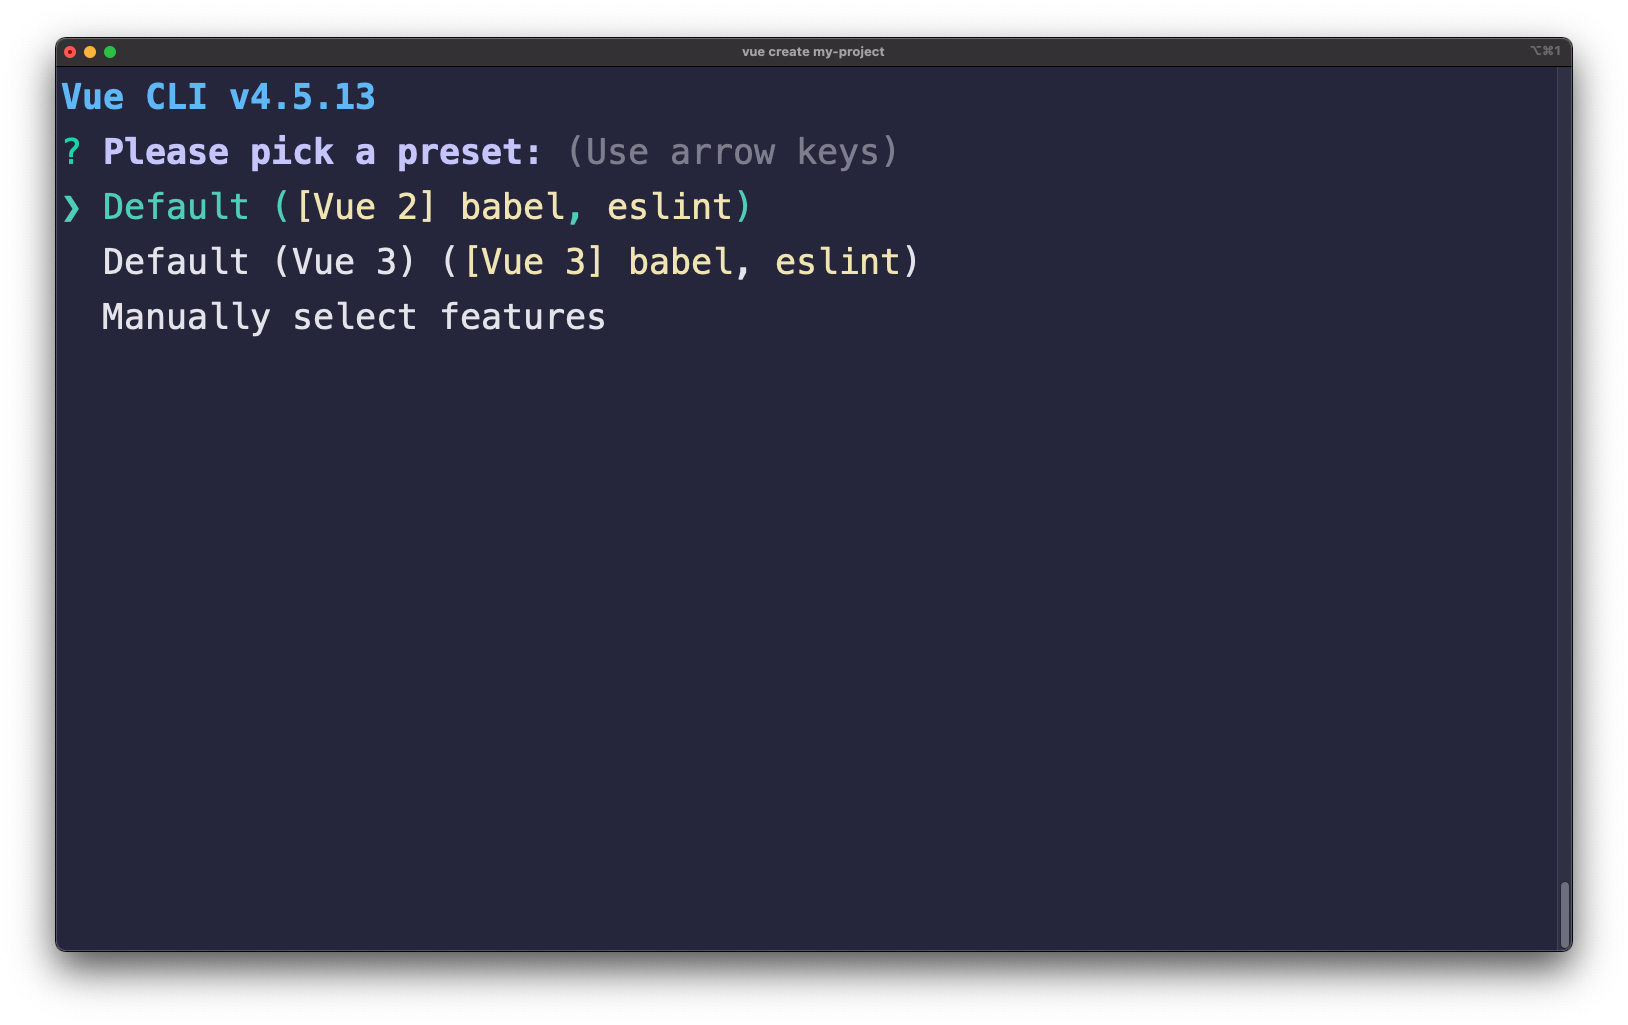
Figure 1
Figure 1 illustrates the Vue CLI in action. There are three options you can choose from:
- create a default Vue 2 project
- create a default Vue 3 project
- manually create and configure a project
If you choose the latest option - * to create and configure a project manually*, you will have to answer a series of questions. The purpose of those questions is to configure the project based on your needs.
Thus, it allows you to:
- select the features needed for your project - Babel, TypeScript, Vuex, PWA support and others
- choose whether you want CSS Pre-processors or not. If you do, you can select which one you want.
- add linter and formatter.
- integrate Unit and/or E2E testing into your project.
- choose the version of Vue you want to start with - 2.x or 3.x
- select whether to use class-style component syntax or not.
- choose whether to use Babel alongside TypeScript or not.
Therefore, you can see the power of the CLI and how it simplifies the process of creating a complex project. Imagine the time required to set up everything manually.
Install Vue CLI
You can install the Vue CLI on your machine by running either of the following commands:
npm i -g @vue/cli

// or

yarn global add @vue/cli
If you prefer npm, use npm. Alternatively, if you like yarn, use yarn. Both commands install the CLI globally, which means you can use the command line interface anywhere on your machine.
vue create <project_name>
You can access and run the CLI with the above command. Once you run the command, you will be prompted with a series of questions needed to configure your project.
Caveat
If you do not want to install the CLI on your machine, you can use npx. The npx tool allows you to use CLI tools and other executables from the NPM registry. That is, you can use them without installing them on your machine.
npx vue create <project_name>
Running the above command will start the Vue CLI. You can use it as if it is installed on your machine.
Useful commands
There are other useful commands you can use with the vue create command.
Default configuration
You can use the -d flag to skip the questions and create a Vue project with the default preset.
vue create -d my-project
If you do not want to configure your Vue application at all, you can use the default settings. The -d flag skips all the prompts and creates the application right away. ** It’s important to note** that the default flag installs Vue 2!
Custom preset
Another helpful flag is the preset flag. You can save a custom configuration that you can use for all your Vue projects.
vue create -p my-preset my-project
This flag is helpful when you create multiple Vue projects with the same configuration. Instead of answering the CLI questions all the time, you can save a preset and use it as a default for all the subsequent Vue projects.
Install plugins
There are chances you might want to add additional plugins after creating a Vue project. As an example, let’s say you want to add TypeScript to your project.
You can add new plugins with the vue add command. To install TypeScript, you would need to run the following command:
vue add typescript
Similarly, you can add other plugins to your project!
More commands
The above commands are the ones I use the most. However, you can find more commands and their description by running:
vue create -h

// or

vue -h
The vue create -h command tells you about the flags available when you create Vue applications. On the other hand, vue -h shows you the flags available for the vue command, which is used to create projects, install plugins, build the application and so on.
Vue GUI
How about those people who prefer graphical user interfaces? Vue UI is a graphical user interface that you can use to achieve the same things as with the CLI.
You can open the Vue GUI by running the following command in your terminal:
vue ui
Once you run the command, the GUI starts on port 8000. You can access the GUI at http://localhost:8000, and it looks as follows:
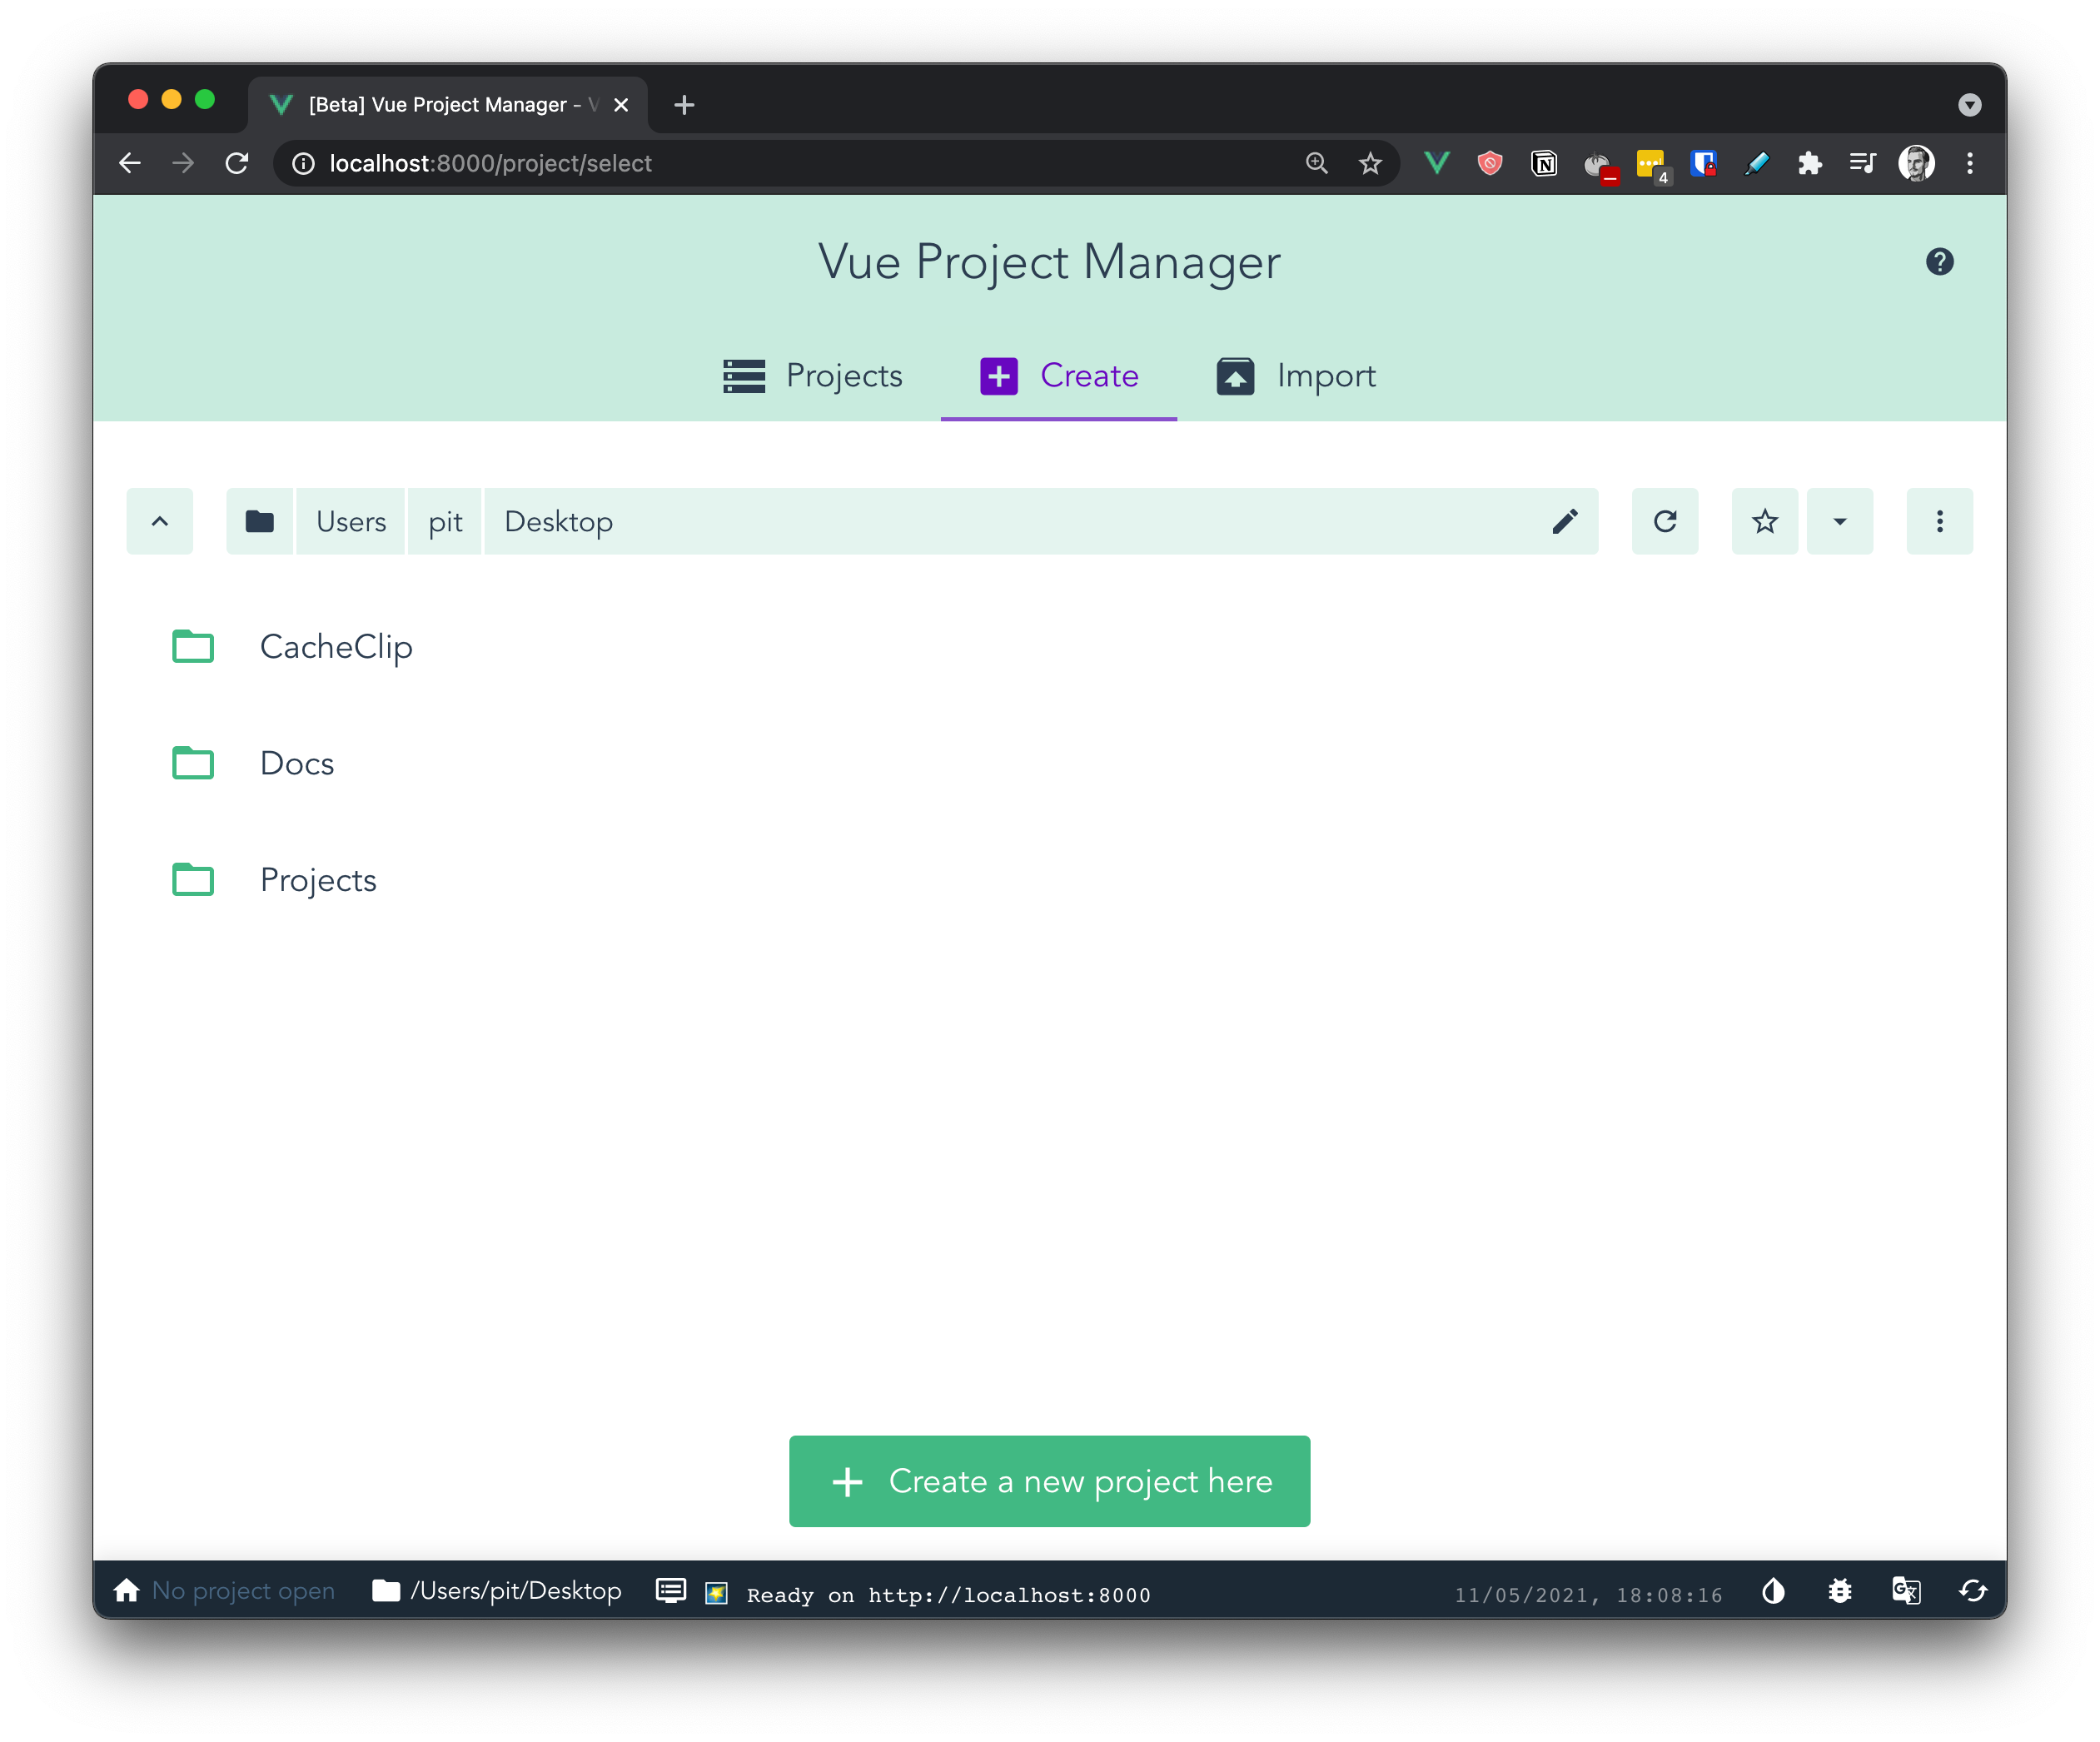
Figure 2
From there, you can create and configure your Vue project as you would do with the CLI. If you click on the button saying “Create a new project here” from figure 2, it will start the creation process.
If you follow the creation and configuration process, you will create a brand new Vue project. Figure 3 illustrates the dashboard of the project.
From the dashboard, you can:
- manage the plugins and dependencies
- configure your project
- run tasks such as
serve,build,lint,testand so on.
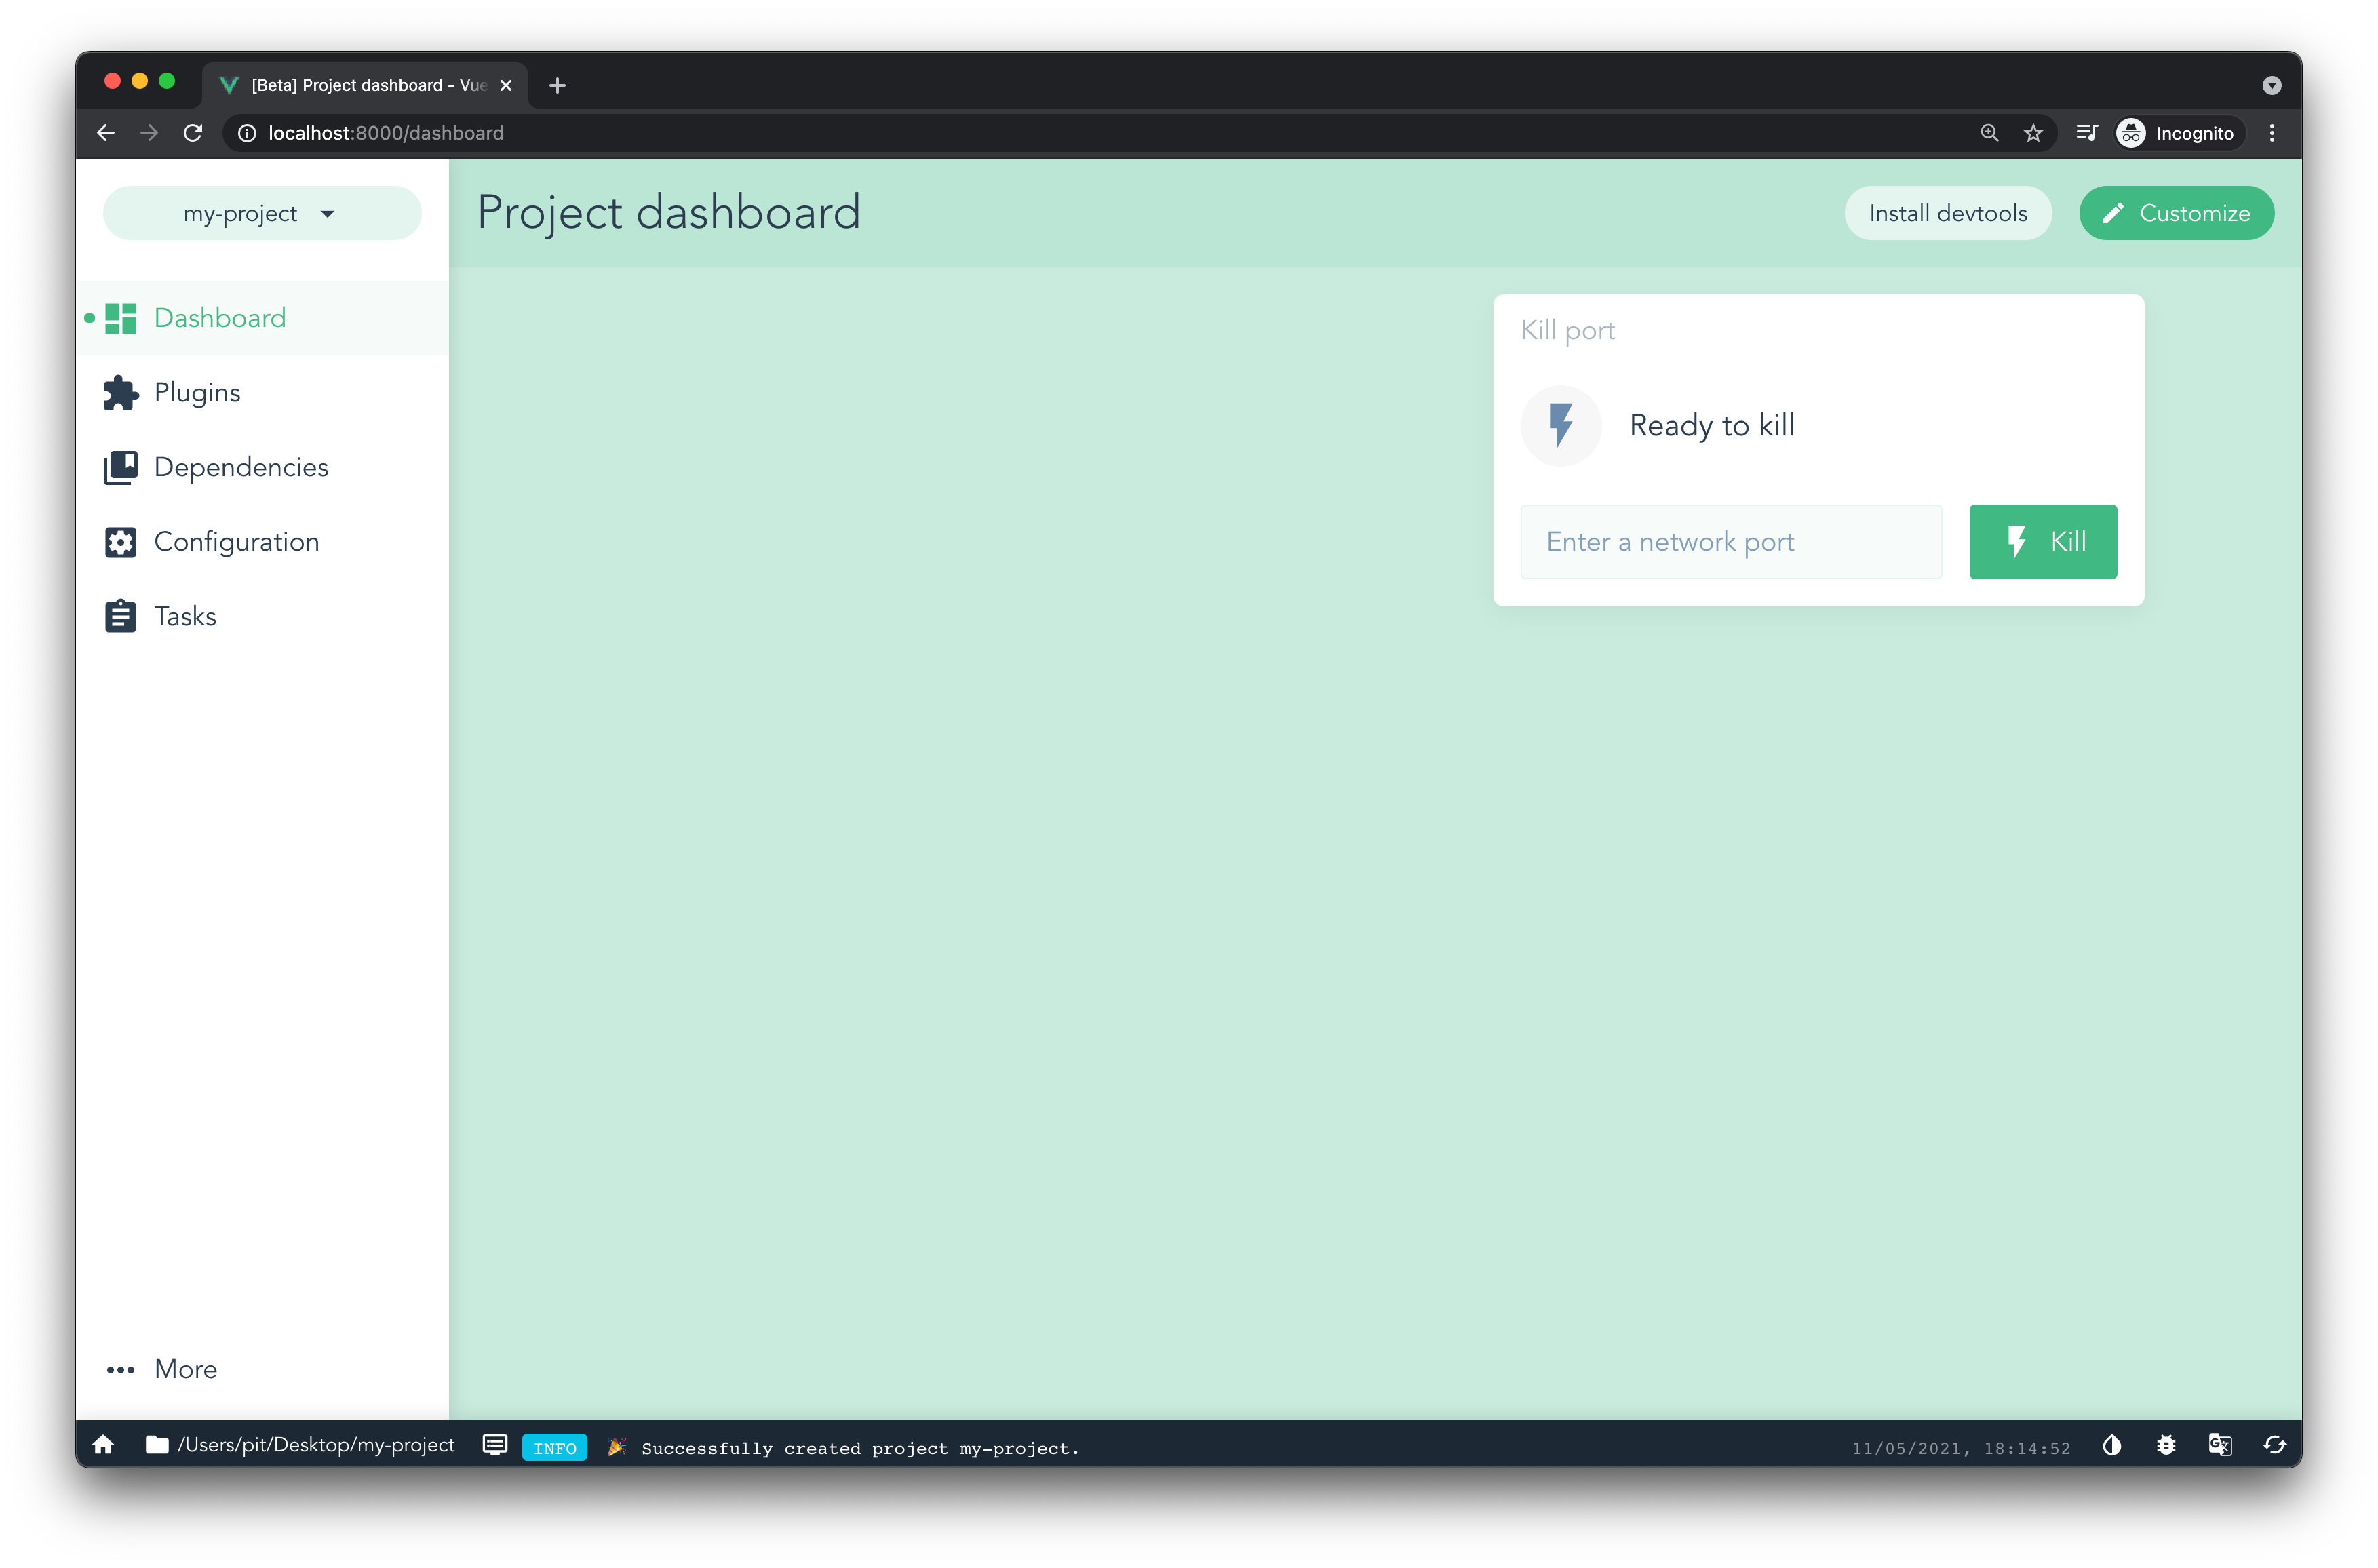
Figure 3
It’s important to note that you can import and analyze Vue projects created from the command line interface too. Moreover, with the Vue UI is that you can see information such as:
- the number of errors and warnings
- assets, modules and dependencies size
- speed statistics
If you want to see the whole process of creating a Vue application with the UI, you can watch the video below.
With that being said, Vue UI is excellent, and I encourage you to try it out! It’s more visual than a CLI, and it makes it easier to create, configure and manage Vue applications!
Conclusion
By this point, you should be comfortable with using the Vue CLI and UI to create Vue applications.
In this article, you learn what the CLI and UI are and how to use them. This is just an introduction, but there is more to the Vue CLI. If you want to dive deep down into it, I recommend checking the official Vue guide.
Become a Vue.js developer and get hired with the complete Vue mastery course.