
Hashnode has an API that you can use however you please. Using the API, you can retrieve, create, edit and delete articles. Additionally, you can manipulate replies and reactions.
As a result, you can use the API to display your blog articles in other places like your personal portfolio, for example.
Pre-requisites
There is some stuff you should be familiar with before you continue. The article shows how to use the Hashnode API, but it does not teach you about the underlying technologies.
To follow the tutorial and implement the application, you should have basic knowledge about:
- JavaScript
- GraphQL
- HTTP requests
Besides that, you should have a Hashnode account. Without further ado, let's jump straight in!
Get started with the Hashnode API
You can visit the API Playground and see the docs and schema available. If you are not familiar with GraphQL, the docs specifies the queries and mutations you can perform on the data. On the other hand, the schema is a description of the data. That is, it specifies what fields you can select, what object they return and so on.
Before moving further, I advise you to give it a go and play a bit with it.
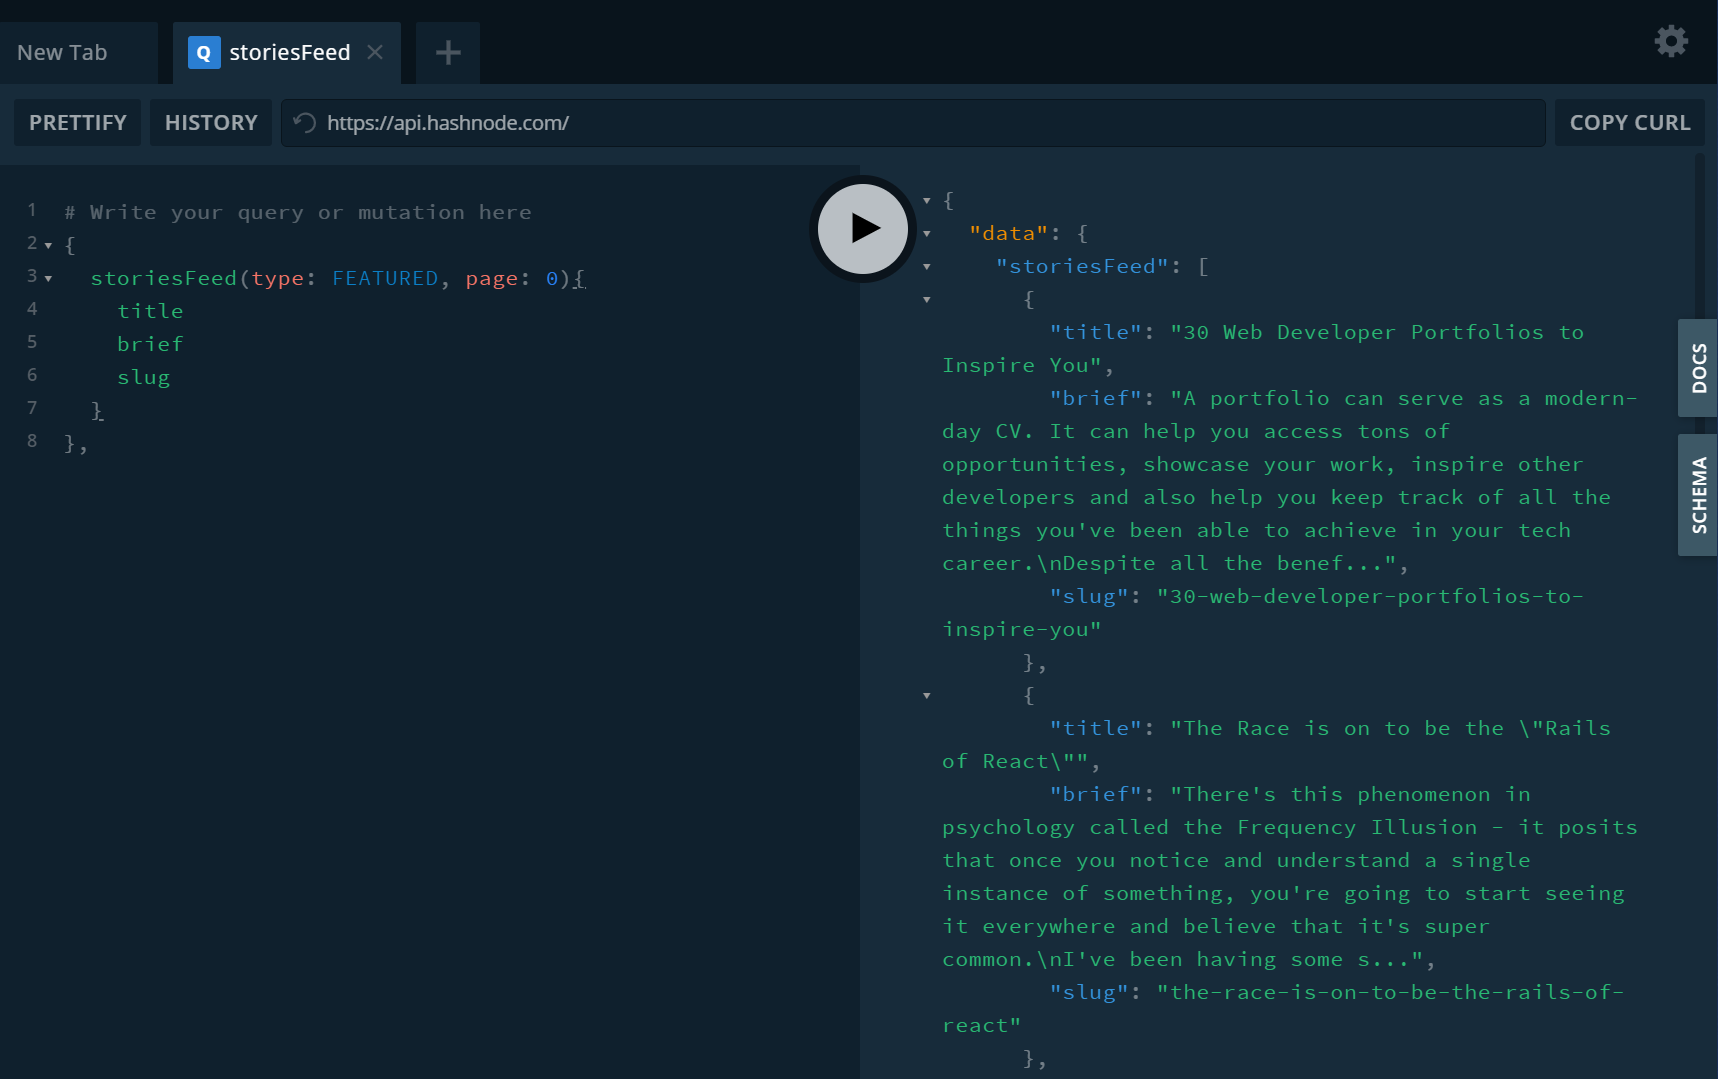
Figure 1
In figure 1, above, you can see a simple query pulling all the featured stories from the first page. The query is as follows:
{
  storiesFeed(type: FEATURED, page: 0){
    title
    brief
    slug
  }
}
However, you can pull the articles of a specific user as well. Let's take my user and blog as an example. You can fetch all my articles from the first page with the following query:
{
  user(username: "catalinpit") {
    publication {
      posts(page: 0) {
        title
        brief
        slug
      }
    }
  }
}
Note: Even though in both queries I selected only the title, brief and slug you can select more fields. As mentioned previously, check the docs and schema to see what queries/mutation you can perform and what are the available fields.
Authentication - Hashnode personal access token
Some queries and mutations require authentication, which is based on personal access tokens. You can get your PAT (personal access token) from the developer settings.
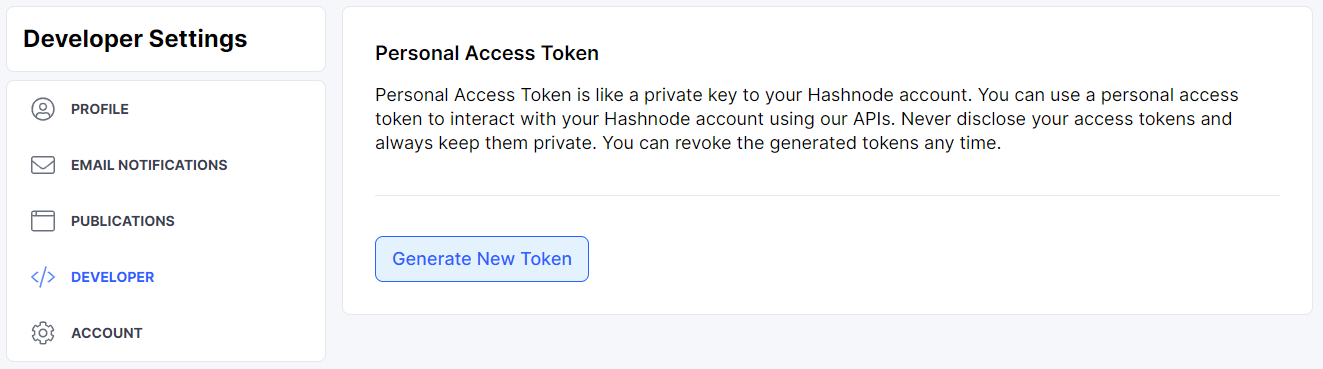
Figure 2
You can get a new PAT by clicking on the button saying Generate New Token. After you get the token, you can use it with the Authorization HTTP header where the token is the value.
It's important to note that you can use the Hashnode API without the token. However, there are some queries and mutation where you need the token. With that being said, let's move onto the next step.
Fetch your articles
Let's create a Vanilla JavaScript application that you will use to fetch your Hashnode articles. The first step is to create two files. Create a file called index.html and another one called app.js.
After creating the files, open the HTML file, index.html, and write the following code:
<!DOCTYPE html>
<html lang="en">
<head>
    <meta charset="UTF-8">
    <meta http-equiv="X-UA-Compatible" content="IE=edge">
    <meta name="viewport" content="width=device-width, initial-scale=1.0">
    <title>Hashnode API Example</title>
</head>
<body>
    <script type="text/javascript" id="articles" src="app.js"></script>
</body>
</html>
The HTML file is not too complicated. You set the title of the webpage and you link the JavaScript file.
Fetch function
You will do all the work in the JavaScript file. Open the app.js file and write the following code:
async function gql(query, variables={}) {
    const data = await fetch('https://api.hashnode.com/', {
        method: 'POST',
        headers: {
            'Content-Type': 'application/json',
        },
        body: JSON.stringify({
            query,
            variables
        })
    });

    return data.json();
}
You use the above method - gql - to fetch data from the Hashnode API.
As you can see, it uses the fetch method to make POST requests to https://api.hashnode.com/. In the POST requests, you also pass the query and additional variables. An example of an additional variable might be the page number.
GraphQL query
You can use the GraphQL queries straight in the gql function from above. However, it can get messy if you write complex queries. Additionally, you cannot reuse the function if you use the queries straight in the gql function.
const GET_USER_ARTICLES = `
    query GetUserArticles($page: Int!) {
        user(username: "<your_Hashnode_username>") {
            publication {
                posts(page: $page) {
                    title
                    brief
                    slug
                }
            }
        }
    }
`;
Thus, you can store your GraphQL queries in a constant, as shown in the code snippet above. You store each query in its constant. Also, the query takes a page variable so you can get the articles from a specific page.
Fetch data
In this step, you are fetching your articles from the first page. You pass two arguments when you call the gql function:
- GET_USER_ARTICLES => This is the GraphQL you wrote previously. Its purpose is to specify what the API should return.
- { page: 0 } => The page you want to fetch the articles from.
gql(GET_USER_ARTICLES, { page: 0 })
    .then(result => {
        const articles = result.data.user.publication.posts;
        let container = document.createElement('div');

        articles.forEach(article => {
            let title = document.createElement('h2');
            title.innerText = article.title;

            let brief = document.createElement('p');
            brief.innerText = article.brief;

            let link = document.createElement('a');
            link.innerText = 'Read more...';
            link.href = `https://catalins.tech/${article.slug}`;

            container.appendChild(title);
            container.appendChild(brief);
            container.appendChild(link);
        })

        document.querySelector('.app').appendChild(container);
});
What about result.data.user.publication.posts from the third line? Let's look at figure 1 below.
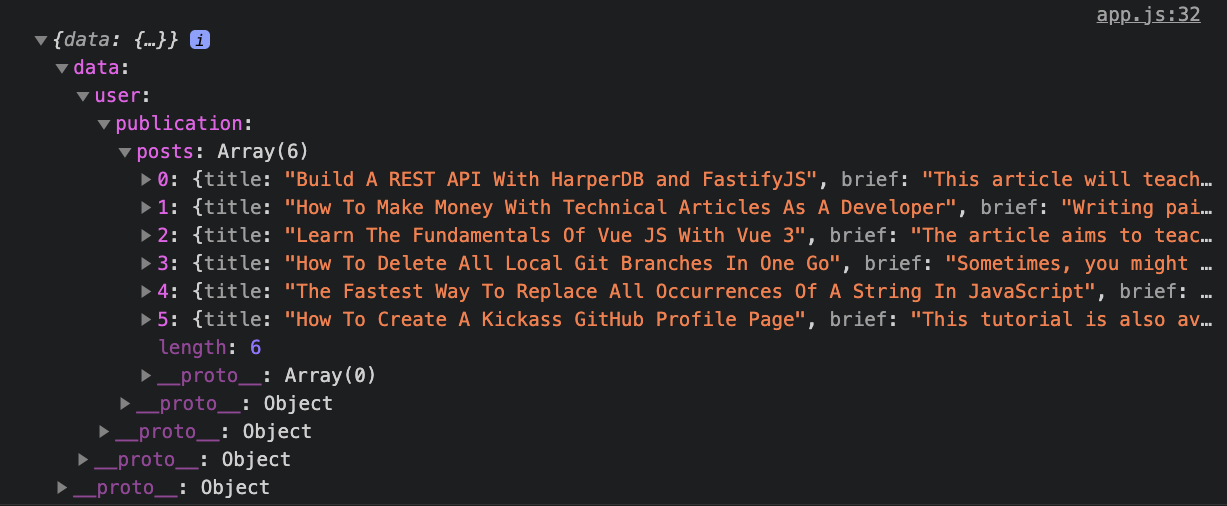
Figure 1
If you look at figure 1, you can see that the gql function returns an object called "data". The "data" object returns a "user" object. The "user" returns the "publication" object. And lastly, the "publication" returns the "posts" array. Thus, with the line result.data.user.publication.posts you access only your blog articles.
After that, you store the array in the constant called articles. Once you have the array of posts, you use the forEach method to loop over each article from the array. For each article, you create a heading, a paragraph and a link. Then you append the elements to the div container.
The next step is to display the data on your page.
Display data
At the bottom of the app.js file, write the following code:
document.getElementById('articles').parentNode.innerHTML = `
<div class="app">
    <h1 class="app-heading">Catalin Pit's Articles</h1>
</div>`;
With the following code, you create a div that will hold your application. Inside that div, you create a heading and you are done.
If you visit your HTML page now, you should see the following:
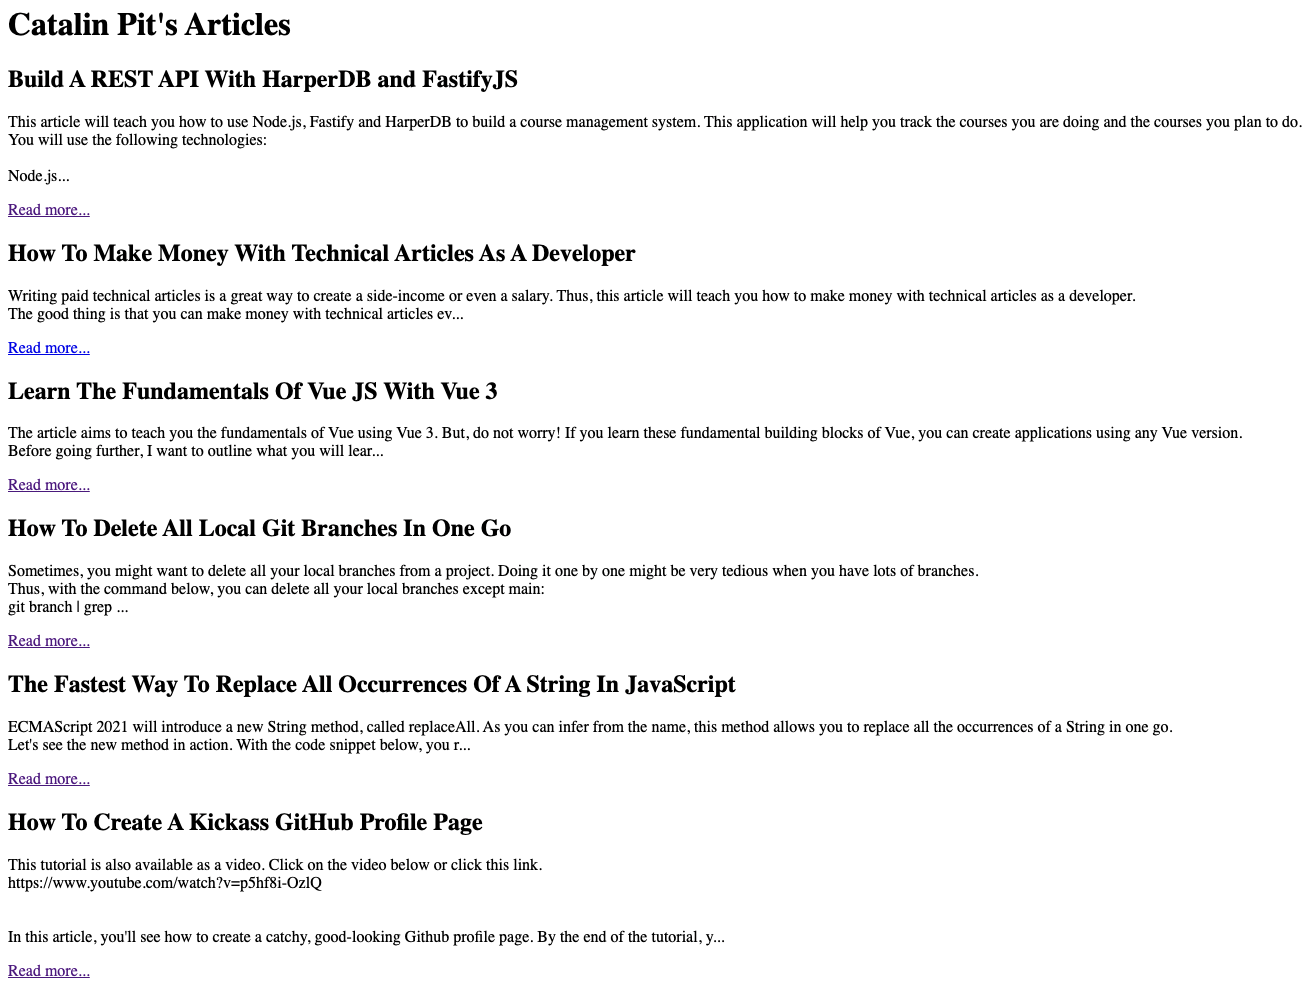
Figure 2
Note: Your web page might differ because you (should have) used your username. You should have different articles and header.
Conclusion
Thus, you can display the articles from your Hashnode blog by using the API.
In this article, you can see a basic example of fetching your articles. However, you can do much more with the API. You can:
- create, edit and delete articles
- get the replies from your articles
- create, read, edit and delete replies