

When deploying an application to Heroku, adding the environment variables in the .env file is not enough.
You need to set the environment variables for your application on Heroku. There are two ways to do it, and in this article, you can see both!
The environment variables are called config variables (config vars) on Heroku. As a result, the terms will be used interchangeably in the article.
1. Heroku Web Interface
One way of setting the environment variables on Heroku is to use the web interface.
The first step is to log into your account and go to the Heroku dashboard. Figure 1 illustrates my dashboard.
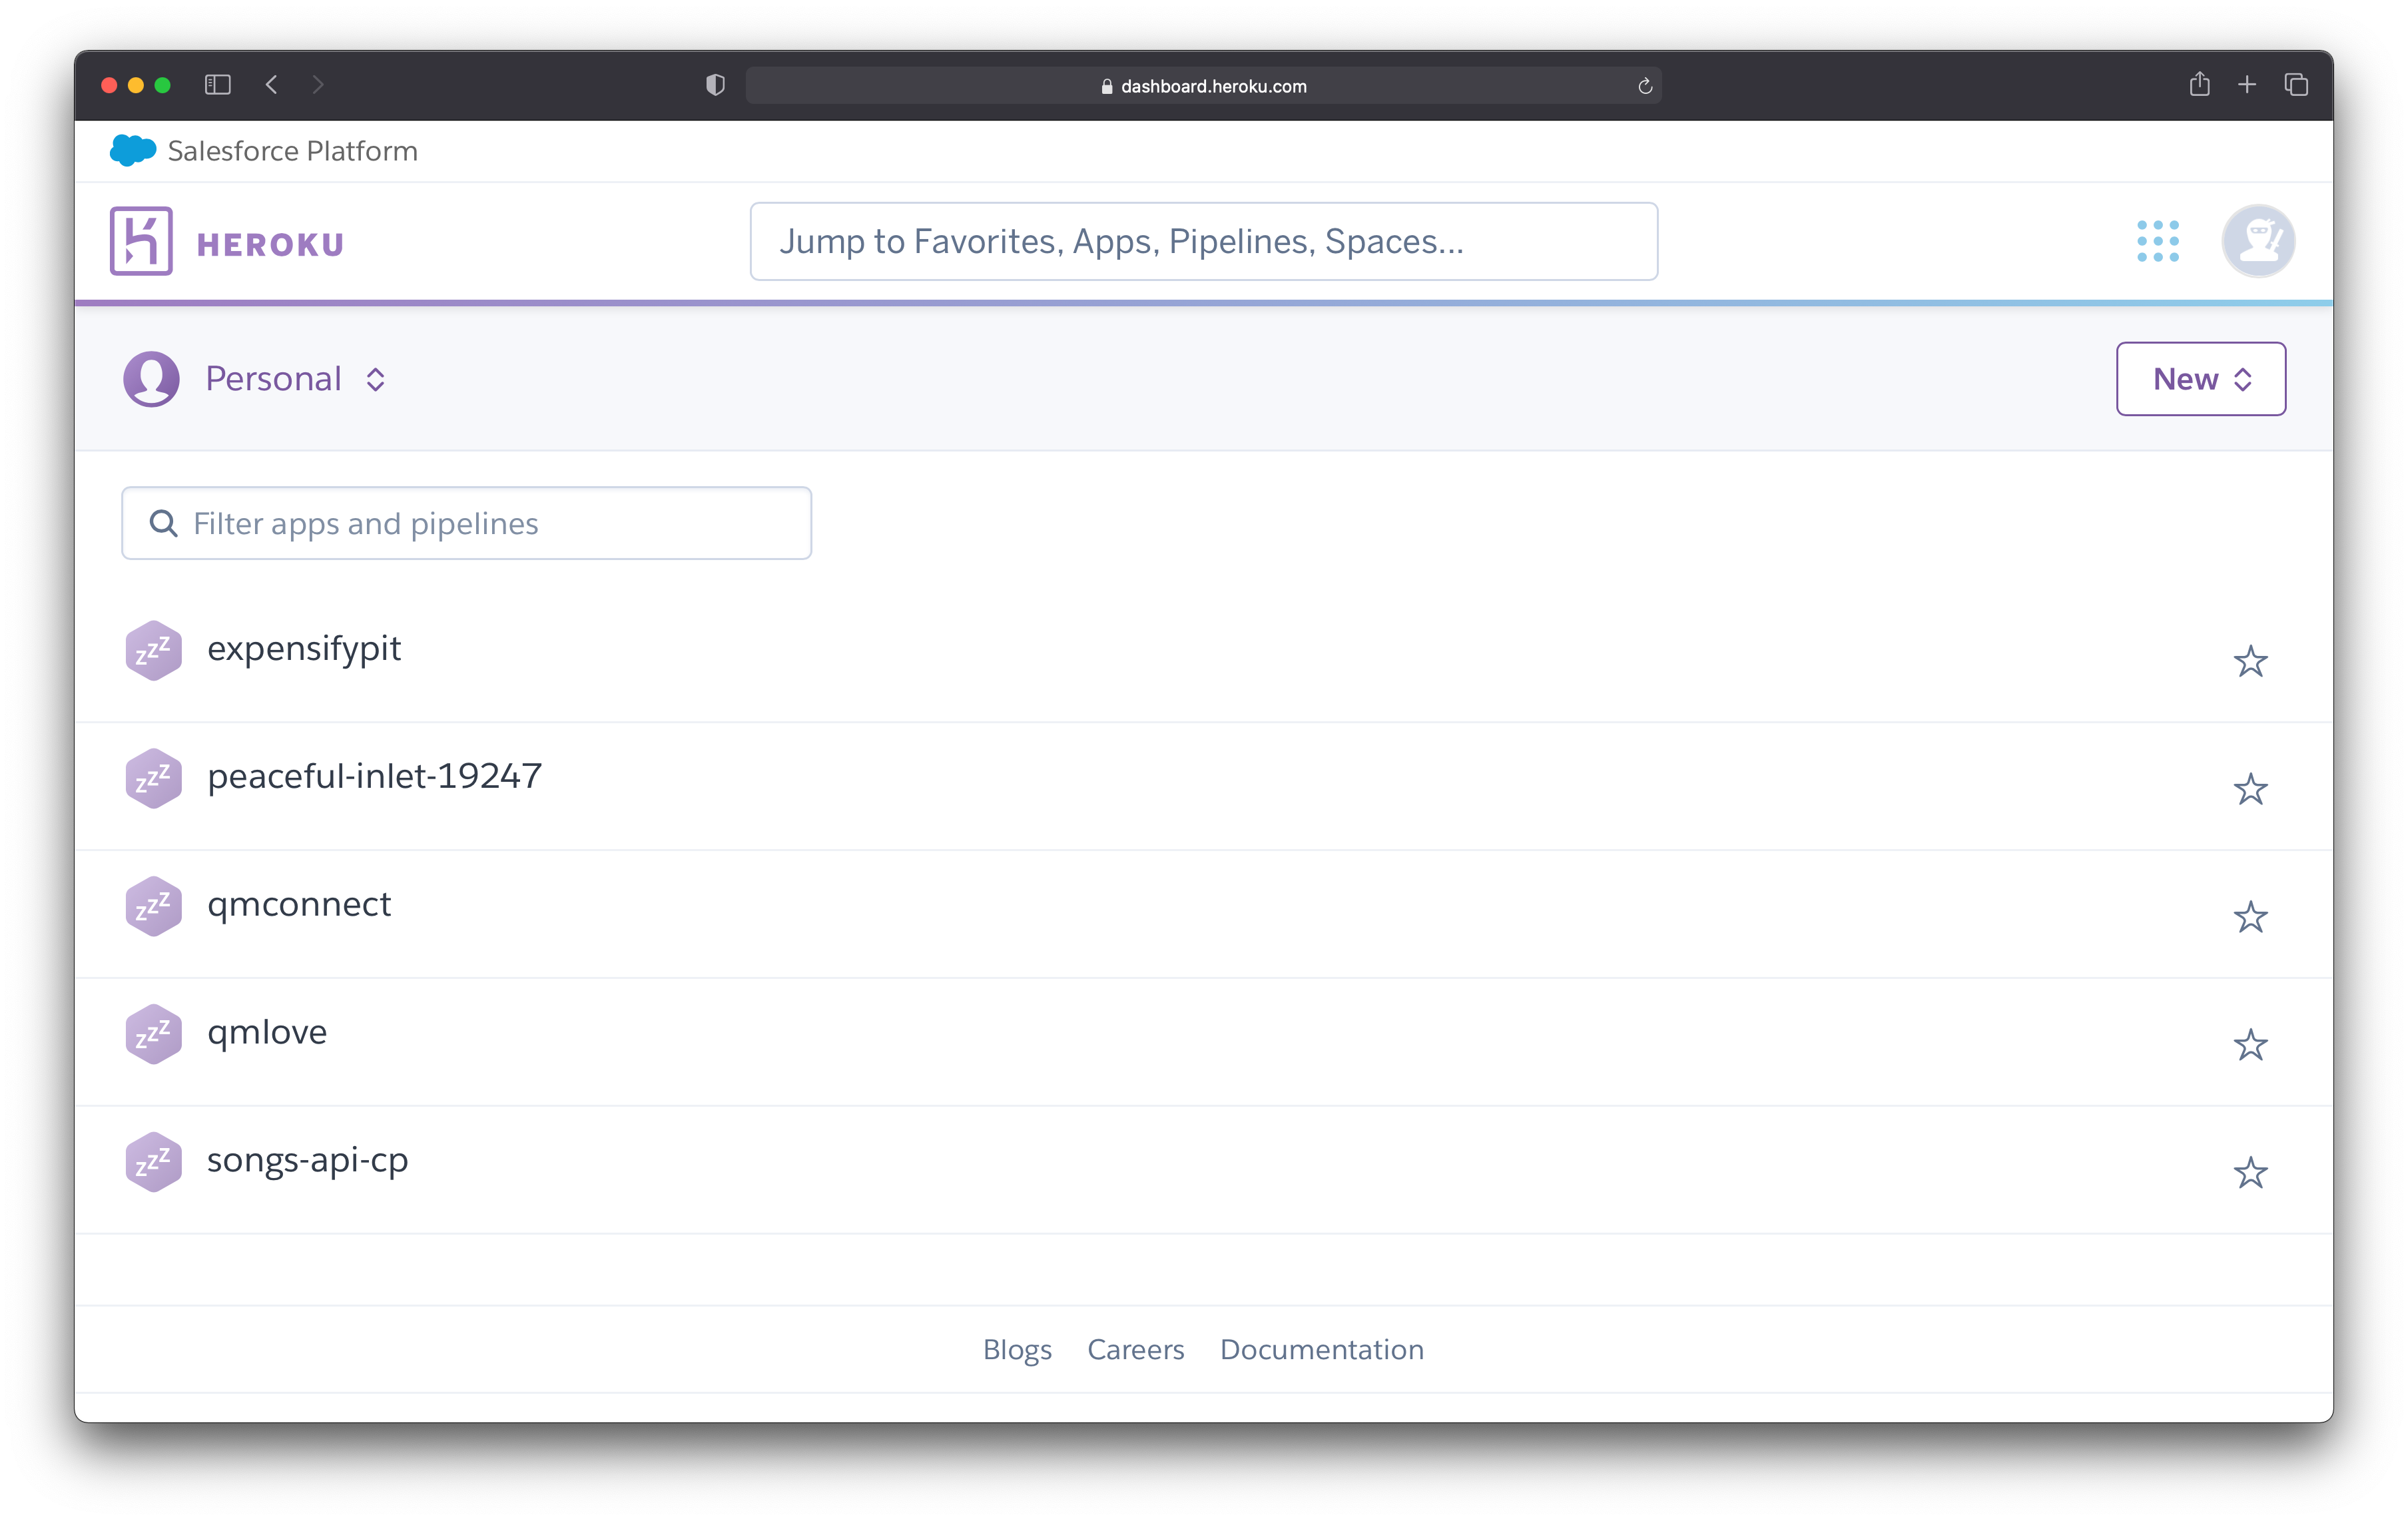 Figure 1
Choose the application for which you want to set the environment variables. Once you select the application, it takes you to the overview page of that project.
Figure 2 illustrates where you should be at this point.
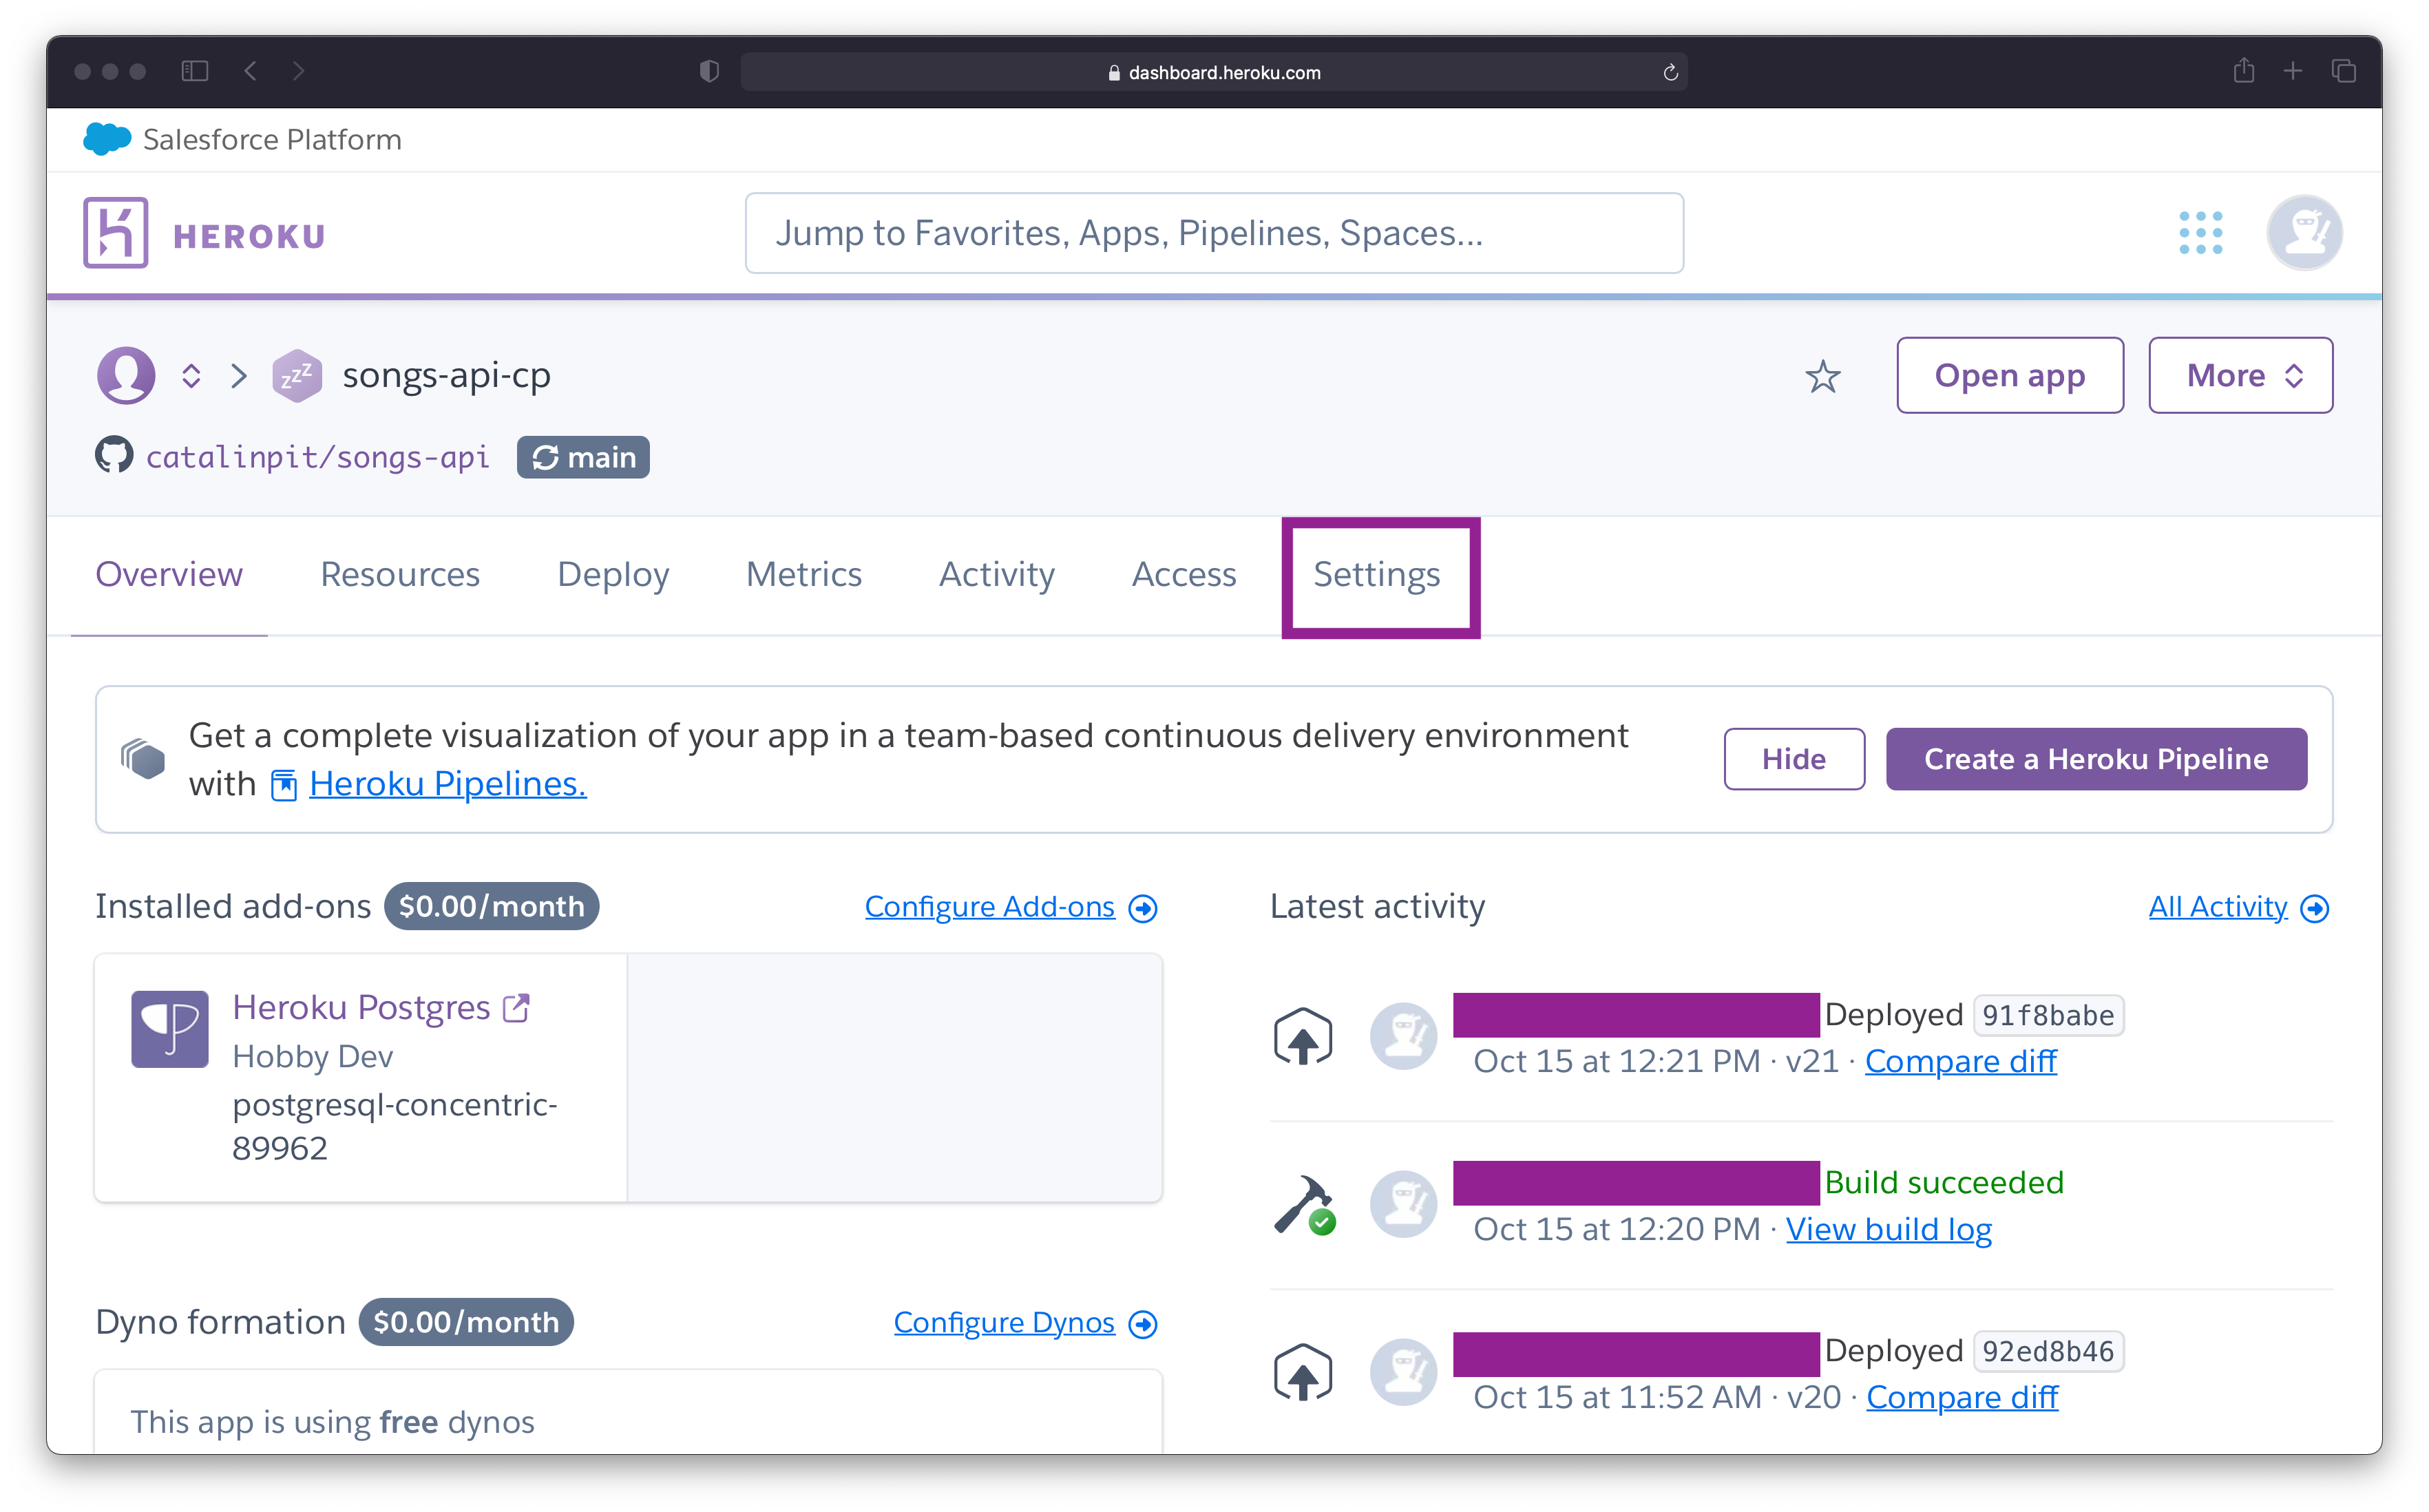 Figure 2
The next step is to go to the "Settings" page. To do that, click on the last option - Settings - as highlighted in figure 2.
Once you are on the "Settings" page, scroll until you see the "Config Vars" section. To add config vars (environment variables) or modify the existing ones, click on "Reveal Config Vars".
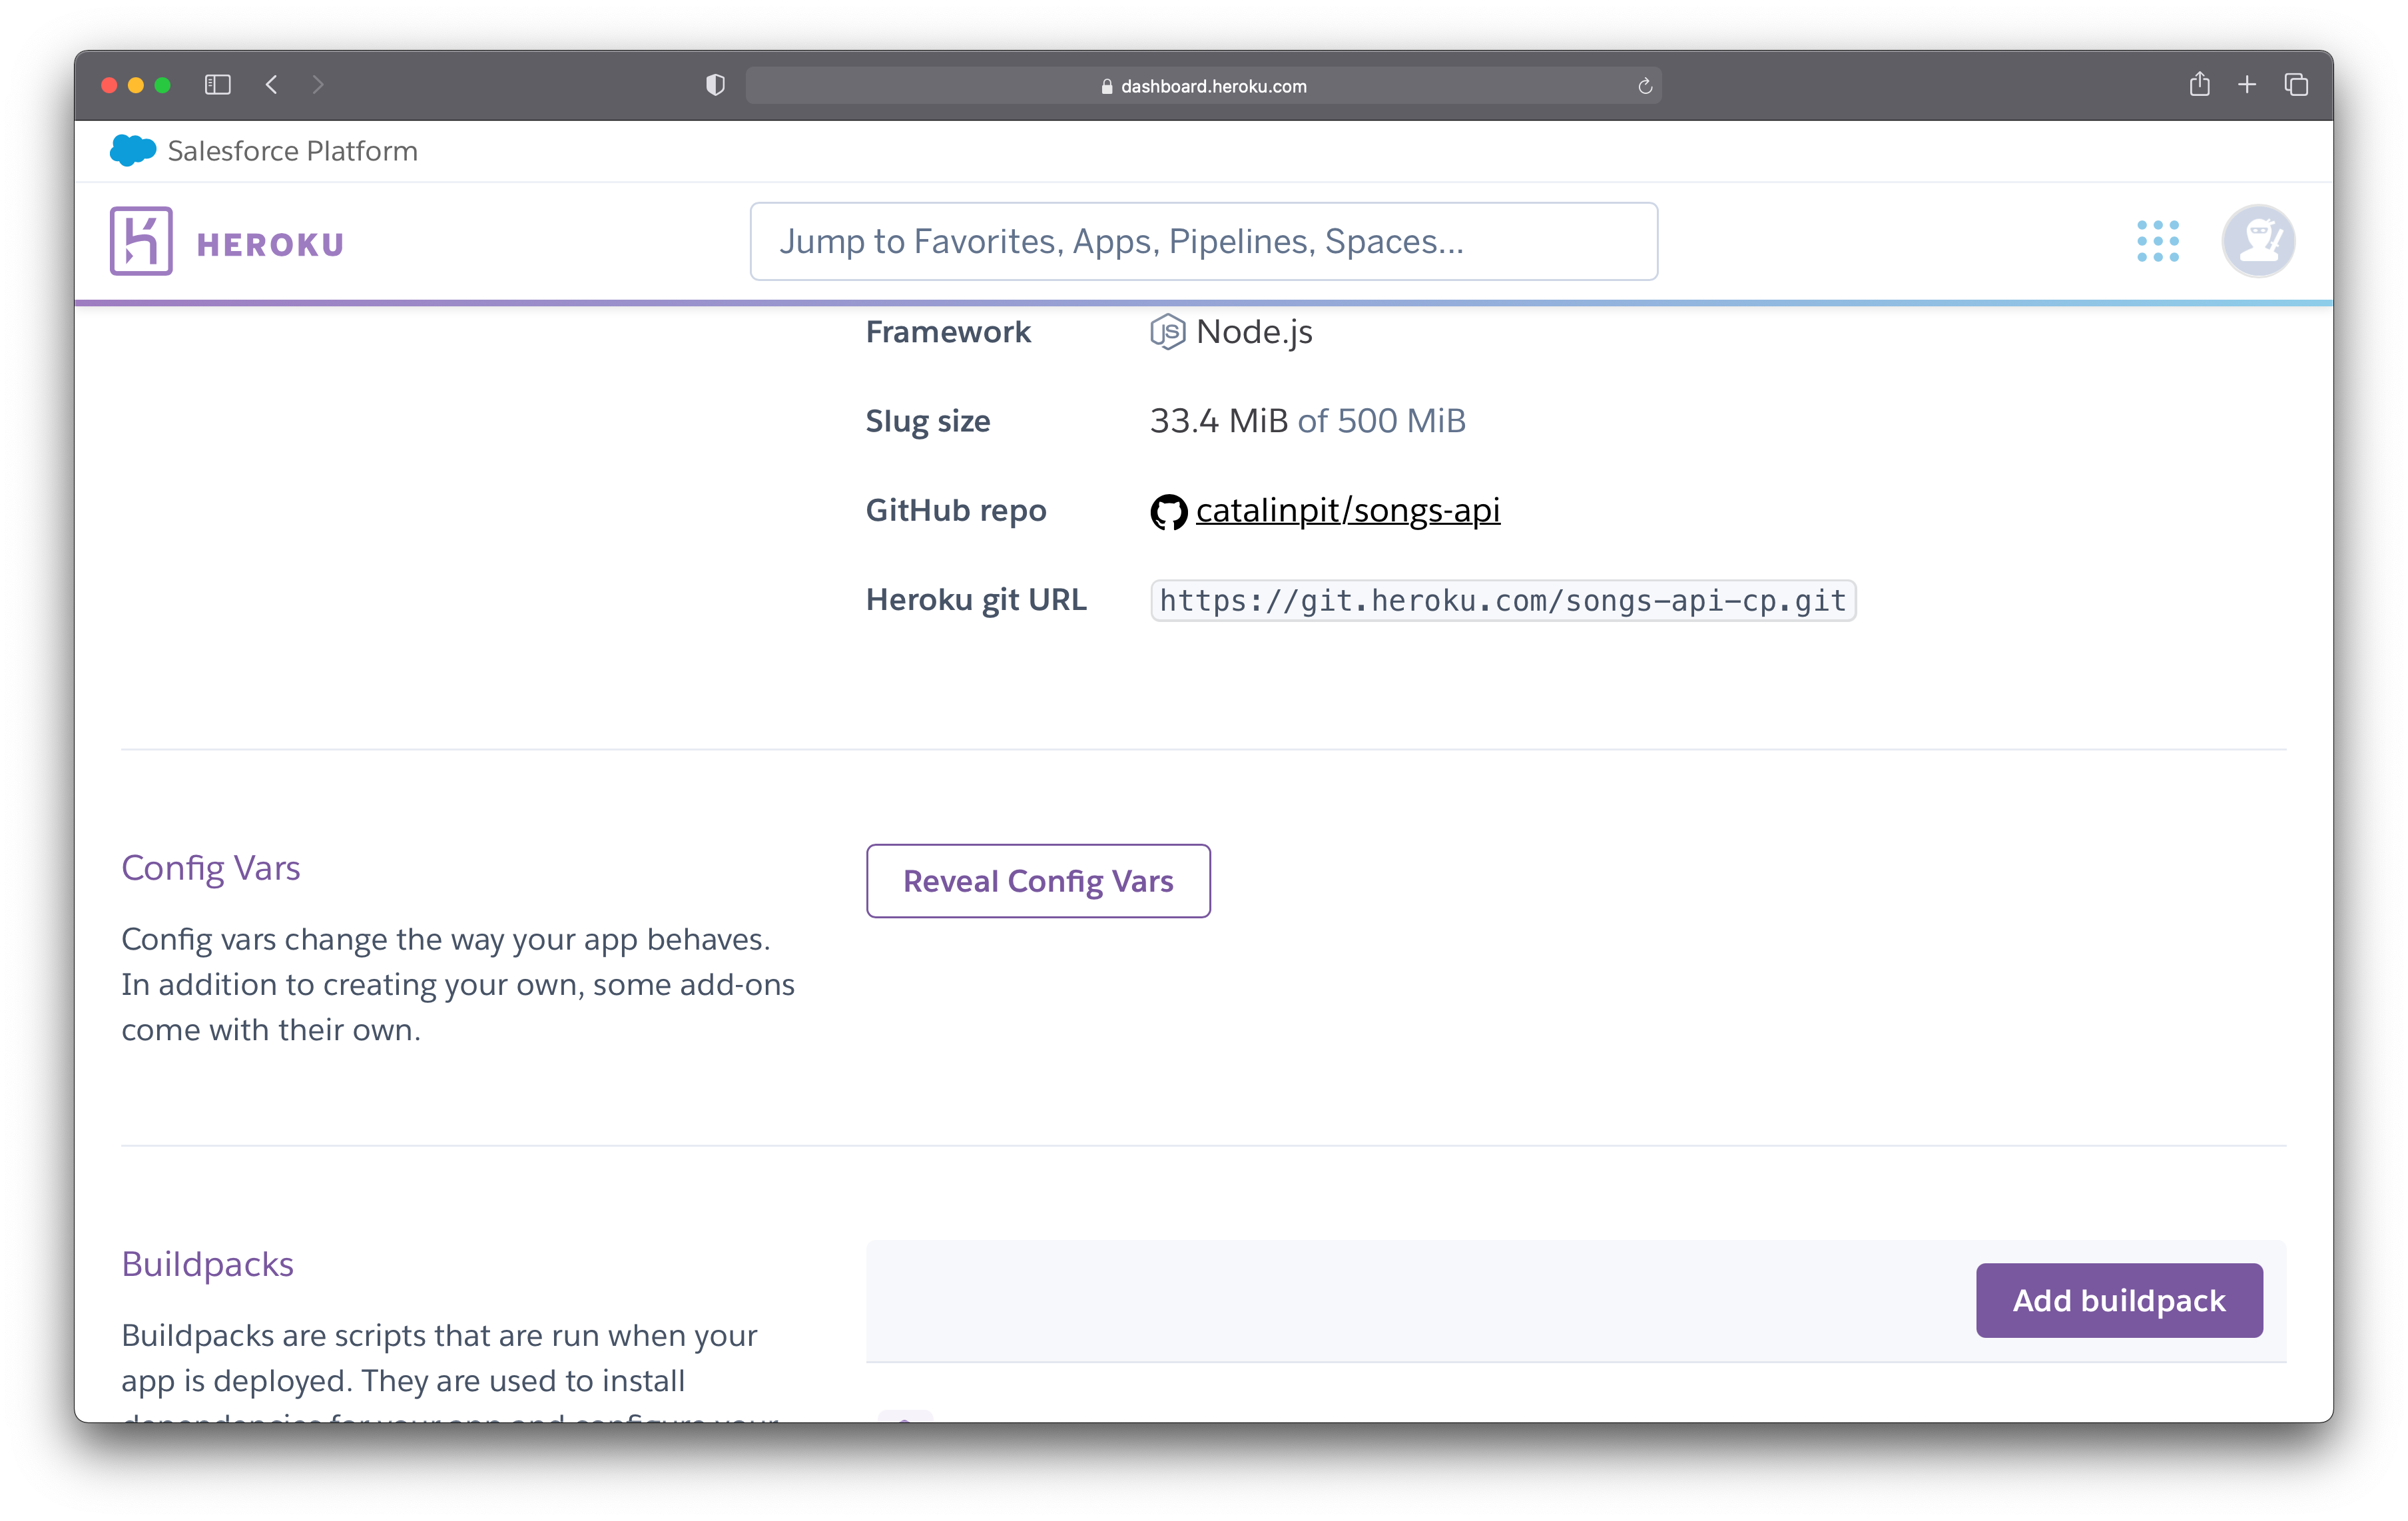 Figure 3
Since you do not have any config vars, you should see the same message as shown in Figure 4.
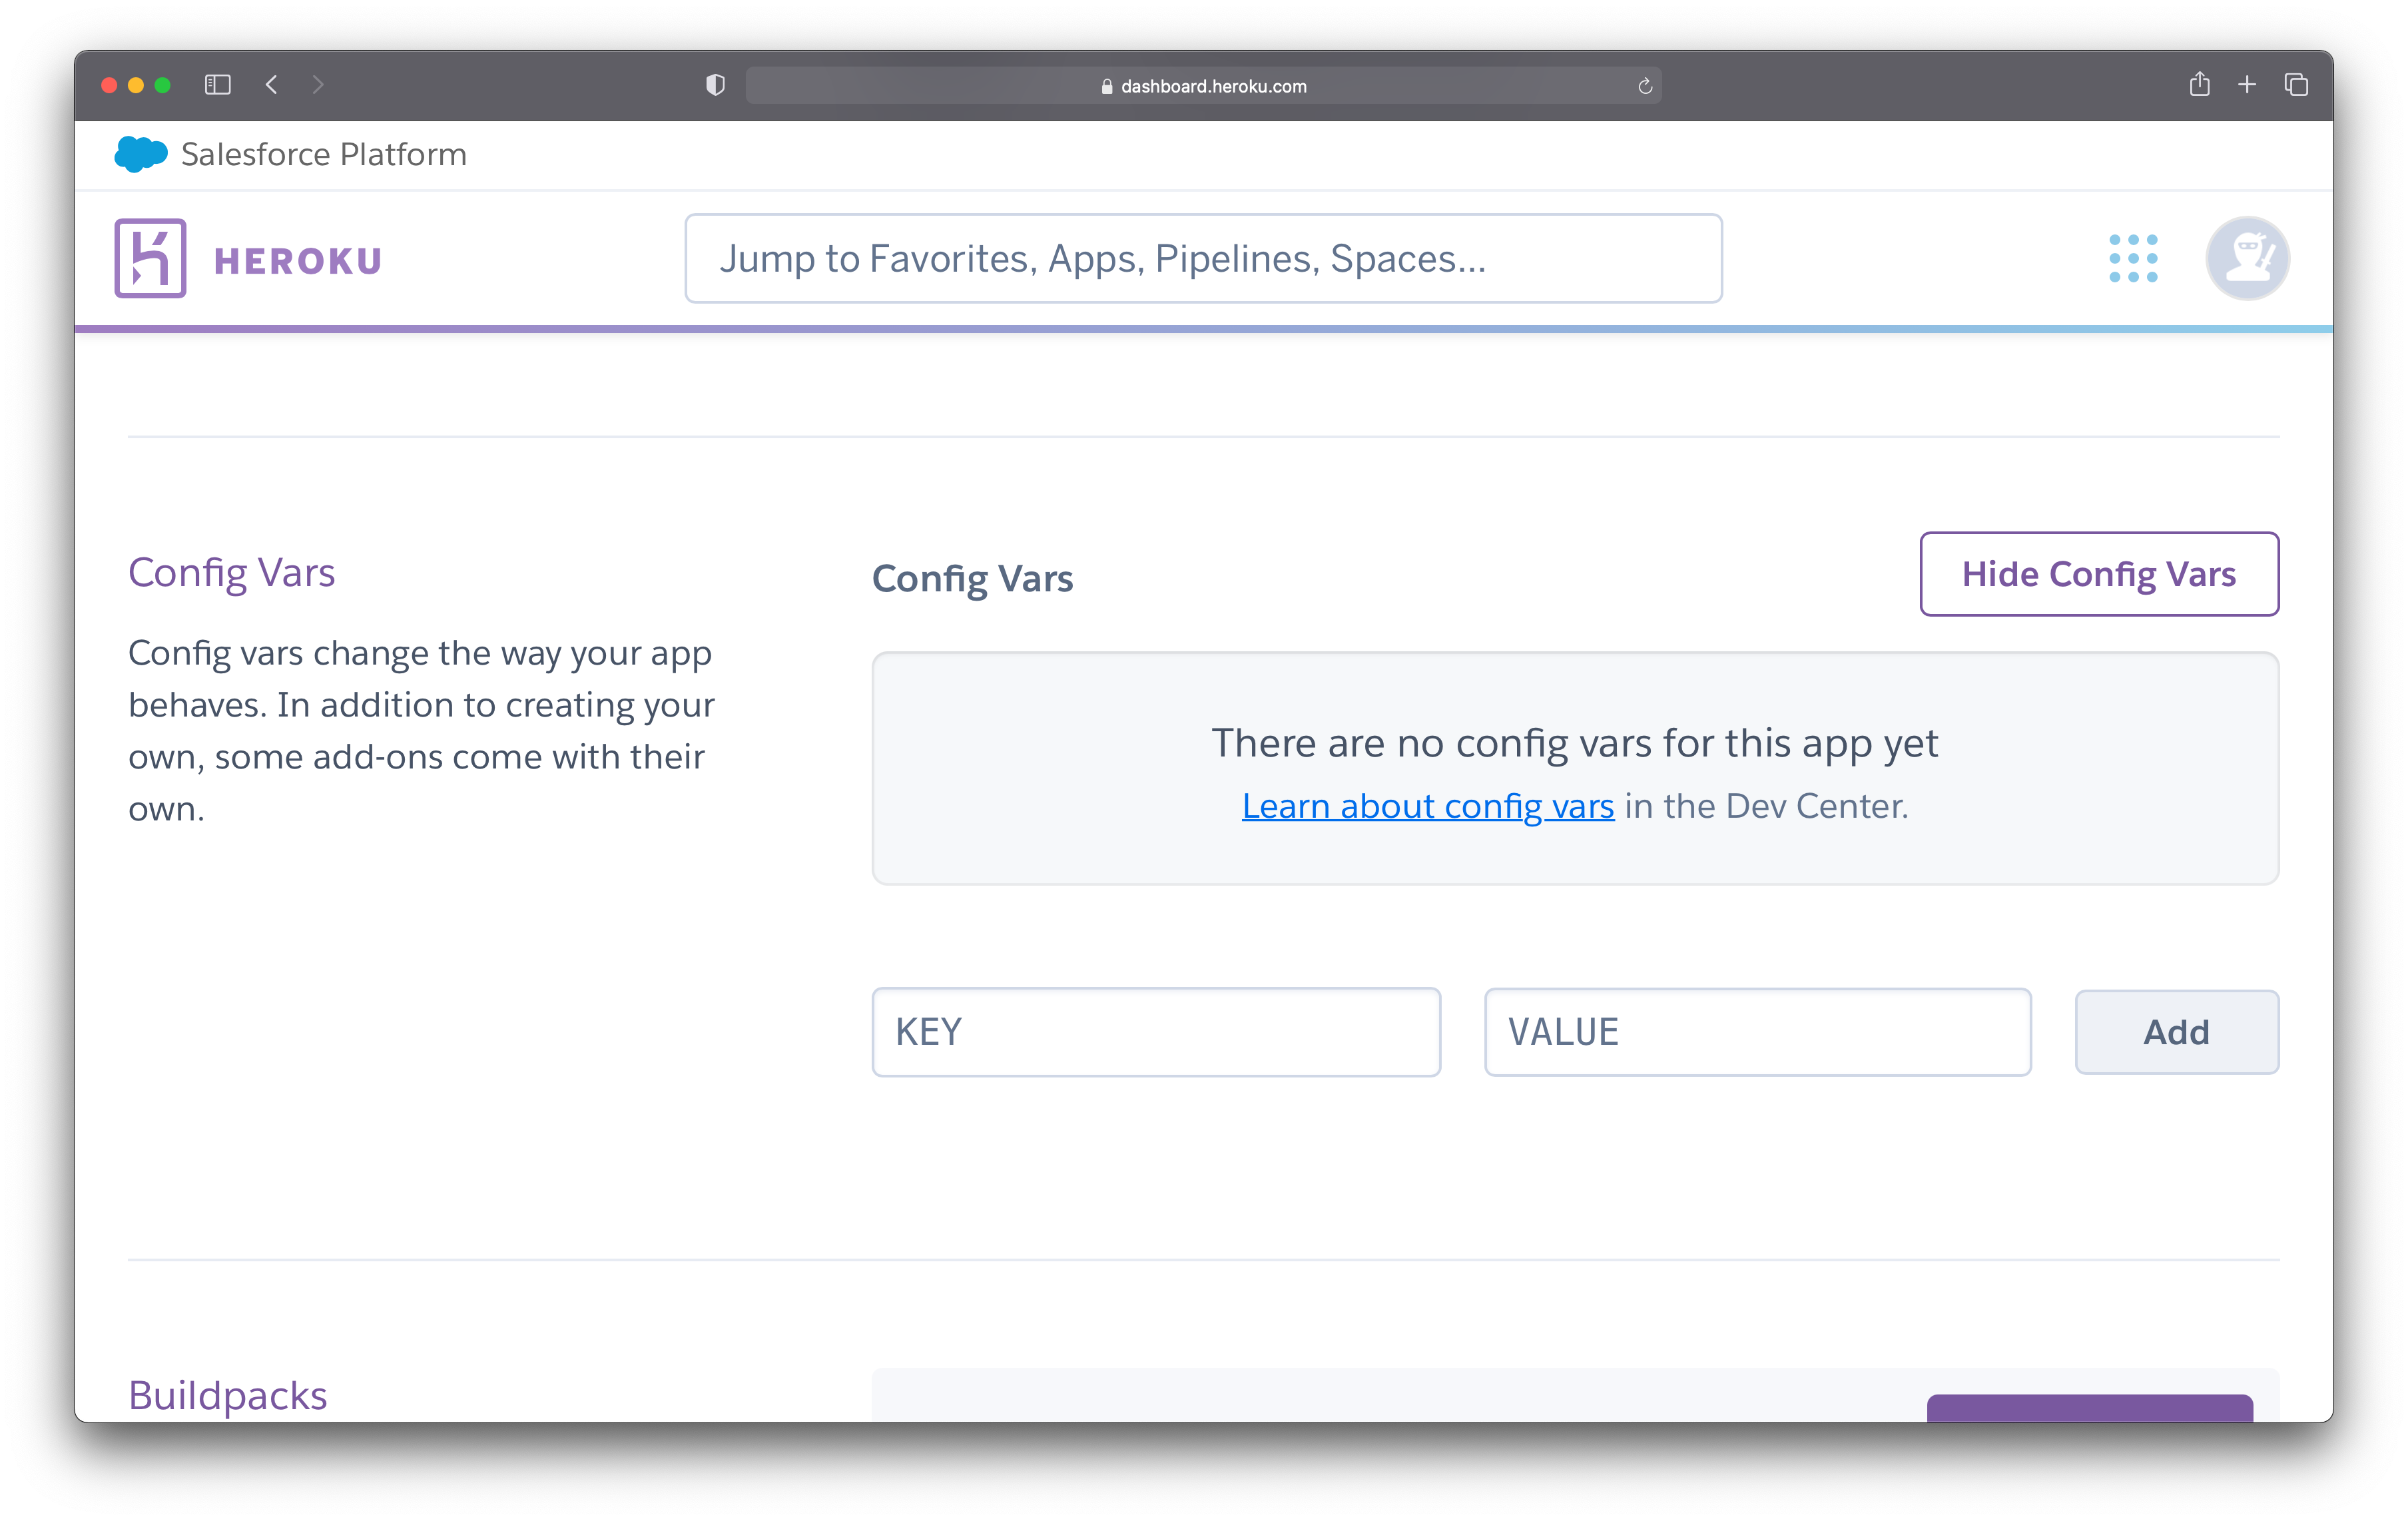 Figure 4
The last step is to set the config vars. In the KEY field, you specify the name of your environment variable, whereas in the VALUE field, you specify its actual value. An example would be storing the database URL as an environment variable.
In this case:
- the key could be
DATABASE_URLand - the value could be
postgres://pamyo:f50@ec2.amazonaws.com:5432/klmdsblk
After entering both the key and the value, press "Add" and you are done. Figure 5 shows the newly created config variables.
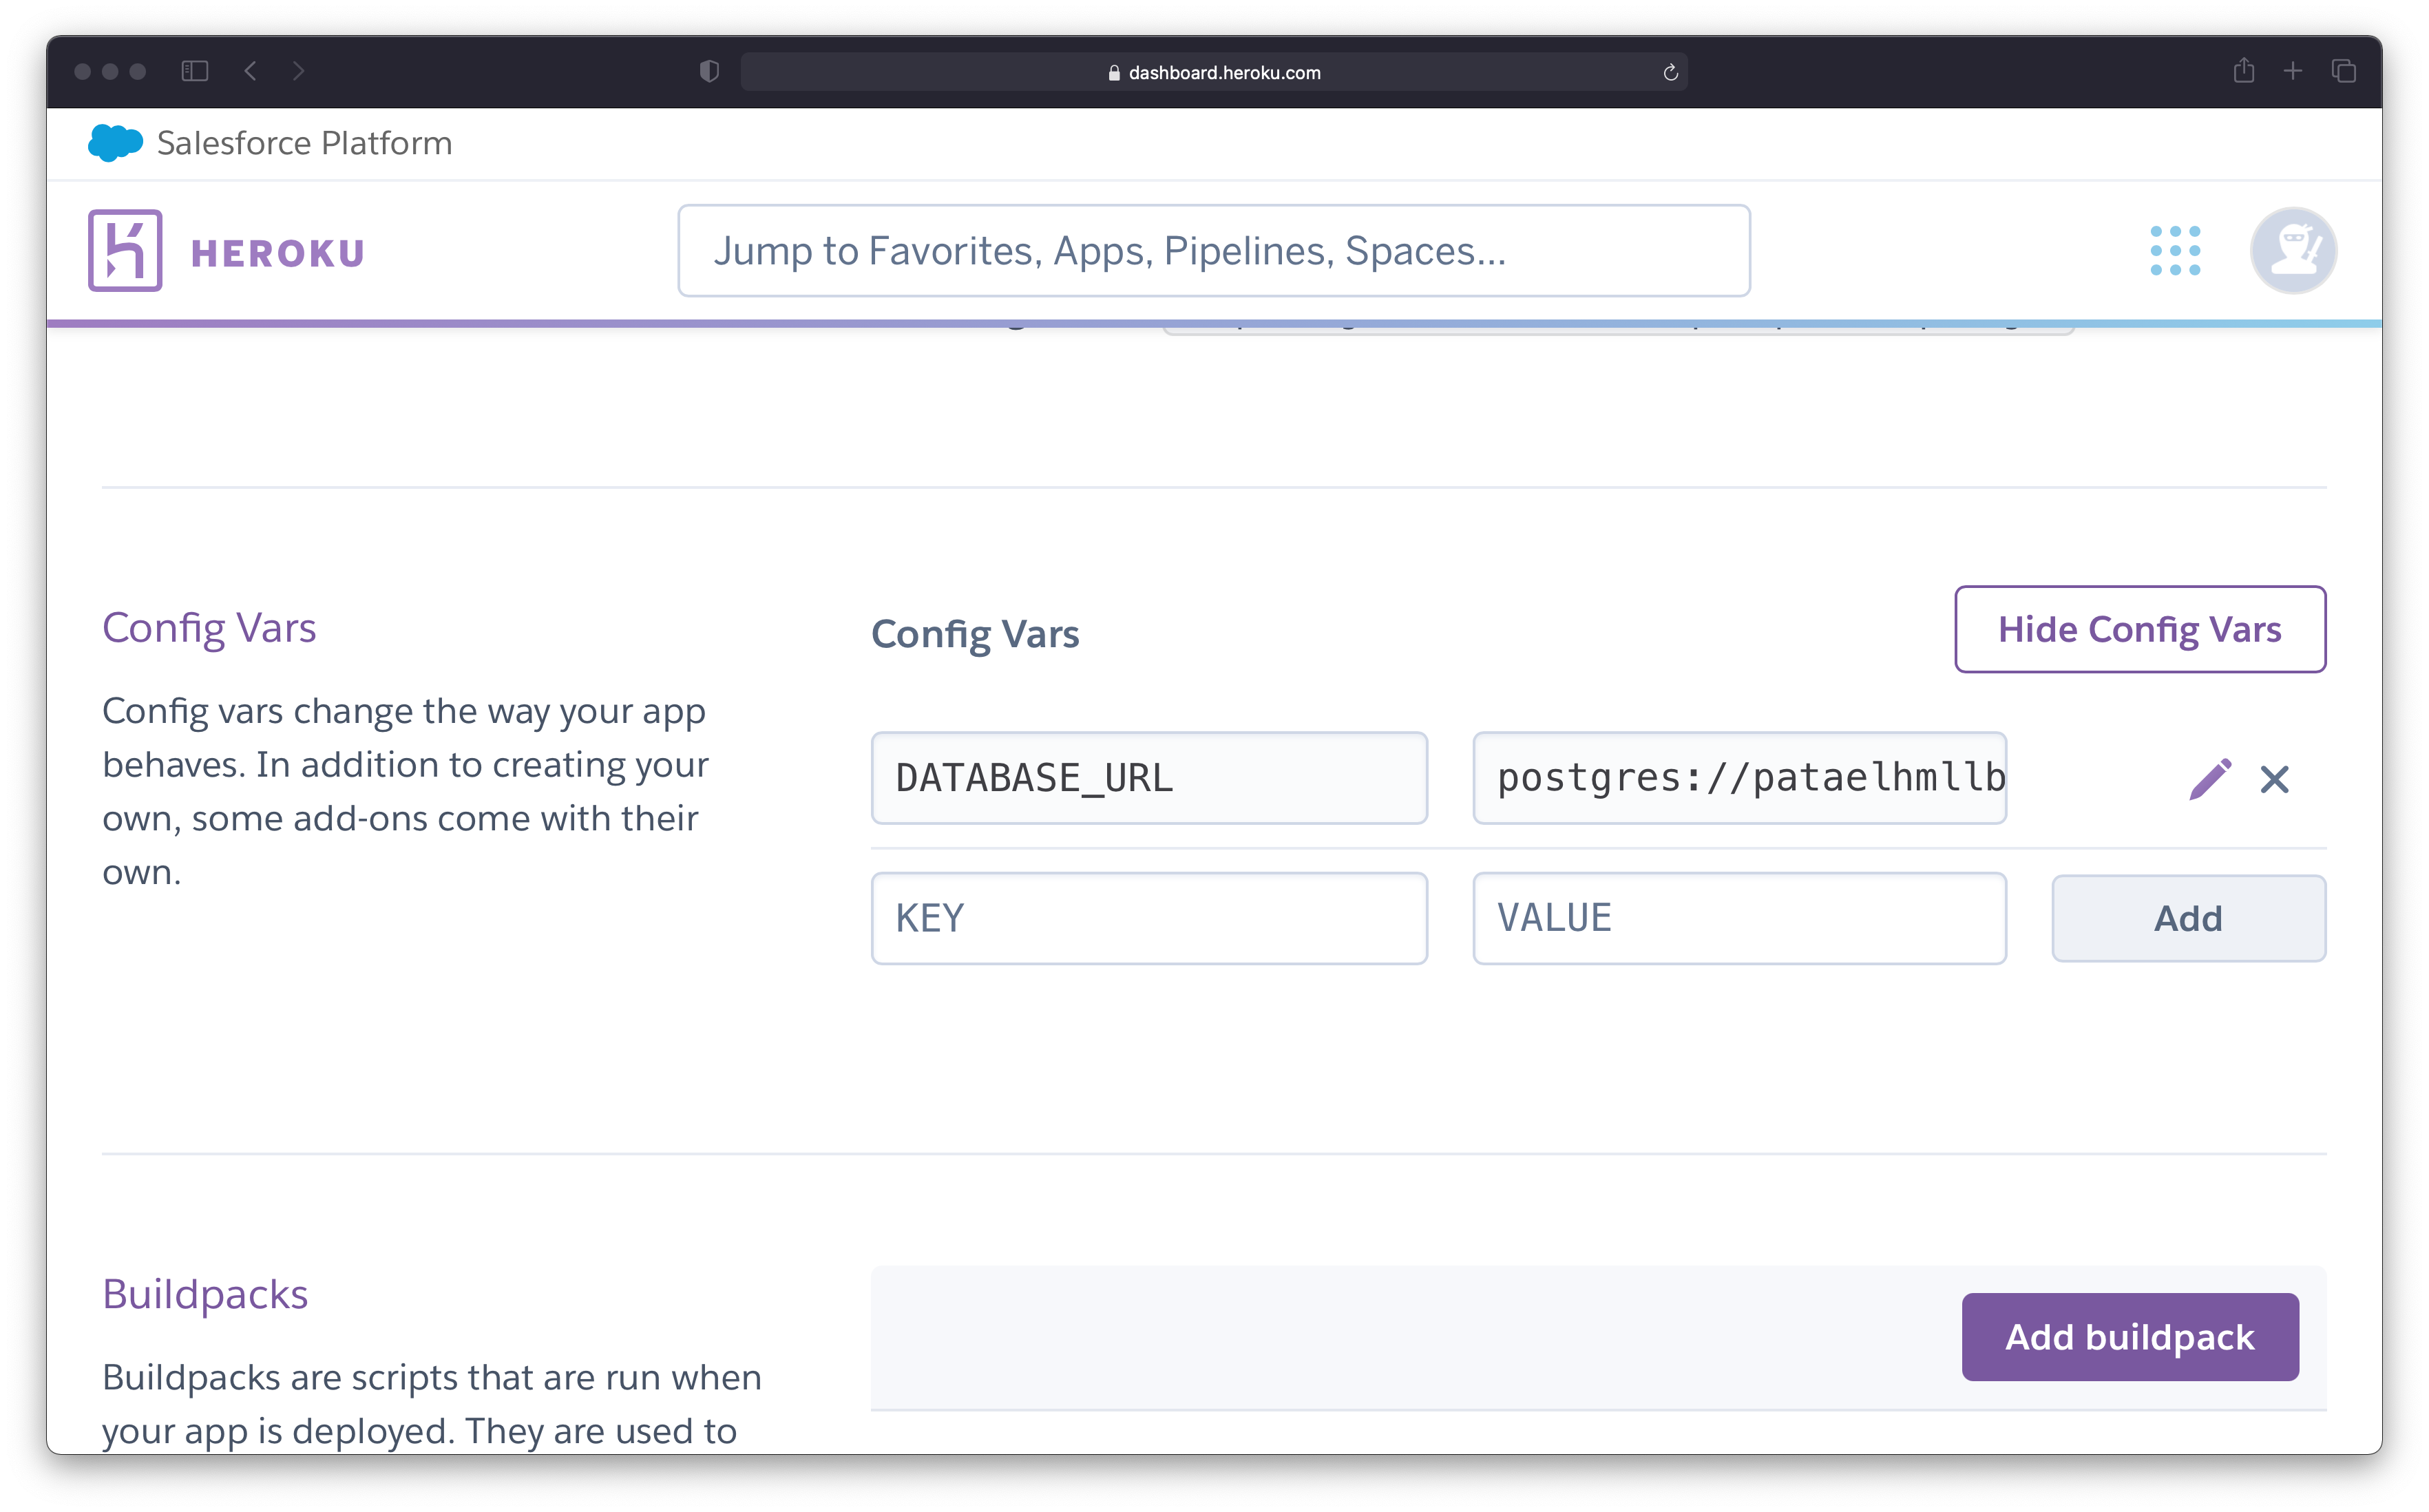 Figure 5
Now you can start using the environment variables in your applications.
2. Heroku CLI
The article assumes you have the Heroku CLI installed. If you do not have it, install it before proceeding further.
The first step is to list all the applications in your Heroku account. You can list them by running heroku apps in your terminal.
The next step is to choose a project from that list and set the environment variables. You can set the environment variables for a specific project with the following command:
heroku config:set KEY=VALUE --app <project-name>
The KEY and the VALUE represent the same things as in the web interface. Using the same example, you could create an environment variable for the database URL as follows:
heroku config:set DATABASE_URL=postgres://pamyo:f50@ec2.amazonaws.com:5432/klmdsblk --app expensifypit
Figure 6 illustrates what happens when you run the above command.
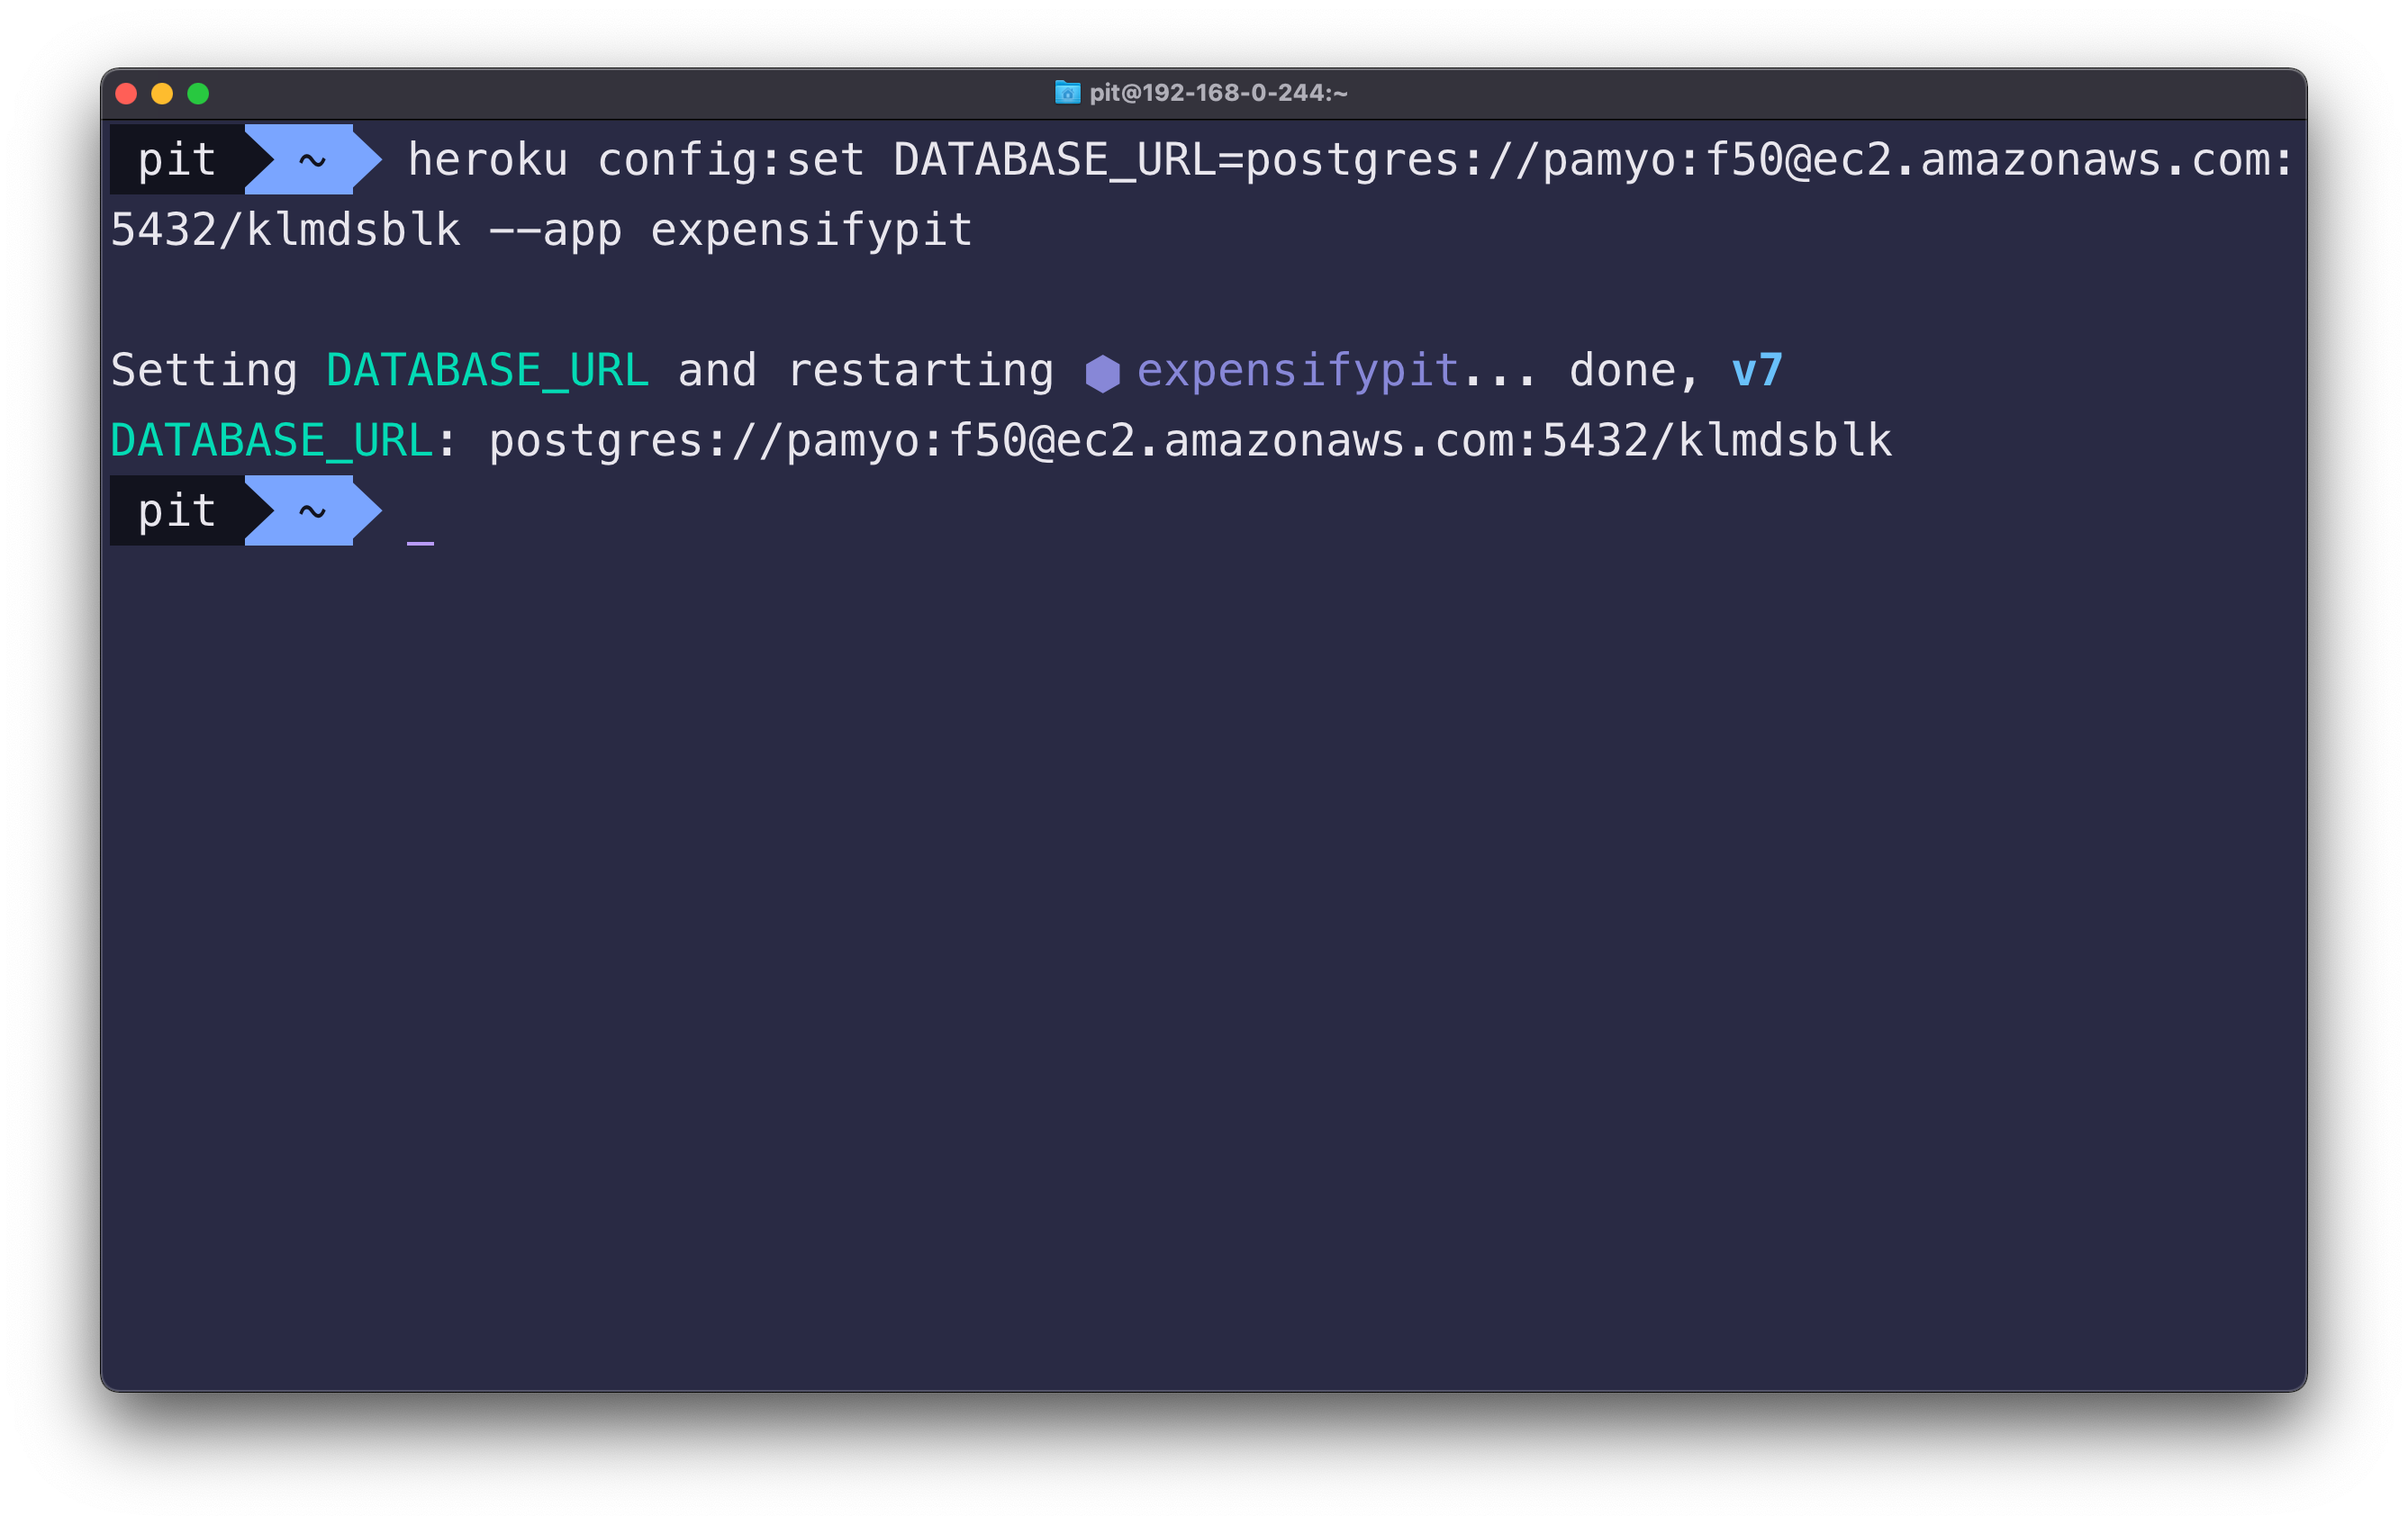 Figure 6
You can check whether the operation was successful or not by running heroku config --app <project-name> in your terminal.
The command returns all the config vars (environment variables) for the specified project. Figure 8 illustrates the config variables for the project expensifypit.
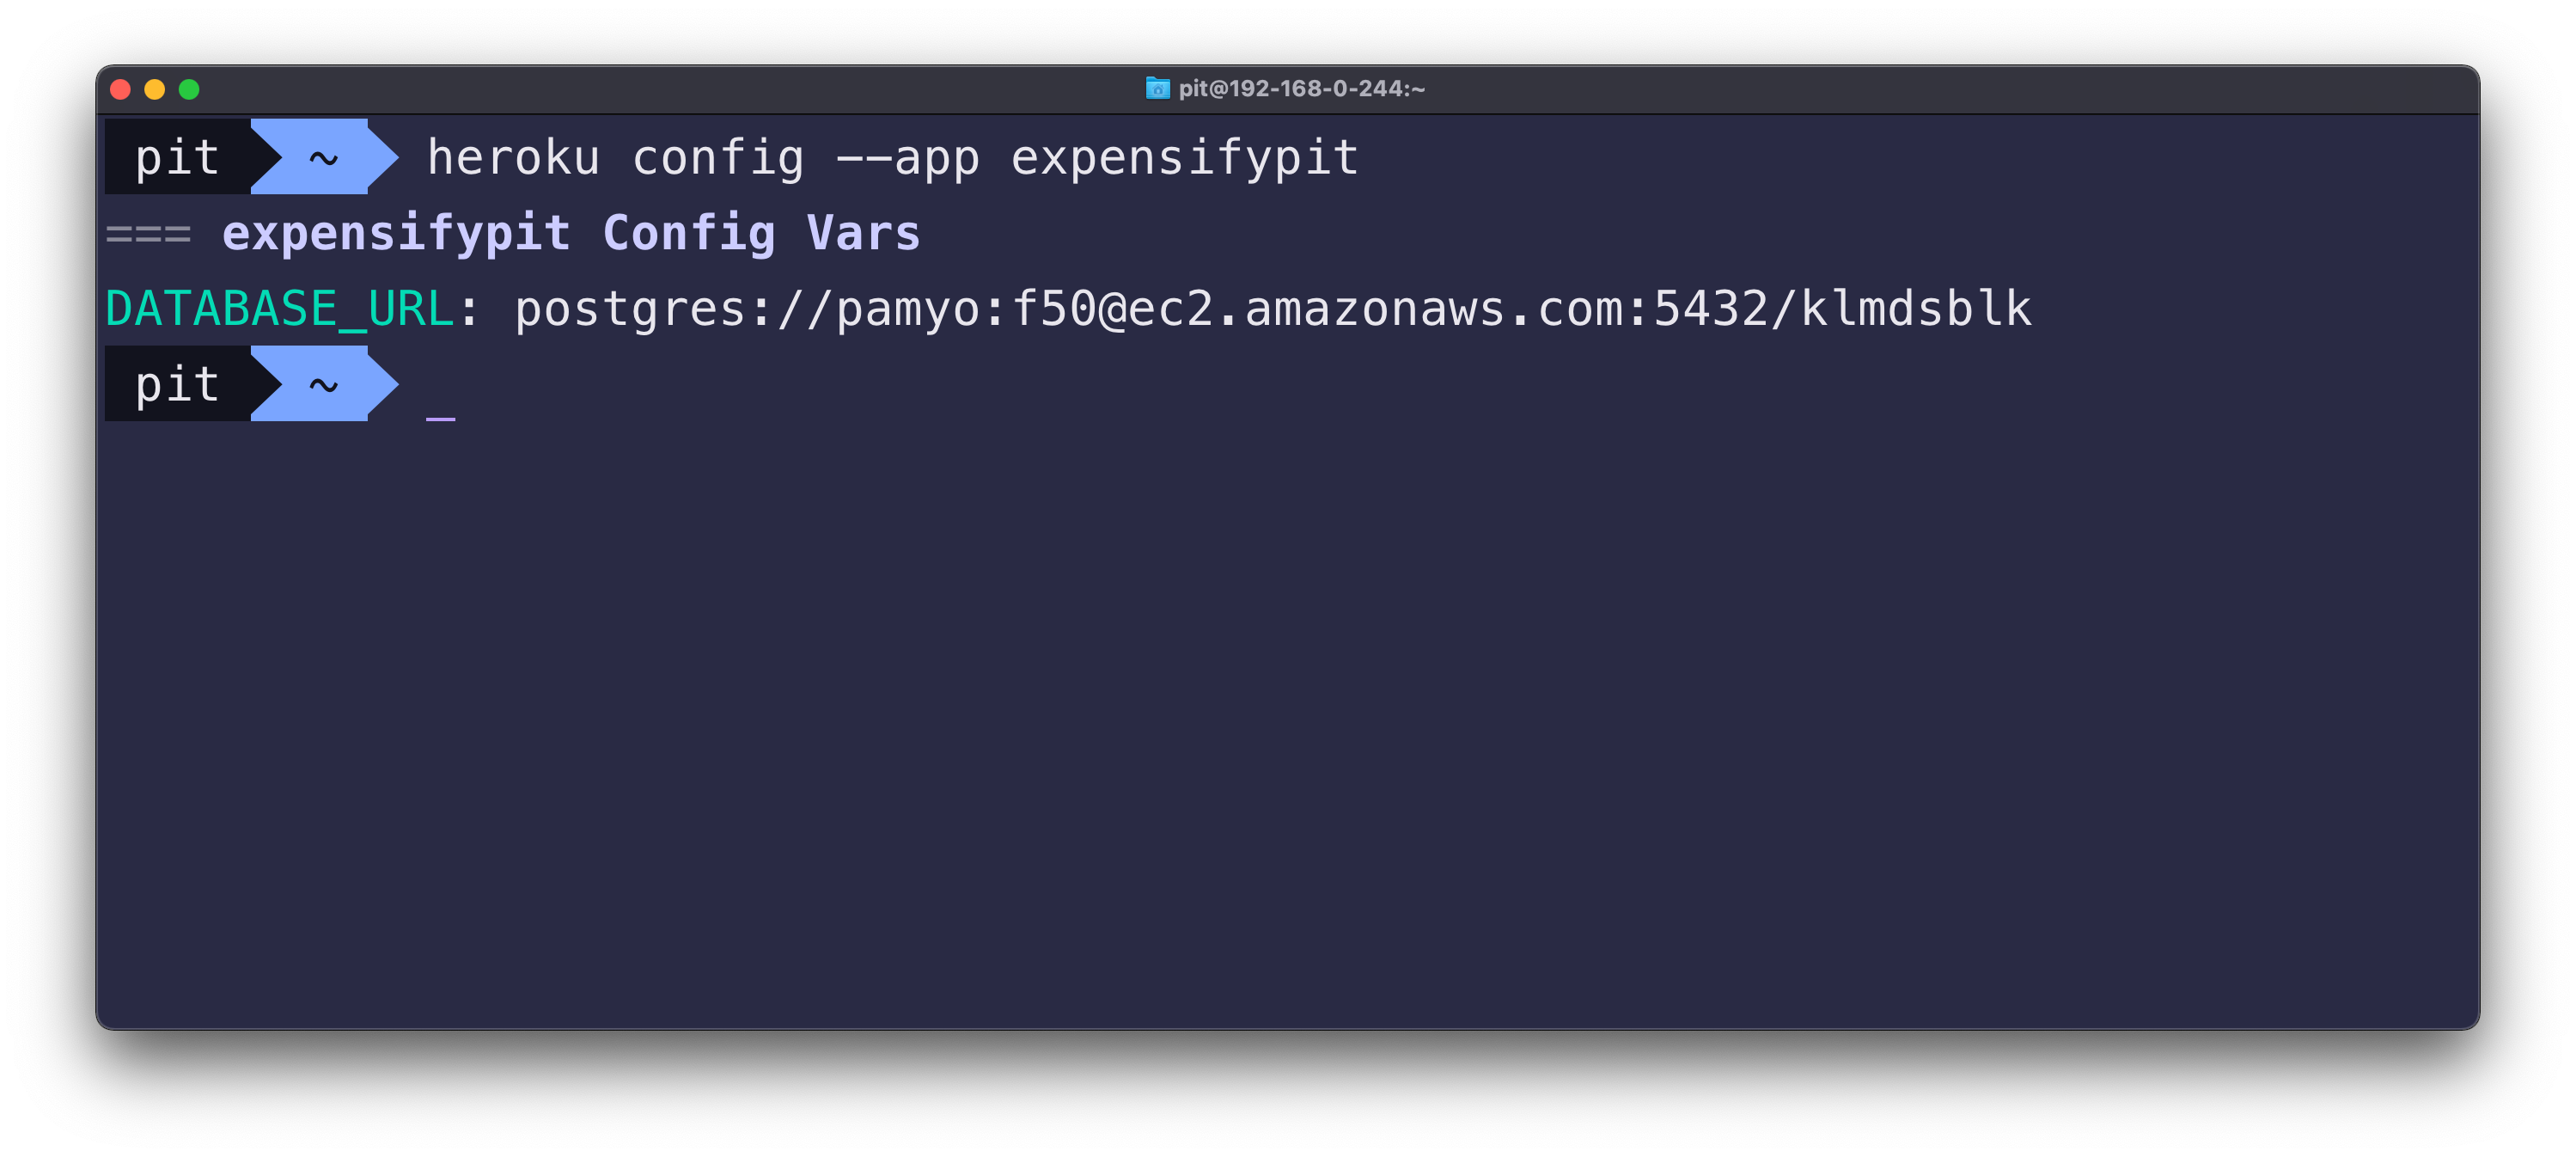 Figure 8
You are done! The config variables are set, and you can use them in your project.