> ## Content Index
> Fetch the complete content index at: https://catalins.tech/llms.txt
> Use this file to discover other available public pages before exploring further.
# How to Create and Validate Forms With React Hook Form
- URL: https://catalins.tech/react-forms-with-react-hook-form/
- Published: 2023-03-28T16:55:46.000Z
- Updated: 2026-09-11T13:50:09.000Z
- Author: Catalin Pit
- Tags: React, Frontend
React Hook Form (RHF) is a library for managing and validating forms. It's a performant library that improves the app performance by reducing the amount of code you need to write and minimizing the number of re-renders. RHF is also super light having zero dependencies. Lastly, you can integrate RHF with the majority of the available React UI libraries.
This article teaches you how to build and validate React forms using React Hook form. By the end of the article, you will have a working form with default input values and validation rules.
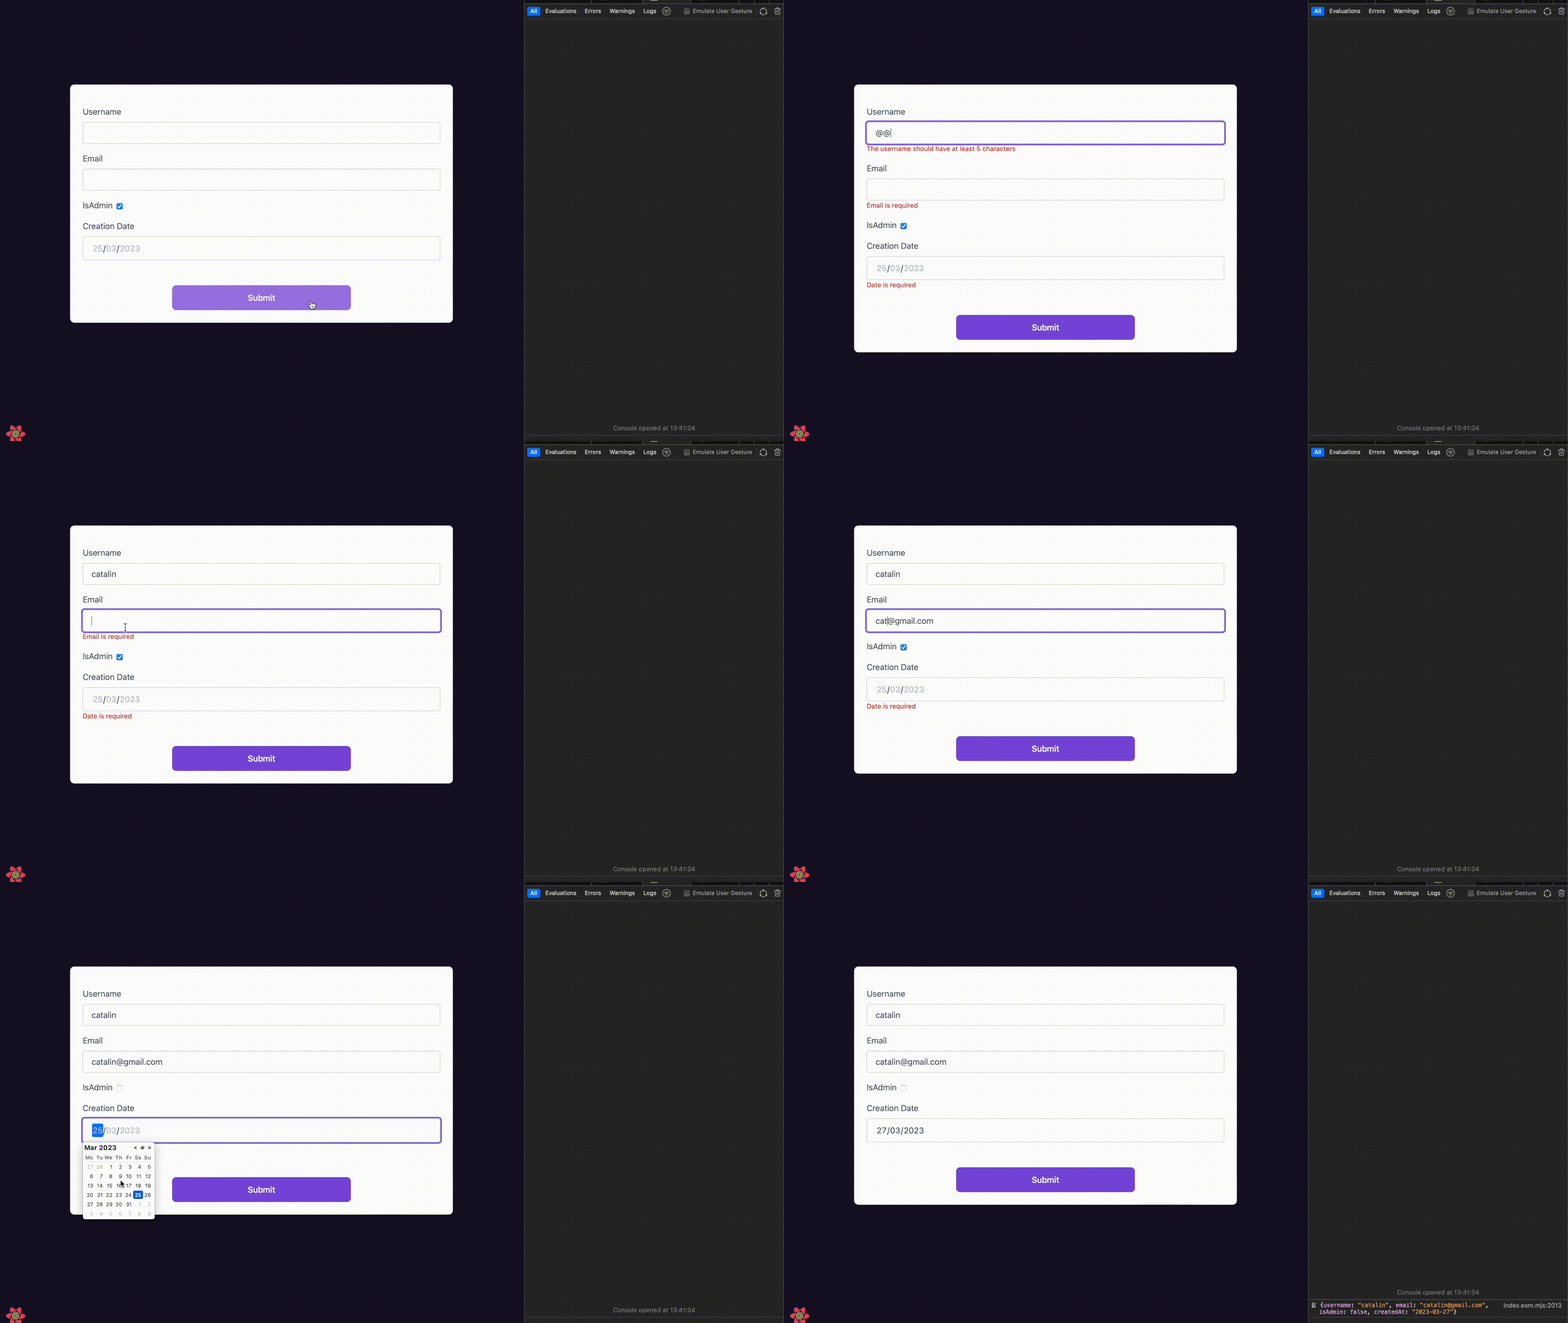
The above video illustrates the form you will build.
## Prerequisite
Make sure you install the following package in your project before continuing further:
```
react-hook-form
```
## Build a form with React Hook Form
Let's start by building a form without any validation first. Import the `useForm` hook at the top of the file:
```
import { useForm } from 'react-hook-form';
```
`useForm` is a custom hook to manage the entire form. It allows you to set default form values, provide a validation schema, submit the form, plus other things.
Now add the following code after the import statement:
```
import { useForm } from 'react-hook-form';
export default function Form() {
const {
register,
handleSubmit,
formState: { errors },
} = useForm();
}
```
In the above code, you initialize the `useForm` hook and then use destructuring to retrieve the required properties. The properties returned by the `useForm` hook include the following:
- `register`: The method you use to register input and select elements for value tracking and validation.
- `handleSubmit`: This method receives the form data if the form validation is successful. You use this method to handle the form submission.
- `formState`: It's an object that holds information about the form state, including any validation errors, touched fields, dirty fields, and more.
Other properties are returned, but we're only interested in these three in this case. You can read more about this hook in the [documentation](https://react-hook-form.com/api/useform/).
Let's continue by rendering a form with the following input fields:
- username
- email
- isAdmin
- createdAt
```
import { useForm } from 'react-hook-form';
export default function Form() {
const const {
register,
handleSubmit,
formState: { errors },
} = useForm();
return (
);
}
```
Currently, the form outputs the data you submit to the console.
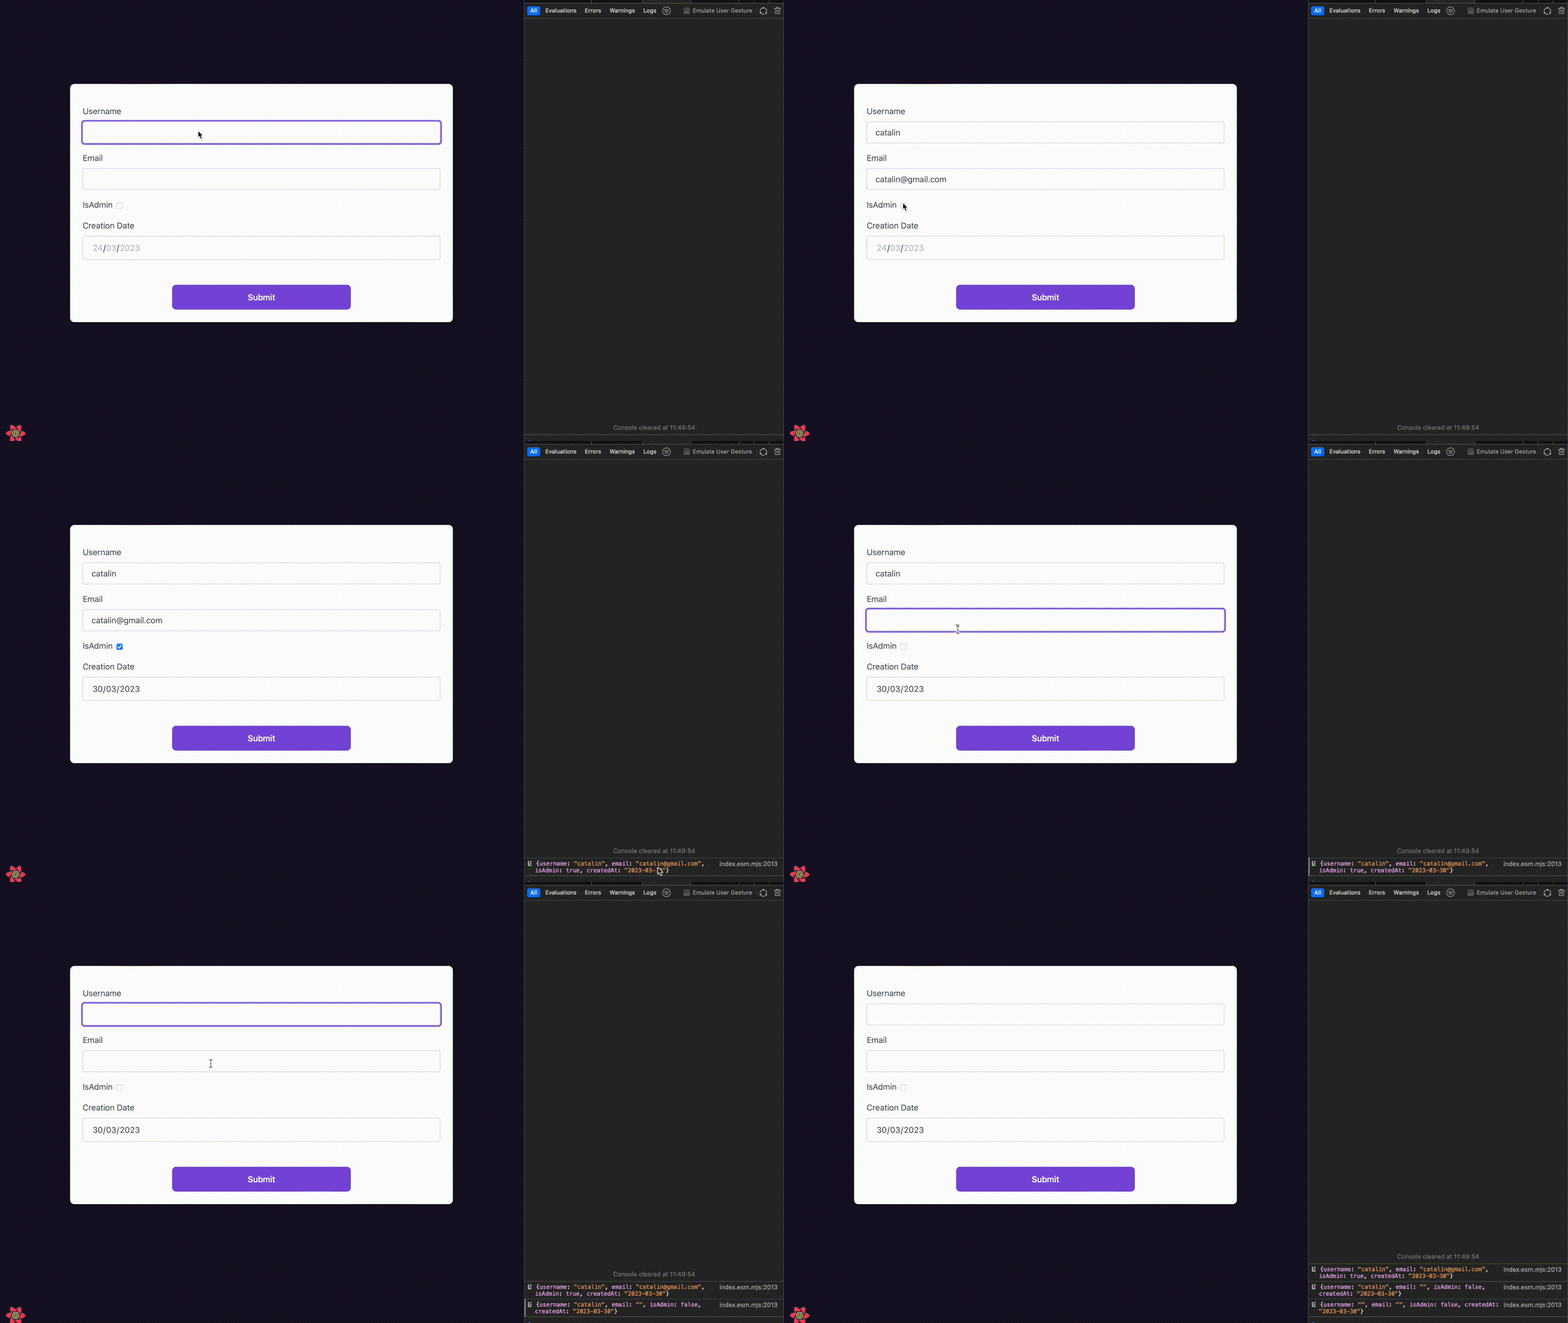
The form doesn't have any validation though, which is not ideal. So, in the next step, you'll add form validation using the mechanisms provided by React Hook Form.
Note: The above snippet doesn't include the styling to keep the code simple and focus on the essential bits. If you want to see the form with the TailwindCSS code, check out [this gist](https://gist.github.com/catalinpit/6262a5b518ef9d9505aa869dbf3fa897).
### Form validation with React Hook Form
Let's add the following validation logic:
- the `username` is required, it should have at least 5 characters, and it must contain only letters, numbers and underscore
- the `email` is required, it should be a maximum of 50 characters long, and it should be a valid email address
- the `createdAt` date is required
Replace the first `div` for the `username` input with the following code:
```
v.length >= 5,
matchPattern: (v) => /^[a-zA-Z0-9_]+$/.test(v),
},
})}
/>
{errors.username?.type === "required" && (
Username is required
)}
{errors.username?.type === "minLength" && (
The username should have at least 5 characters
)}
{errors.username?.type === "matchPattern" && (
Username must contain only letters, numbers and _
)}
;
```
So, what's happening in the above code? The `register` function accepts two parameters - the name of the input/select element and a `RegisterOptions` object. The `RegisterOptions` object allows you to perform data validation, as shown in the above code snippet.
Let's take a closer look at the `input` field:
```
{...register("username", {
required: true,
validate: {
minLength: (v) => v.length >= 5,
matchPattern: (v) => /^[a-zA-Z0-9_]+$/.test(v),
},
})}
```
The `required` flag is set to `true`, meaning users cannot submit the form without providing a username. The `validate` object allows you to define custom validation rules for the input field. In this example, it checks if the `username` is at least five characters long and if it matches the given regex expression.
```
{errors.username?.type === "required" && (
Username is required
)}
{errors.username?.type === "minLength" && (
The username should have at least 5 characters
)}
{errors.username?.type === "matchPattern" && (
Username must contain only letters, numbers and _
)}
```
You can see the validation errors by accessing the `errors` object if any validation rules fail. For example, the above code displays error messages for the "username" input field based on the failed validation rule.
You can apply validation rules to the `email` field similarly. Replace the second `div` for the `email` input with the following code:
```
v.length <= 50 || "The email should have at most 50 characters",
matchPattern: (v) =>
/^\w+([.-]?\w+)*@\w+([.-]?\w+)*(\.\w{2,3})+$/.test(v) ||
"Email address must be a valid address",
},
})}
/>
{errors.email?.message && (
{errors.email.message}
)}
;
```
If you compare the code for the `username` input with the one for the `email` input, you should observe something different, though. The difference is that the `email` input code contains only one conditional rendering block for the errors.
Previously, there were three blocks for the `username` input field, one for each error type. The more validation rules you have, the more error code blocks you have. However, that can be improved by directly returning the error message when the validation rule fails:
```
validate: {
maxLength: (v) =>
v.length <= 50 || "The email should have at most 50 characters",
matchPattern: (v) =>
/^\w+([.-]?\w+)*@\w+([.-]?\w+)*(\.\w{2,3})+$/.test(v) || "Email address must be a valid address",
```
Instead of checking for each error type, you can return the validation error you provided in the `validate` object.
```
{errors.email?.message && (
{errors.email.message}
)}
```
As a result, you have less code.
Up to this point, you learnt how to add multiple validation rules to a field. But what if you only want to add one validation rule, such as making the field required? You can do it as follows:
```
;
```
So, you learnt how to add one or more validation rules to the form input fields.
### Set default values for the form
Before testing the form, let's define some default values for the form. You can do that by passing the `defaultValues` object with custom values for each input field to the `useForm` hook. In this case, the `isAdmin` flag is set to `true` by default. The rest of the fields are left empty.
```
const {
register,
handleSubmit,
formState: { errors },
} = useForm({
defaultValues: {
username: "",
email: "",
isAdmin: true,
createdAt: "",
},
});
```
It's time to test the form and check if the default values and validation work correctly.
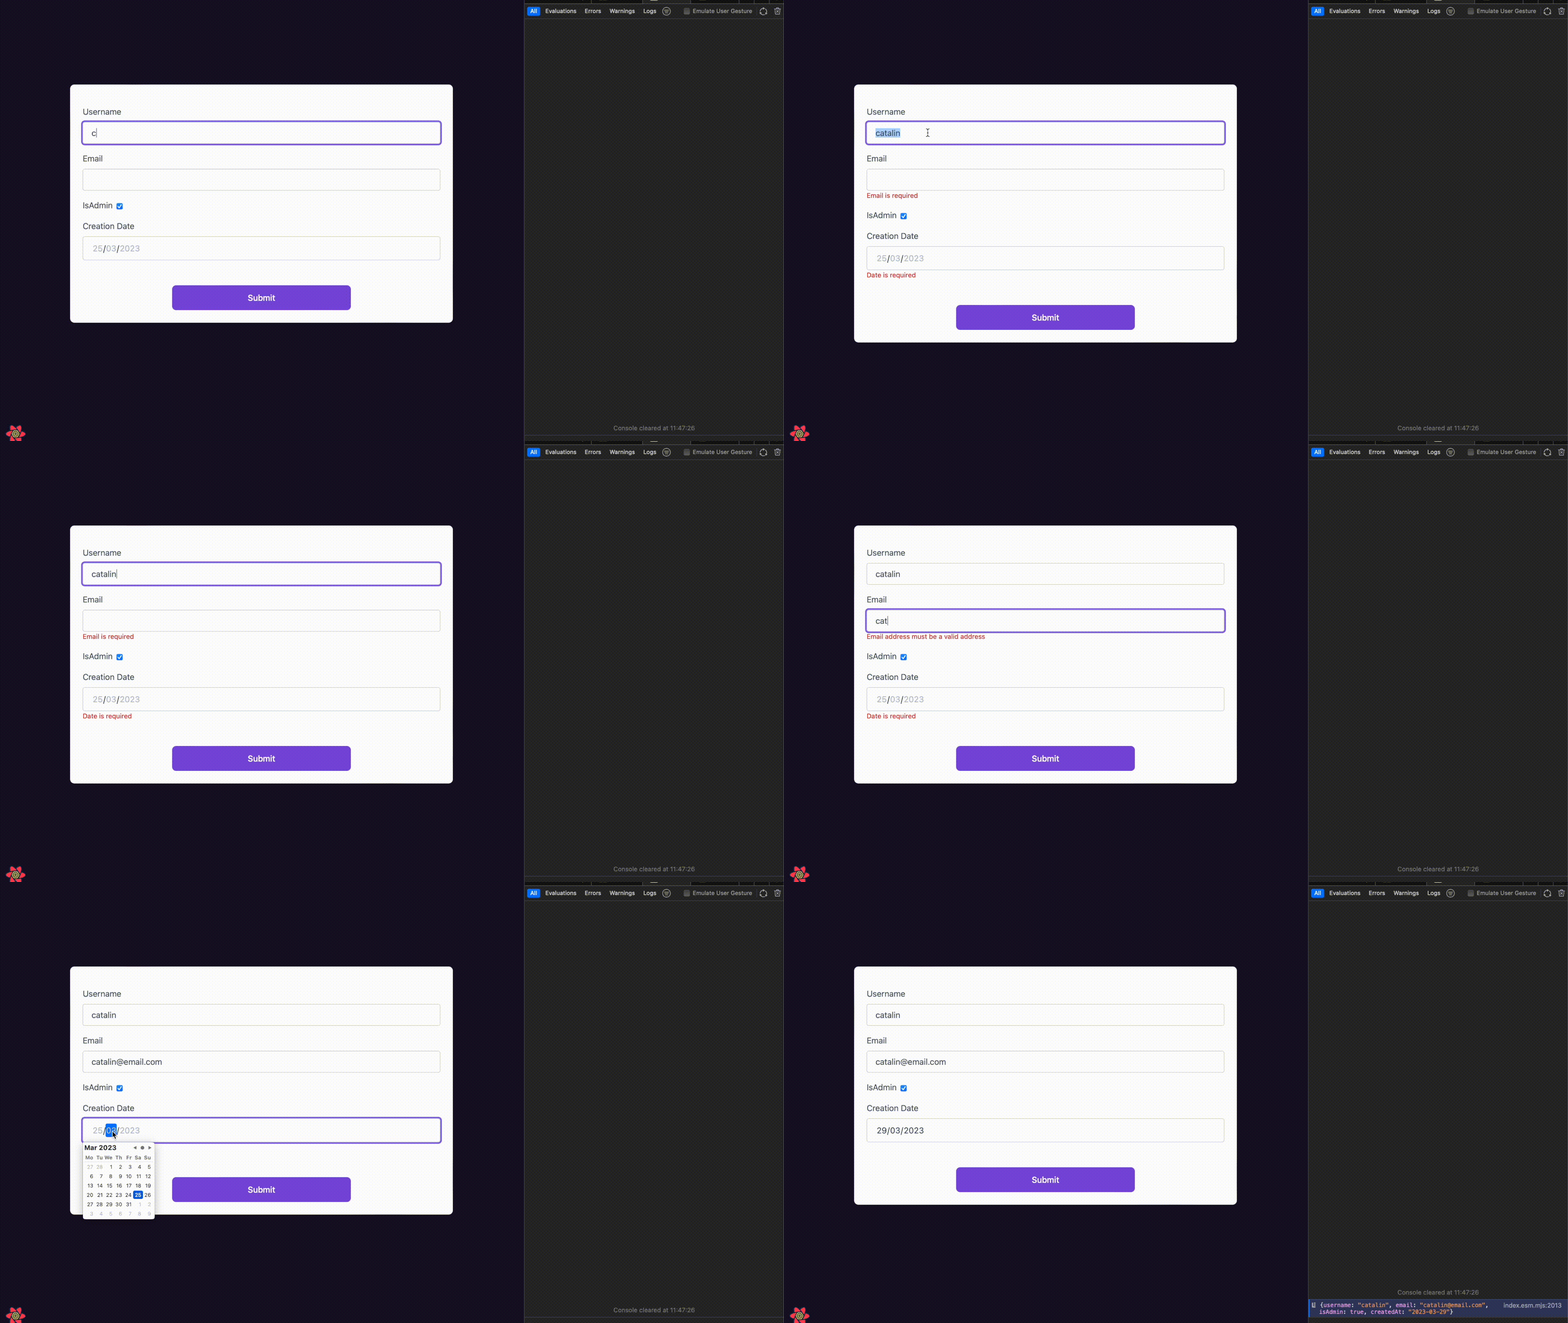
As the video illustrates, the form works as intended. The `isAdmin` flag is checked by default, and all the validation rules work correctly. You can see the complete form code in [this gist](https://gist.github.com/catalinpit/07d54c40d892cf8a143fddb9e9dcd7a6).
Congrats! You have a working form with validation rules and default values.
If you're using React Hook Form, you might also be interested in the following articles:
- [Form validation with React Hook Form and Zod](https://catalins.tech/form-validation-with-react-hook-form-zod-typescript/)
- [Share Zod validation schema between server and client](https://catalins.tech/share-zod-validation-schema-between-server-and-client/)
And the same library outside forms: [validate environment variables with Zod](https://catalins.tech/validate-environment-variables-with-zod/).