

Setting up a Hetzner VPS
Let's start by creating a new Hetzner VPS.
If you don't have an account, you can use my referral link to sign up as a thank you.
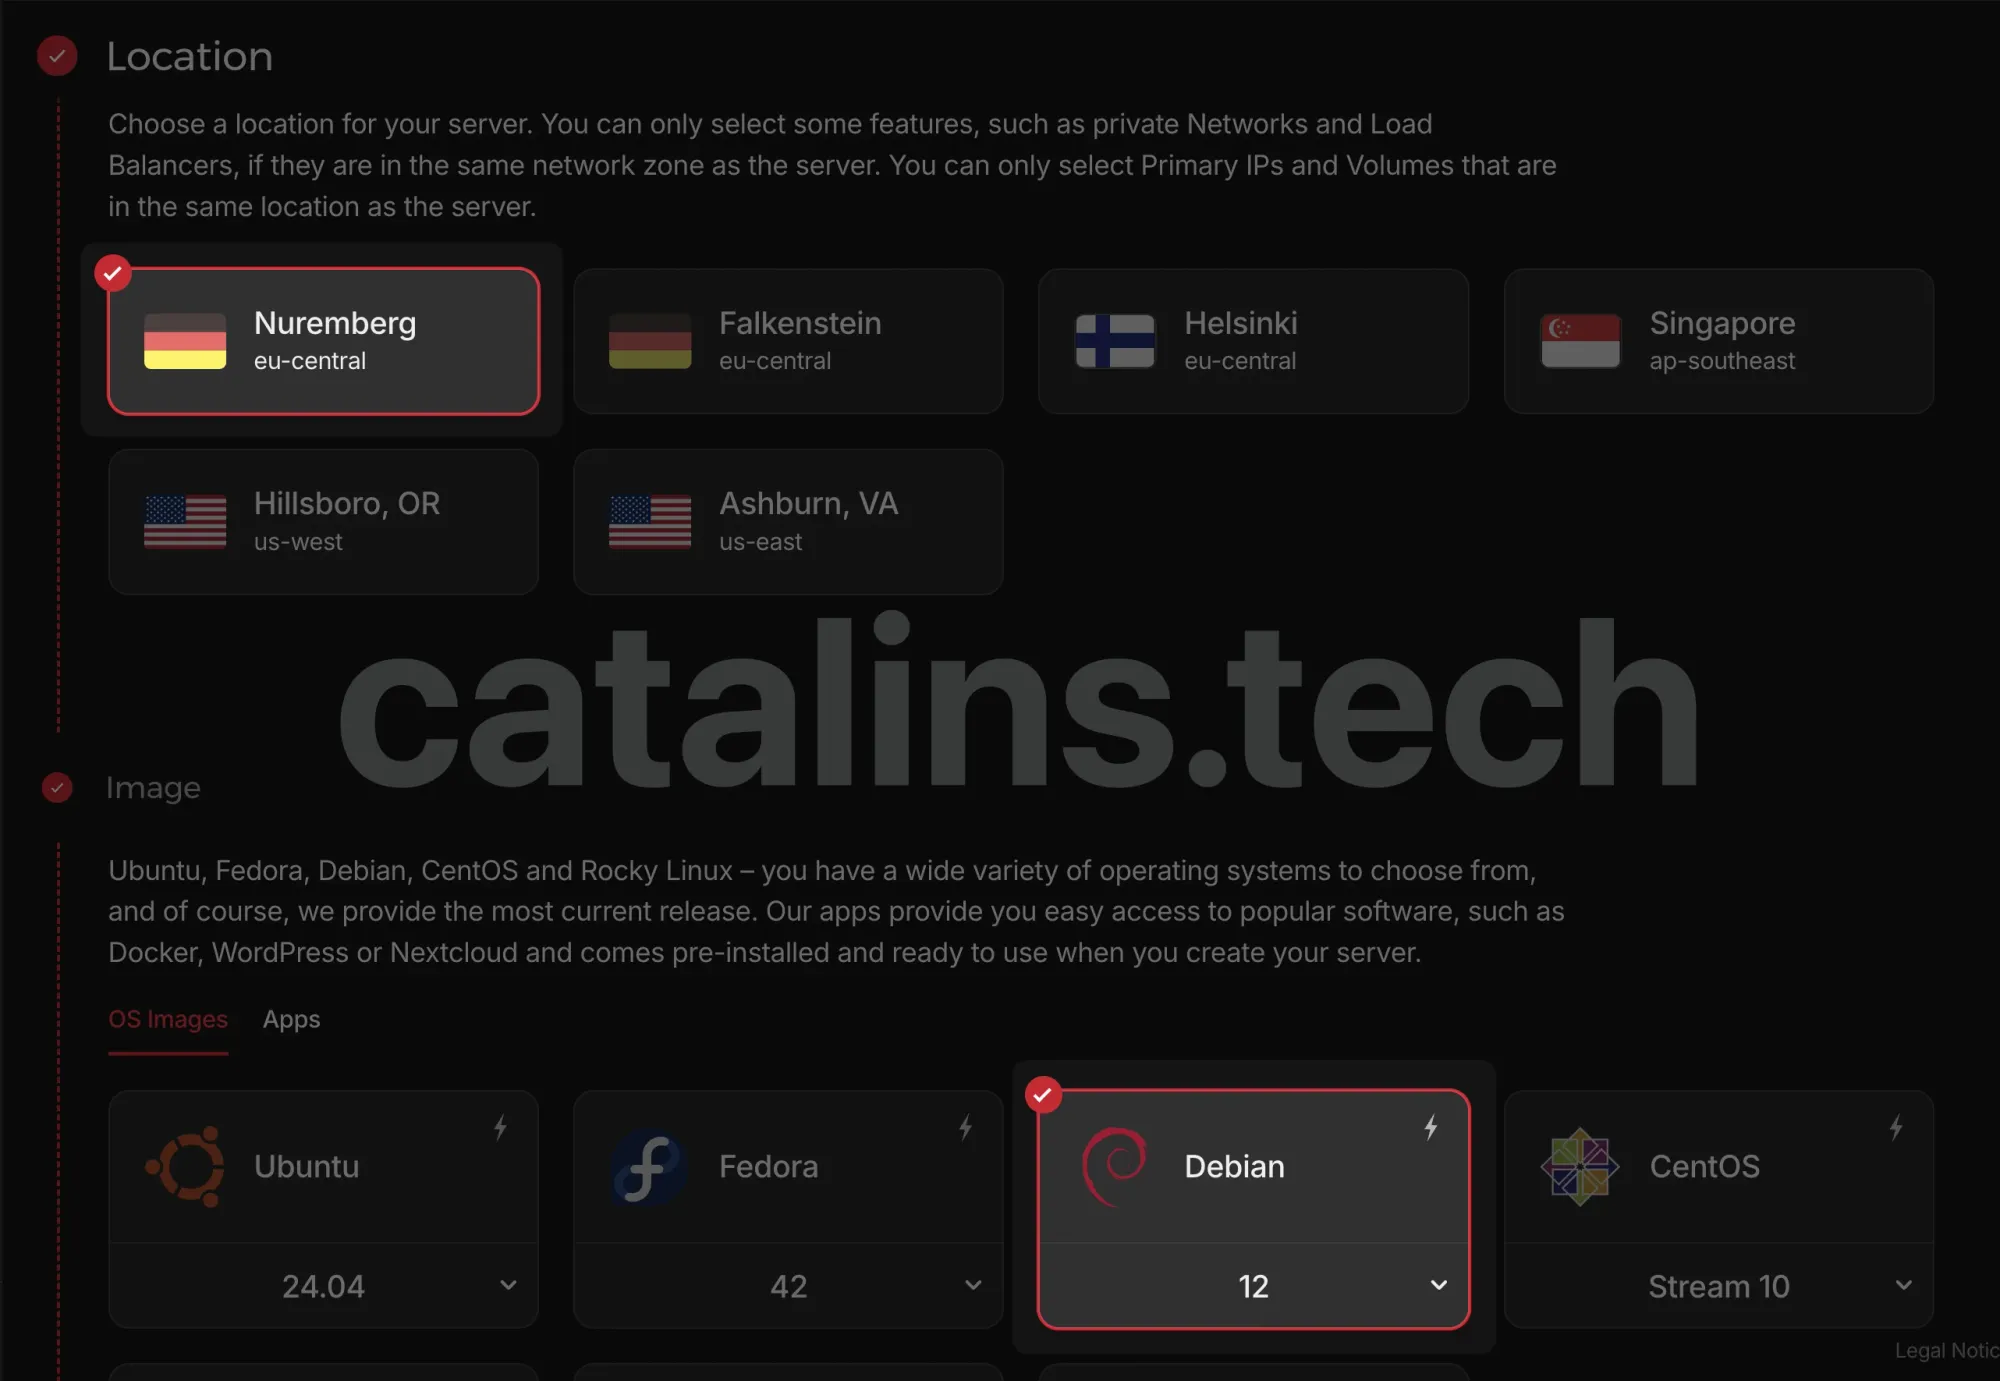
The first step is to choose your machine's location and operating system. In my case, I picked:
- Location: Nuremberg (eu-central)
- OS: Debian
The reason for choosing Debian is the unattended upgrades. That means it keeps your machine up-to-date with the latest security updates automatically.
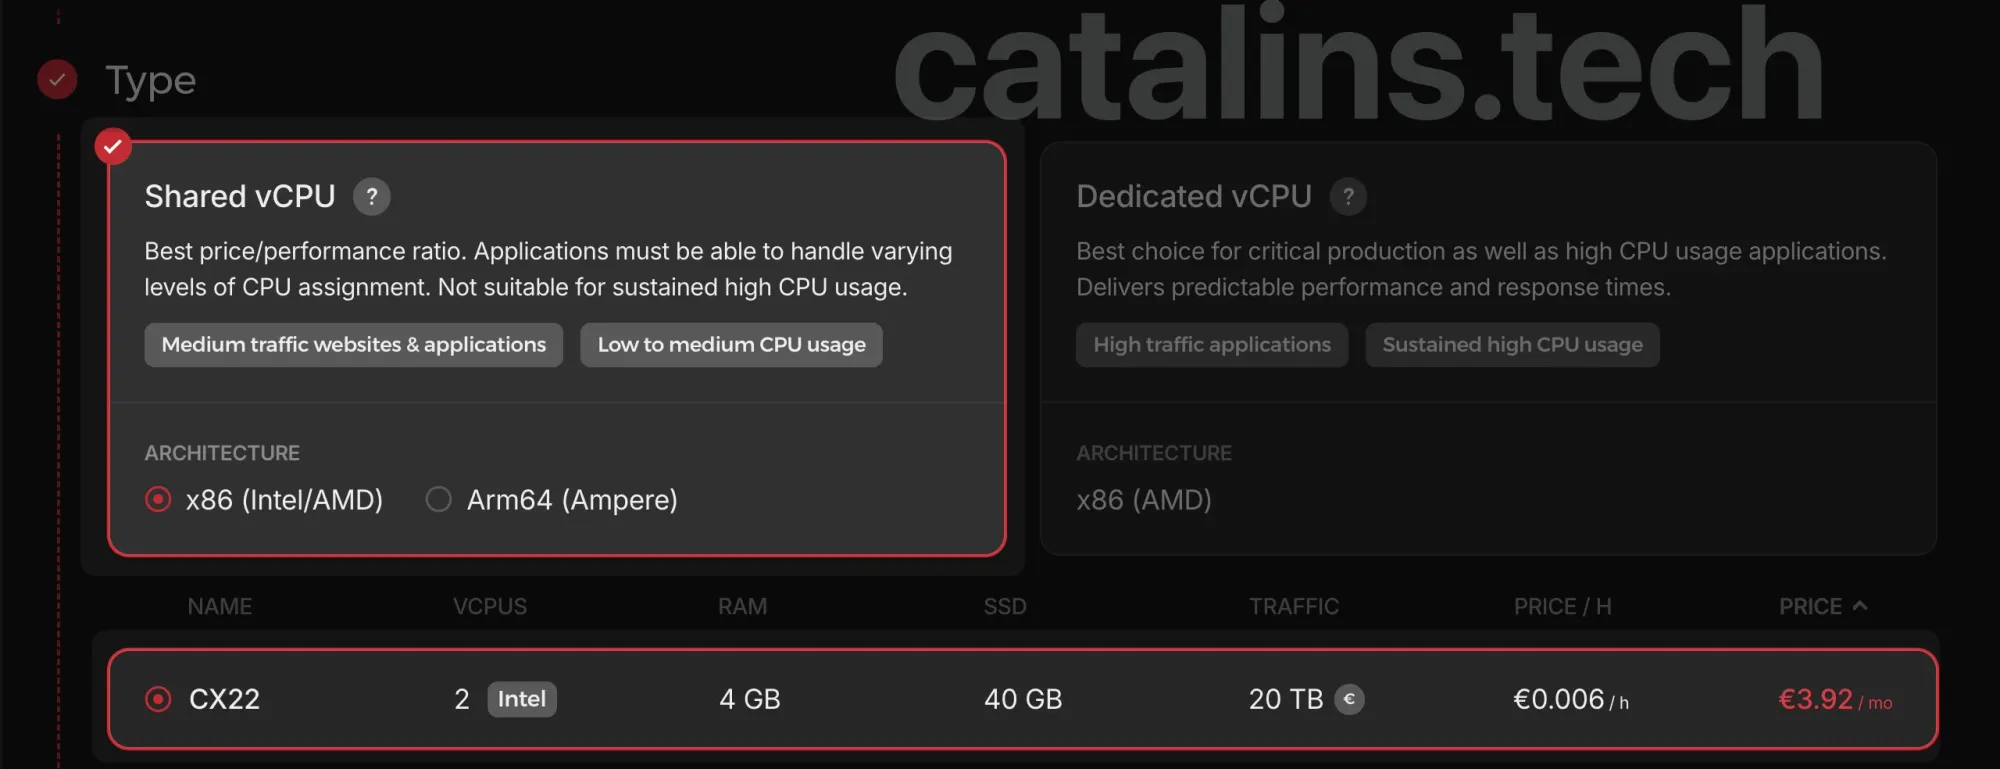
The next step involves choosing a machine type.
I picked the cheapest instance (CX22) since it's more than enough for the apps I intend to deploy. It gives you:
- vCPUs: 2 (Intel)
- RAM: 4 GB
- SSD: 40 GB
You can always start with a modest VPS and upgrade later if needed.
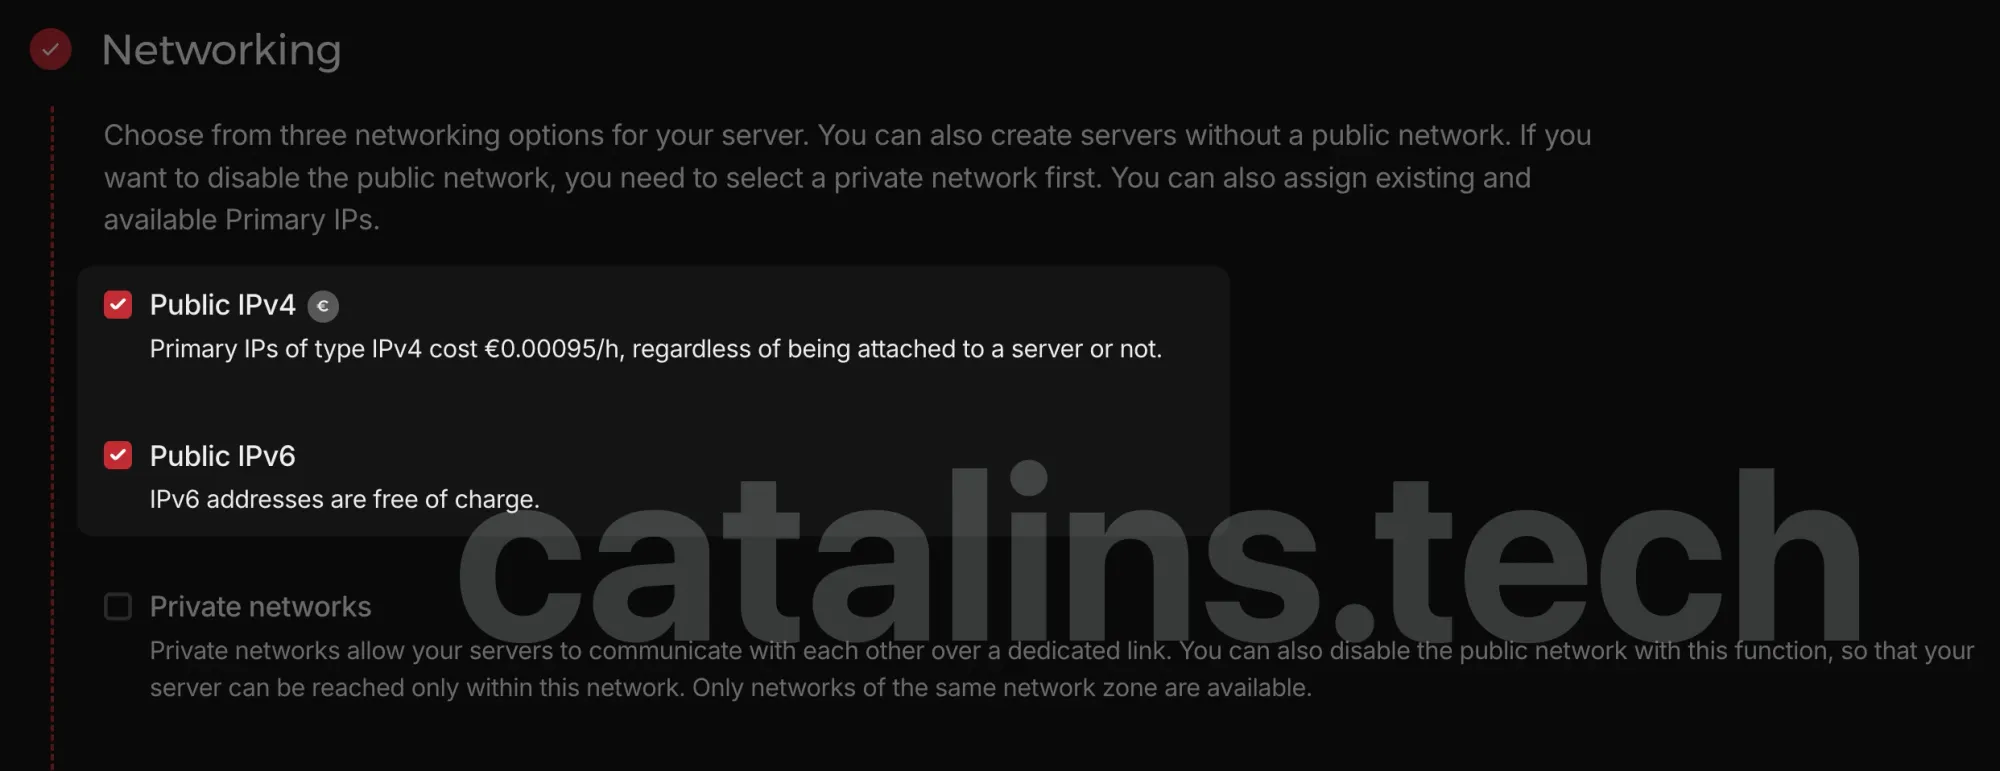
For the networking part, leave the default selections.
Don't disable IPv4 if you don't want to run into issues with websites that don't support IPv6.
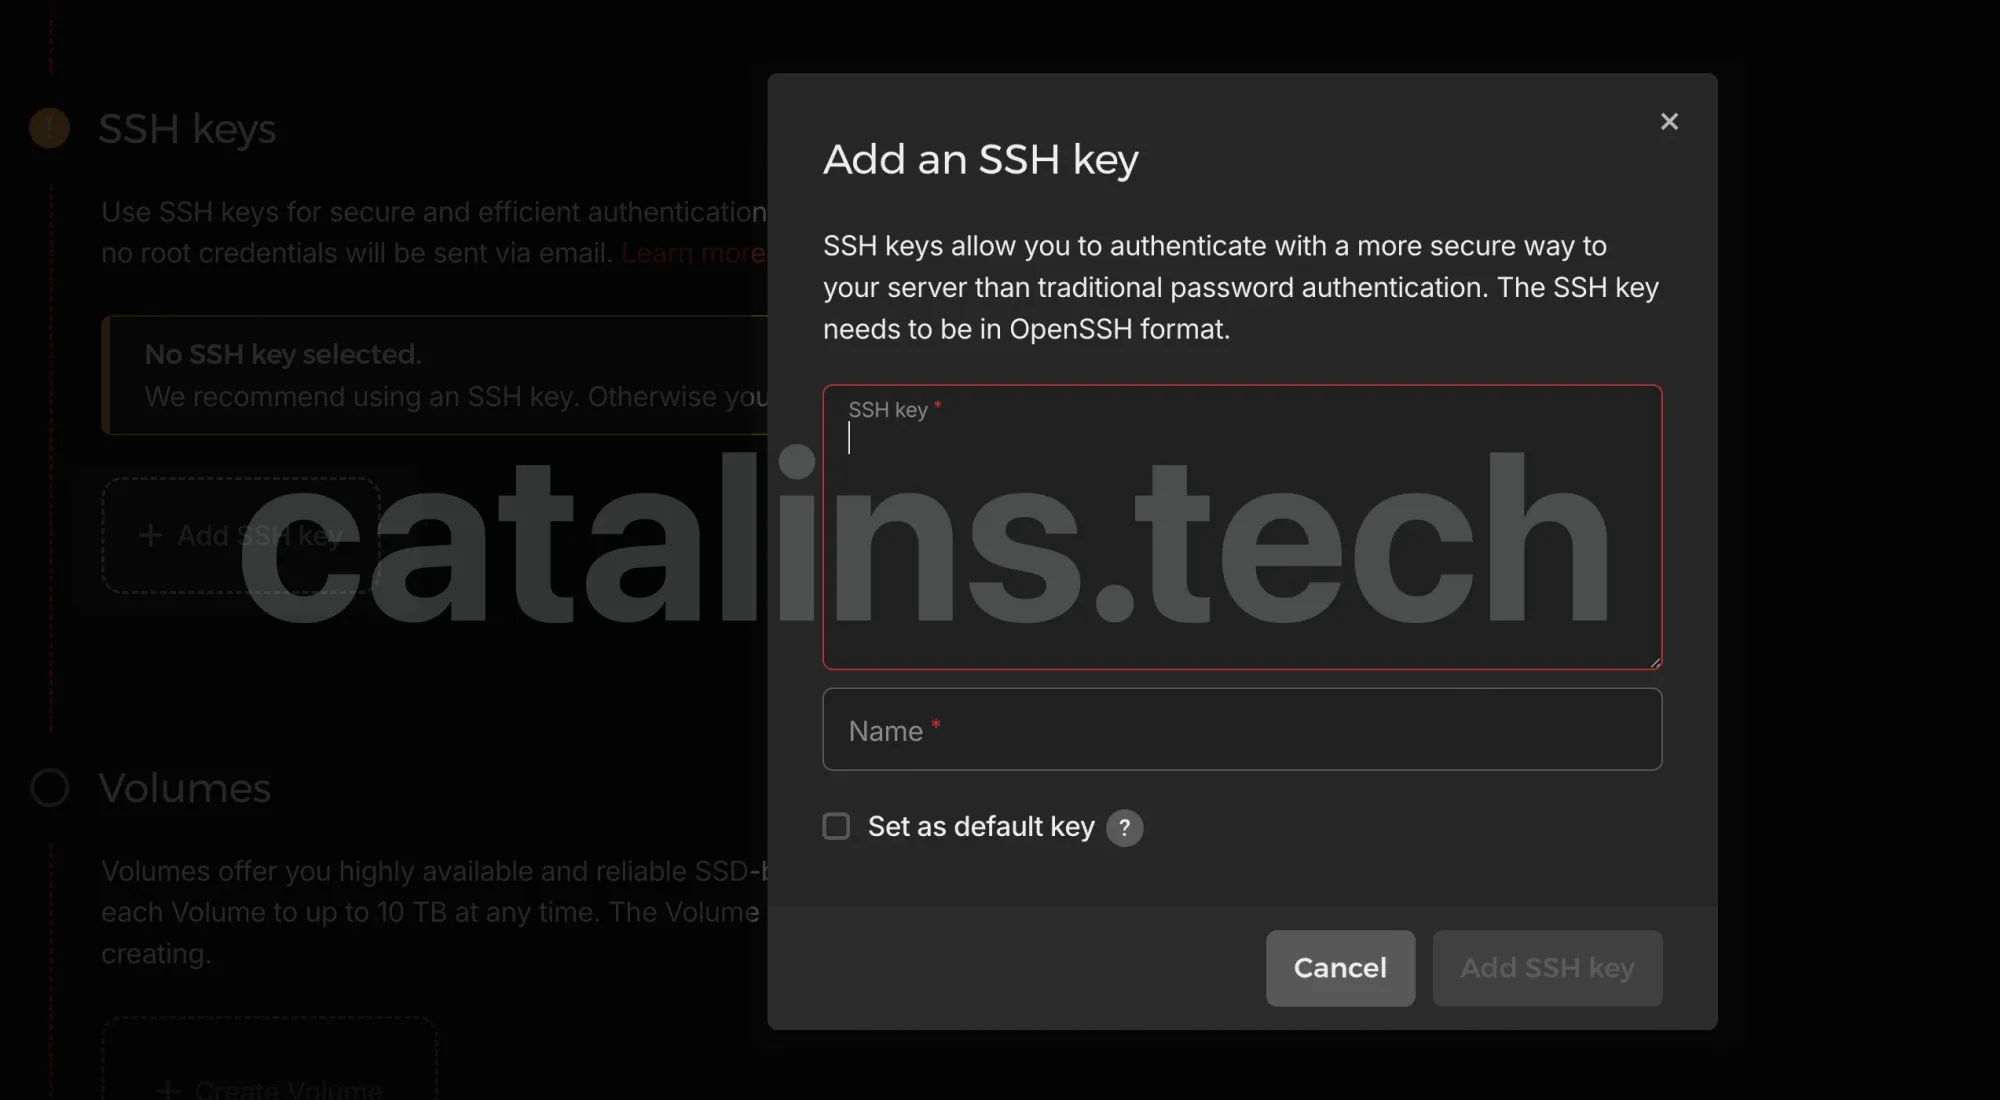
Now it's time to configure the SSH key for your server. Using an SSH key instead of credentials to log into your server is highly advisable since it's more secure.
Slight Detour: Generating SSH Keys
Generate an SSH key using the Ed22519 algorithm as follows:
ssh-keygen -t ed25519 -C "<your-email-address>"Once you run this command, it'll prompt you to enter the file in which to save the key.
Using the default file id_ed25519 will overwrite the previous content, and you may run into trouble with SSH authentication for other clients.
To avoid that, I save my keys in different files:
Enter file in which to save the key (/Users/<your-username>/.ssh/id_ed25519): /Users/<your-username>/.ssh/vps_selfhostingAfter specifying the file in which to save the key, you need to enter a passphrase. Although you can continue without one, I recommend that you add one.
Once you add it, the SSH setup is complete.
For more information about setting up SSH keys, check out this article from GitHub.
Slight Detour: Adding SSH Keys to a Hetzner VPS
You now need to add the public key to your Hetzner VPS. You can copy it as follows:
cat .ssh/vps_selfhosting.pub | pbcopyReturn to the VPS configuration page and paste the key.
You're almost done with the server configuration. Leave the "Volumes", "Firewalls", and other sections untouched. You can and will configure some of them later.
Important: Don't blindly copy my choices. Use the options that fit your needs and requirements.
SSH Into VPS
You can now SSH into your VPS as follows:
ssh root@<your-vps-ip> -i ~/.ssh/vps_selfhostingHowever, having to provide the SSH key every time you want to access your VPS is annoying.
Add the key to the SSH agent:
ssh-add ~/.ssh/vps_selfhostingNow you can run ssh root@<your-vps-ip.
Install and Configure Dokku on Hetzner
Most of the following commands and instructions are from the Dokku documentation. If you prefer it, follow the documentation.
SSH into your VPS:
ssh root@<your-vps-ip>Get the latest updates and packages for your operating system:
sudo apt update -y
sudo apt upgrade -y
Then, install Dokku:
wget -NP . https://dokku.com/install/v0.35.18/bootstrap.sh
sudo DOKKU_TAG=v0.35.18 bash bootstrap.sh
Once the installation finishes, copy the SSH keys to the Dokku admin so you can push from your local machine:
cat ~/.ssh/authorized_keys | dokku ssh-keys:add admin
Global Domain
Optionally, you can set up a global domain for Dokku:
dokku domains:set-global <your-domain-or-subdomain>In case you don't want to use a domain, you can also use the IP of your server:
dokku domains:set-global <your-ip>If you set up a global domain, all your deployed apps will be created on a subdomain:
- for example, an app named
expense-trackerwill be deployed onexpense-tracker.global-domain.com
This is handy when hosting multiple applications under the same domain. You don't need to set up a global domain if you want to host only one app on your VPS.
Add Your Hetzner VPS to Cloudflare
Create an A record in your Cloudflare account that points to your server's IP.
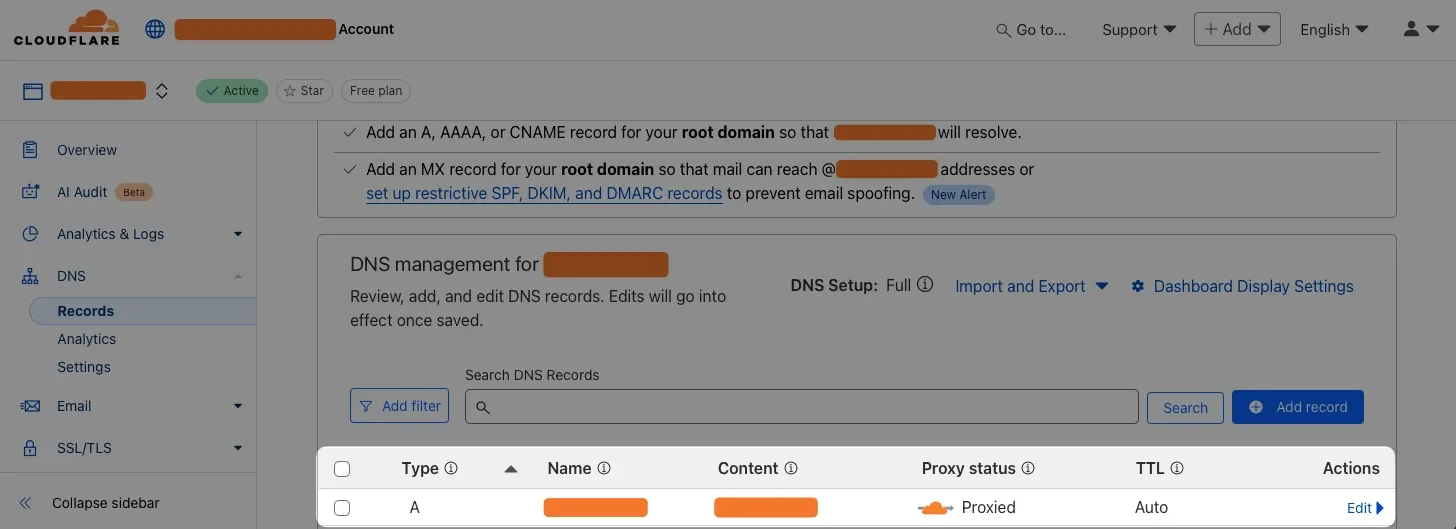
Also, set the "Proxy status" to "Proxied". That proxies your traffic through Cloudflare, which provides benefits such as:
- protecting your server from DDoS attacks
- caching and optimizing the requests to your server
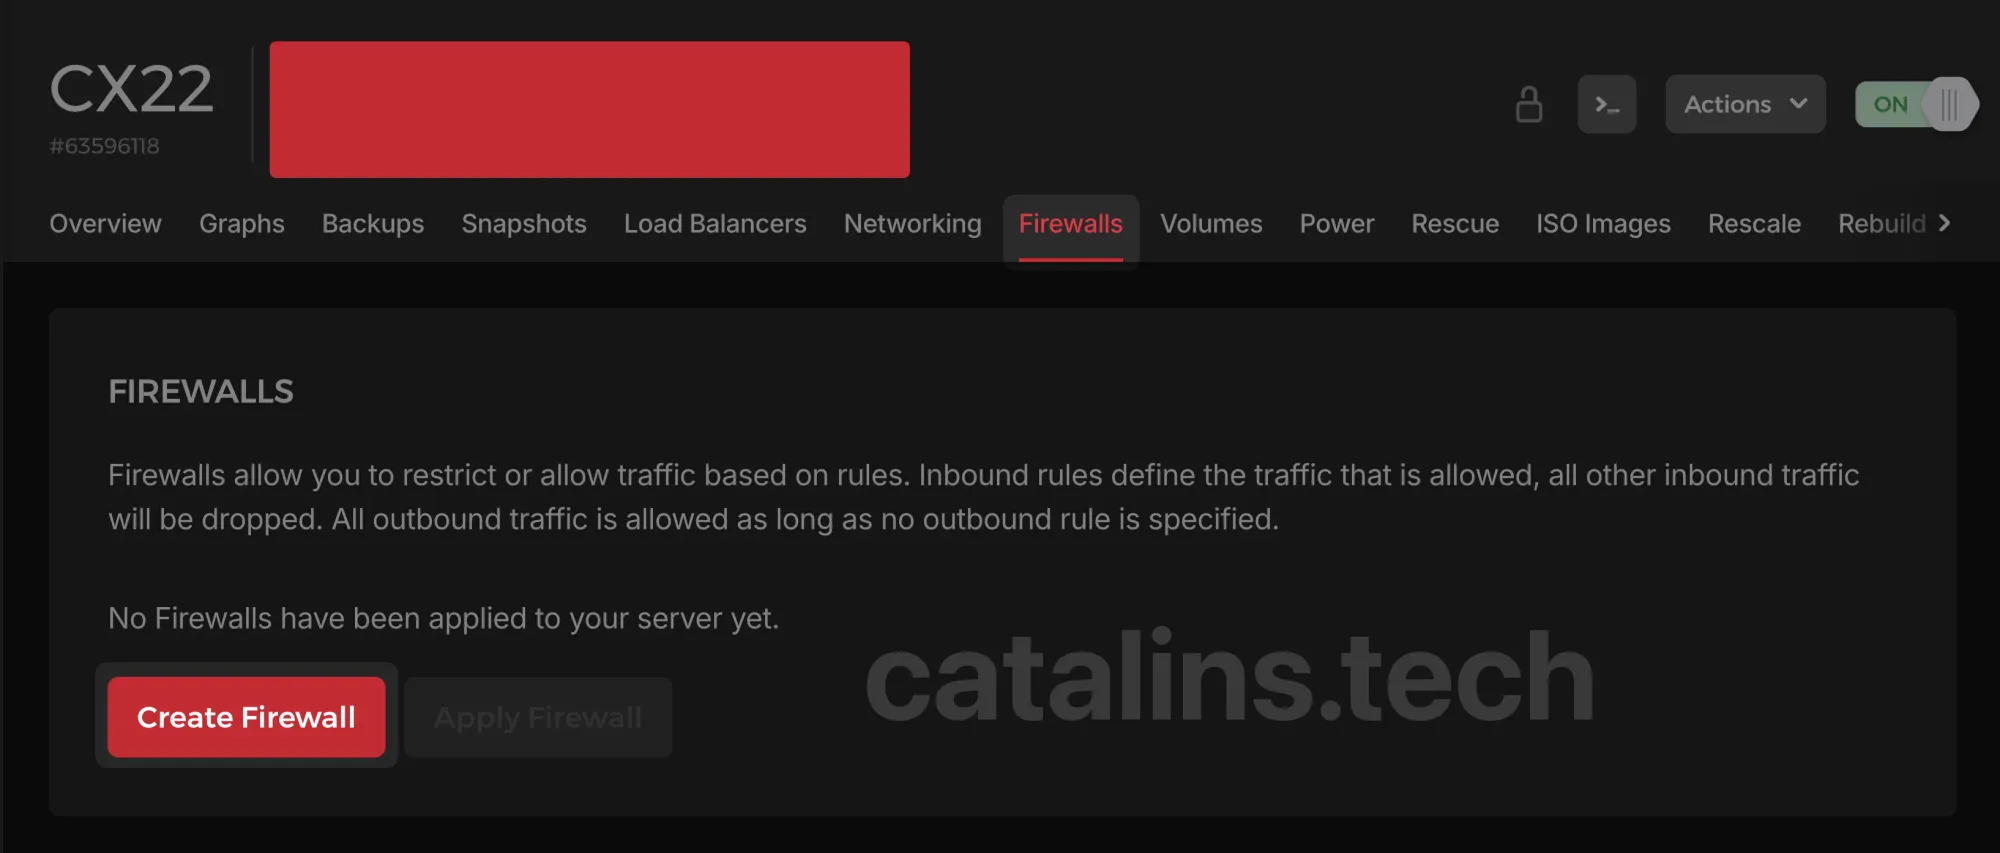
Cloudflare-Only Access on Port 80
You want to make sure that your server is accessible on port 80 only by Cloudflare. This makes your VPS more secure, since only Cloudflare can access port 80 on your VPS, which Dokku uses.
To add a Firewall, navigate to the "Firewalls" section on your VPS page and click the "Create Firewall" button.
Then add all the IPs from the "IP Ranges" page and click the "Create Firewall" button.
Important: Make sure that your server is selected in the "Apply to" section.
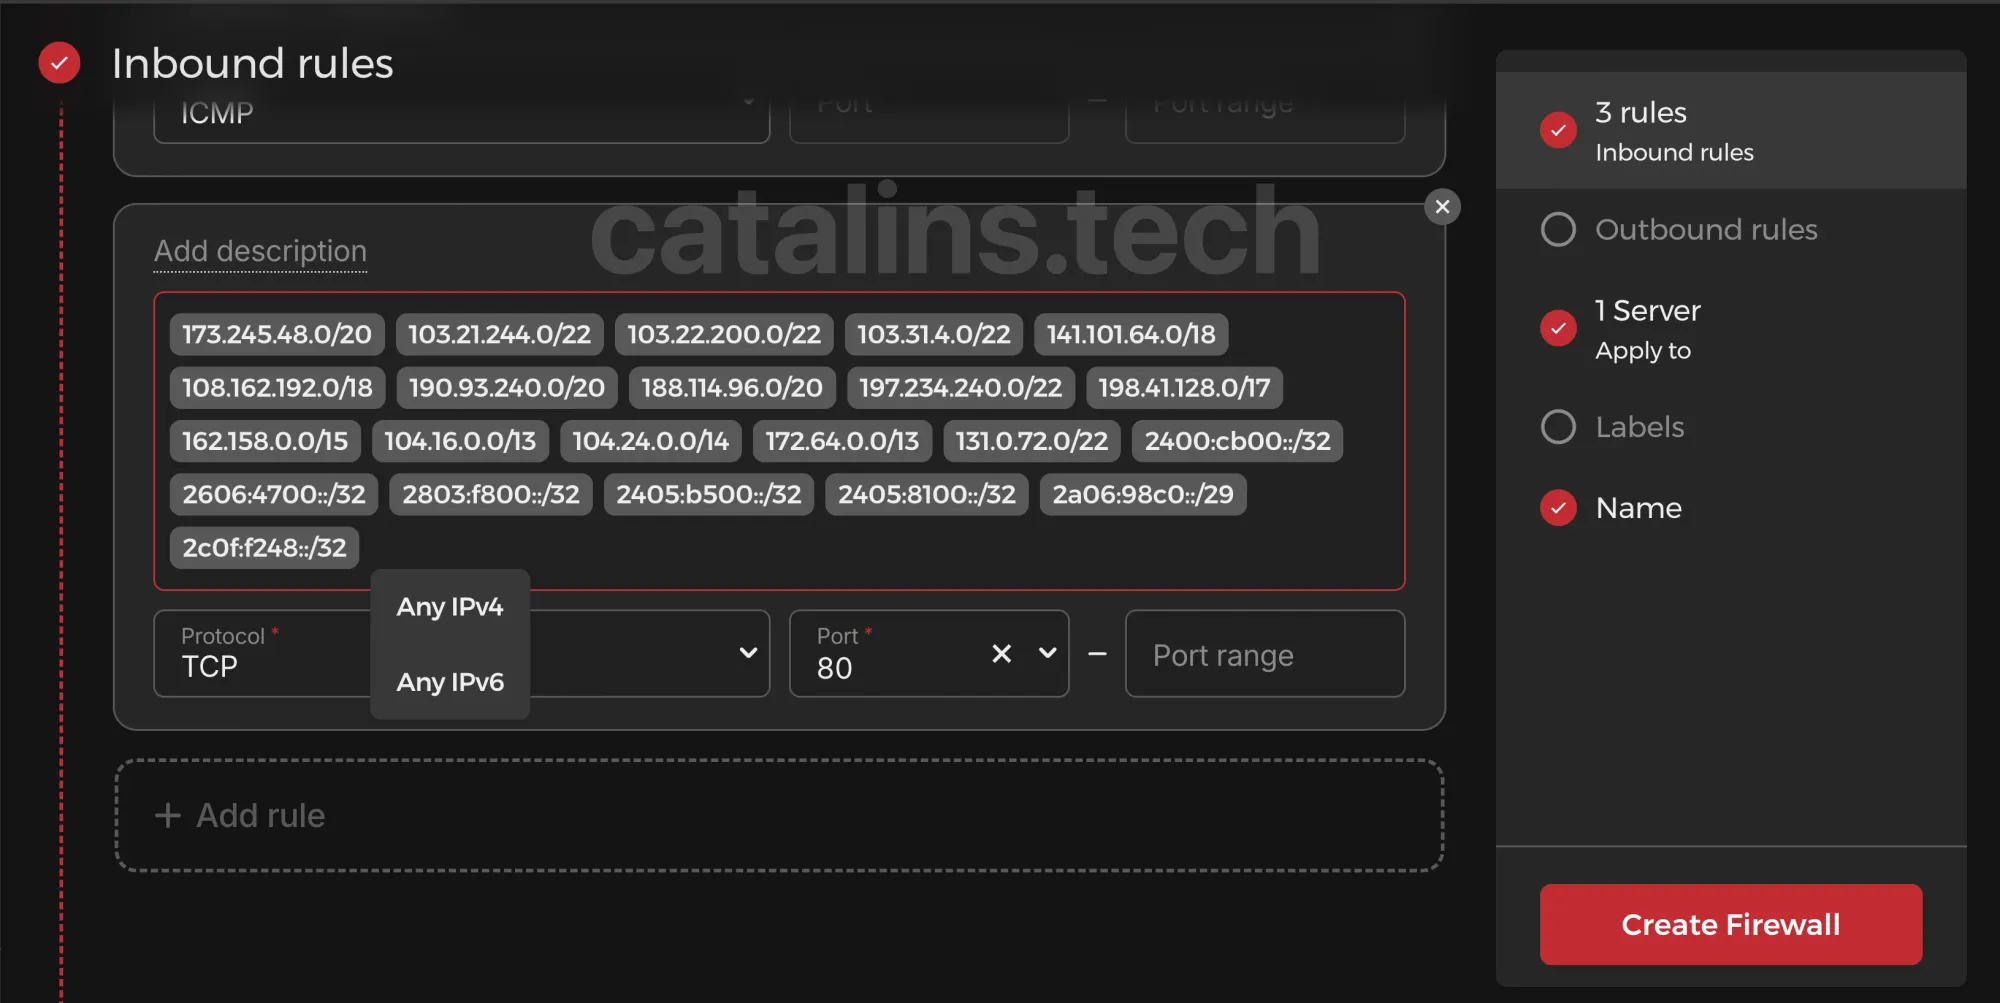
Note: my app wasn't accessible after setting up HTTPS with Let's Encrypt until I did the same thing for port 443.
You can take it further and add an Inbound rule for port 22 (SSH connections) too.

That means, only the specified IPs (your machine) can SSH into the VPS. Or even better, you can change the default SSH port from "22" to something else.
Your VPS is in good shape now, so it's time to deploy an app to Dokku.
Thanks to Ben for these tips on hardening your VPS.
Deploy App to Dokku with PostgreSQL Database
SSH into your VPS:
ssh root@<your-vps-ip>Create the application with Dokku:
dokku apps:create <your-app-name>To create and host a PostgreSQL database on Dokku, you need to install the PostgreSQL plugin:
sudo dokku plugin:install https://github.com/dokku/dokku-postgres.git
Then create the database:
dokku postgres:create <your-db-name>A successful database creation outputs the database connection string. However, you can link a database and an app with a dokku command:
dokku postgres:link <your-db-name> <your-app-name>Your app and database are now linked, but you still don't have a deployed app.
Local Machine Configuration
Navigate to the app directory on your local machine, and add a git remote for Dokku:
git remote add dokku dokku@<your-vps-ip>:<your-dokku-app-name>Your pushes and deployments will fail if the remote username isn't dokku.You're done. You can now deploy your app with the following command:
git push dokku mainAs the image below shows, the deployment fails if the application requires environment variables to run.
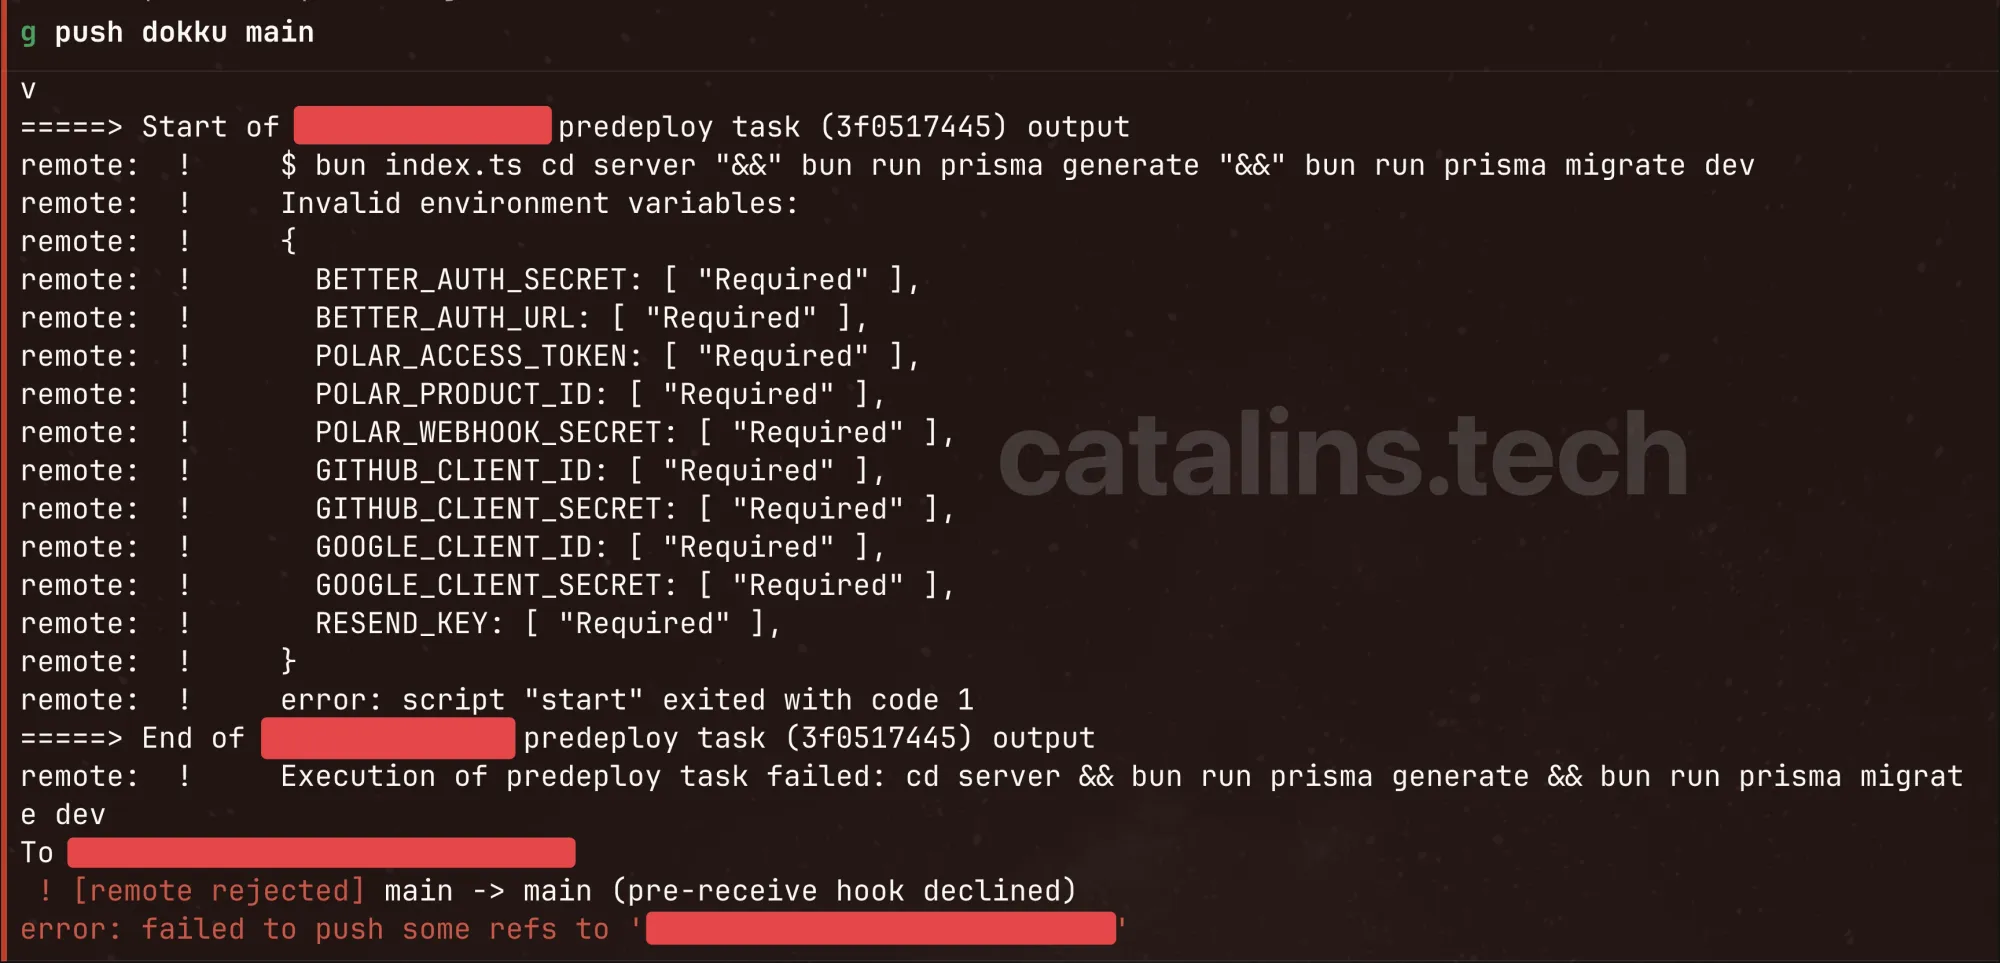
You need to set all the required environment variables on Dokku as well.
Setting Environment Variables on Dokku
You can set multiple environment variables on Dokku using the config:set command. Here's an example of setting multiple env variables for my app:
dokku config:set <your-app-name> ENV=prod \
PORT=<your-app-port> \
DATABASE_URL=<your-db-url> \
NODE_ENV=production \
BETTER_AUTH_SECRET=<better-auth-secret> \
BETTER_AUTH_URL=<better-auth-url> \
GITHUB_CLIENT_ID=<github-client-id> \
GITHUB_CLIENT_SECRET=<github-client-secret> \
GOOGLE_CLIENT_ID=<github-client-id> \
GOOGLE_CLIENT_SECRET=<github-client-secret> \
POLAR_ACCESS_TOKEN=<polar-access-token> \
POLAR_PRODUCT_ID=<polar-product-id> \
POLAR_WEBHOOK_SECRET=<polar-webhook-secret> \
RESEND_KEY=<resend-key>
Once you run the command, Dokku restarts your application. If you want to avoid that, you can use the --no-restart flag.
Tip: To retrieve the PostgreSQL database connection string, run dokku postgres:info <your-db-name> on your VPS.
Set the App Domain
If you set up a global domain earlier, Dokku will create a subdomain on the global domain.
Whether you want that or not, it's up to you. In this case, we'll host only one app on this VPS, so we'll clear the global domain and use it for the app deployed.
Remove any domains set for your app and the global domain as follows:
dokku domains:clear <your-app-name>
dokku domains:clear-global
Then, link the domain to the deployed app:
dokku domains:add <your-app-name> <your-domain>Your app will now be accessible at the specified domain.
Optional: Set the App Port
When you deploy your apps with custom ports (e.g. 5678), Dokku doesn't automatically create and map the ports.
If you try to access the freshly deployed app via the URL returned by Dokku, you'll likely run into an error.
You can fix that by mapping the port from your VPS to a port inside your Docker container for the application:
dokku ports:set <you-app> http:80:<your-port>This command sets up a rule so that all incoming HTTP requests to your server's port 80 are forwarded to port 5678 inside the <app-name> container.
Configure SSL with Let's Encrypt
Let's Encrypt offers free SSL certificates, so we'll use it to set up HTTPS for your app.
Install the Let's Encrypt plugin for Dokku:
sudo dokku plugin:install https://github.com/dokku/dokku-letsencrypt.git
Then, set up the email address where you want to receive updates and notifications from Let's Encrypt:
dokku letsencrypt:set --global email <your-email>
Enable Let's Encrypt for your app:
dokku letsencrypt:enable <your-app-name>
Once the command finishes running, all that's left is to set up auto-renewal for the certificate:
dokku letsencrypt:cron-job --add
This command keeps your certificate up-to-date by setting up a cron job that renews it automatically.
Your app should now be accessible via HTTPS. Since you're using Cloudflare, HTTP should also automatically redirect to HTTPS.
Automatic Dokku Deployments via GitHub Actions
Deploying your app manually with the git push dokku main command can get tiring.
Thankfully, you can use GitHub Actions to automate the deployment of your apps. GitHub Actions will deploy your app on Dokku whenever you push to the main branch.
Create the .github/workflows/deploy-to-dokku.yml file in the root of your project and add the following code:
name: Deploy to Dokku

on:
  push:
    branches:
      - main

jobs:
  deploy:
    runs-on: ubuntu-24.04
    steps:
      - name: Cloning repo
        uses: actions/checkout@v3
        with:
          fetch-depth: 0

      - name: Push to dokku
        uses: dokku/github-action@master
        with:
          branch: "main"
          git_remote_url: "ssh://dokku@${{ secrets.DOKKU_SERVER_IP }}:22/${{ secrets.DOKKU_APP_NAME }}"
          ssh_private_key: ${{ secrets.SSH_PRIVATE_KEY }}
The branch property under with allows you to specify a custom deploy branch other than master.
Additionally, you can change the deploy branch with this dokku command:
# for a specific app
dokku git:set <your-app-name> deploy-branch <your-branch-name>

# globally
dokku git:set --global deploy-branch <your-branch-name>
If the branch names don't match, Dokku won't deploy your app. You'll likely get an error like the one in the screenshot below:
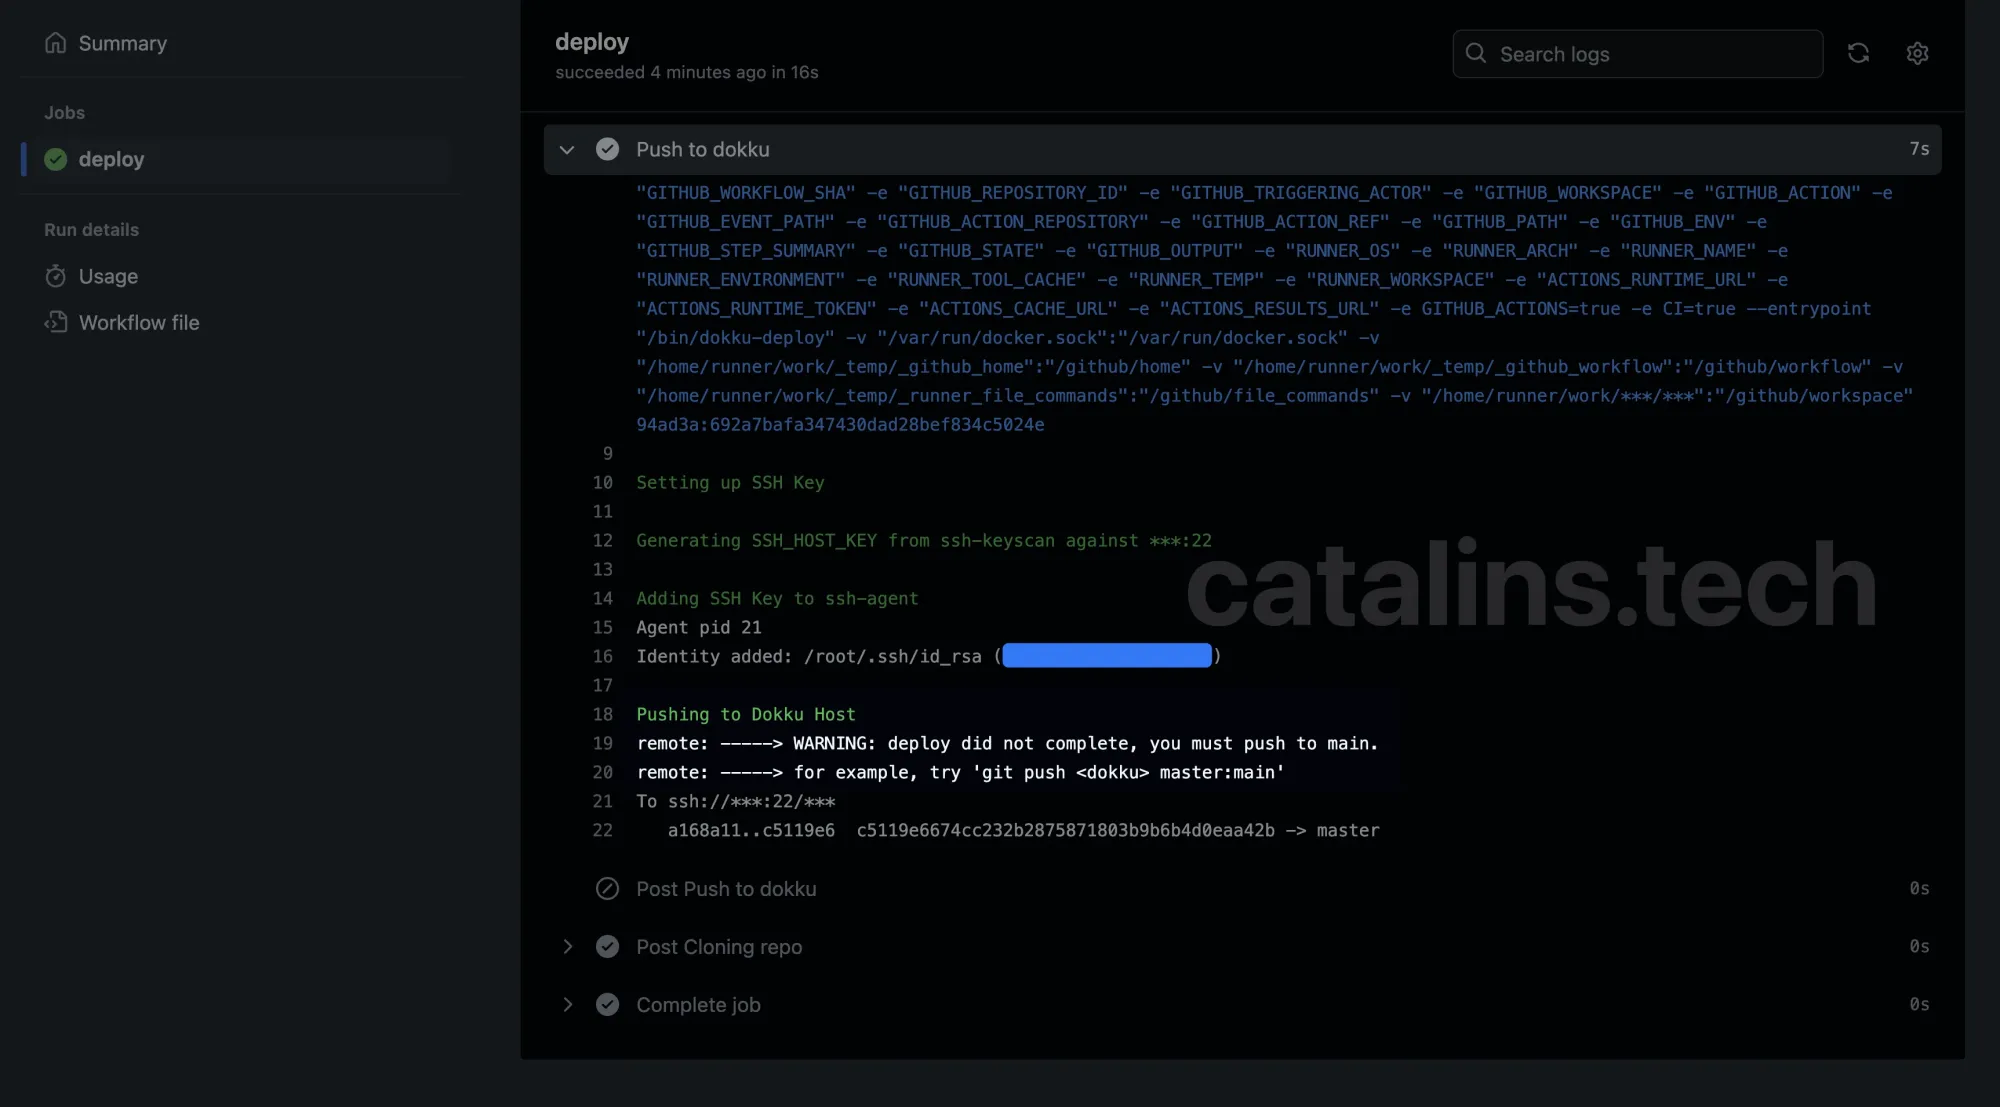
Going forward, you need to set up SSH authentication like you did for your personal machine previously for GitHub Actions to be able to deploy your app.
Generate an SSH key for GitHub Actions:
ssh-keygen -t ed25519 -C "<your-email-address>" -f ~/.ssh/dokku_gh_actions_rsaCopy the private key:
cat ~/.ssh/dokku_gh_actions_rsa | pbcopyThen, navigate to github.com/<your-username>/<your-app-name>/settings/secrets/actions.

On this page, add the following secrets:
SSH_DOKKU_PRIVATE_KEY- add the previously copied private key.DOKKU_SERVER_IP- the IP of your Hetzner VPSDOKKU_APP_NAME- your app name from Dokku
The last step is to add the public key to your Dokku server as follows:
cat ~/.ssh/dokku_gh_actions_rsa.pub | ssh root@<your-server-ip" "sudo dokku ssh-keys:add GITHUB_ACTIONS"Note: If you add a passphrase for this key, you may need to do extra steps.
From now on, every time you push to master or the main branch (or whatever branch you chose), it'll trigger a Dokku deployment.
Also, check out:
Extra Resources
I've used the documentation in combination with a couple of articles to put this guide together. They are very good and I recommend checking them out: