

If you've ever wondered how AI applications generate images from user prompts, you've come to the right place.
In this article, you will learn how these tools work by building an AI application to generate images.
Create the application
We'll start by creating a React + TypeScript application using Vite. Run the following command in your terminal:
npm create vite@latest
You'll then have to answer three questions so Vite understands how to configure your project.
✔ Project name: aimages
✔ Select a framework: › React
✔ Select a variant: › TypeScript
Lastly, you need to install and configure TailwindCSS.
Run the 2 commands below (in that order). The first command installs tailwindcss and its peer dependencies. The second command generates the tailwind.config.js and postcss.config.js files.
npm install -D tailwindcss postcss autoprefixer

npx tailwindcss init -p
Now open the tailwind.config.js file and modify the code as follows:
/** @type {import('tailwindcss').Config} */
export default {
  content: [
    "./index.html",
    "./src/**/*.{js,ts,jsx,tsx}",
  ],
  theme: {
    extend: {},
  },
  plugins: [],
}
The above code configures TailwindCSS, specifying which files the framework should scan for class usage. It's set to check the index.html file and any JavaScript or TypeScript files in the src directory. It also lets you customize the theme, colors, fonts, and many other things.
Lastly, open /src/styles.css and add the TailwindCSS directives at the top of the file:
@tailwind base;
@tailwind components;
@tailwind utilities;
You're done with the project configuration! Now, upload the project on GitHub before proceeding to the next stage. You'll see later why!
The problem with building user interfaces
Before going further, let's highlight the main issues with building user interfaces.
One of the main issues with building user interfaces is that you don't have live visual feedback when building them. You make the changes in your editor, save them, and preview them in the browser. Then, if you're not happy with the changes, you have to repeat the process.
That results in a lot of switching between the IDE and the browser. While it might seem like a minor inconvenience, those seconds of waiting for the browser to refresh, plus the mental shift required, add up over time. Over the course of a day, this switching results in a substantial amount of wasted time.
It also results in a break of flow. Every disruption (like switching between applications) breaks the flow, leading to longer task completion times and possibly more errors.
On top of that, collaborating with others can be tedious and time-consuming. The usual way of collaborating involves working on the app, pushing the changes to GitHub, and deploying them. Only after that can the other collaborators check your work. That results in a substantial amount of time lost on unproductive things, such as waiting for the changes to deploy. So, the traditional approach can be quite cumbersome and inefficient.
In this article, you'll see a complementary tool you can use with your favorite IDE to build user interfaces better and faster.
A visual React IDE
Codux is a free visual IDE for React + TypeScript applications. It enables you to work on the projects in real-time through a visual editor. All the changes you make to the component's properties, styles, and structure (JSX) are reflected automatically on the screen.
Important mention: Codux is not meant to replace your favourite IDE. It's a complementary tool that you can use alongside your IDE.
You can build and modify your interfaces using the panels and controllers provided by Codux. As the image shows, you can set CSS properties & classes and different element states, for example.
And, of course, you also have the code editor at the bottom if you want to make specific changes by writing code.
Note: Whether you make the changes using the visual editor, the built-in code editor, or your usual IDE, they will always be in sync!
Codux also supports all the popular styling solutions such as CSS, Sass, CSS/Sass modules, Stylable, and TailwindCSS. The application we're building uses TailwindCSS, for example.
Component playground
Another cool feature of Codux is the playground feature that enables you to share your work (components) with others.
In the playground mode, people can view and edit your components without setting up a local development environment and the other prerequisites.
Let's see it in action. At the beginning of the article, I mentioned that you must upload the project on GitHub. The reason is that the Playground requires your project to be hosted on GitHub.
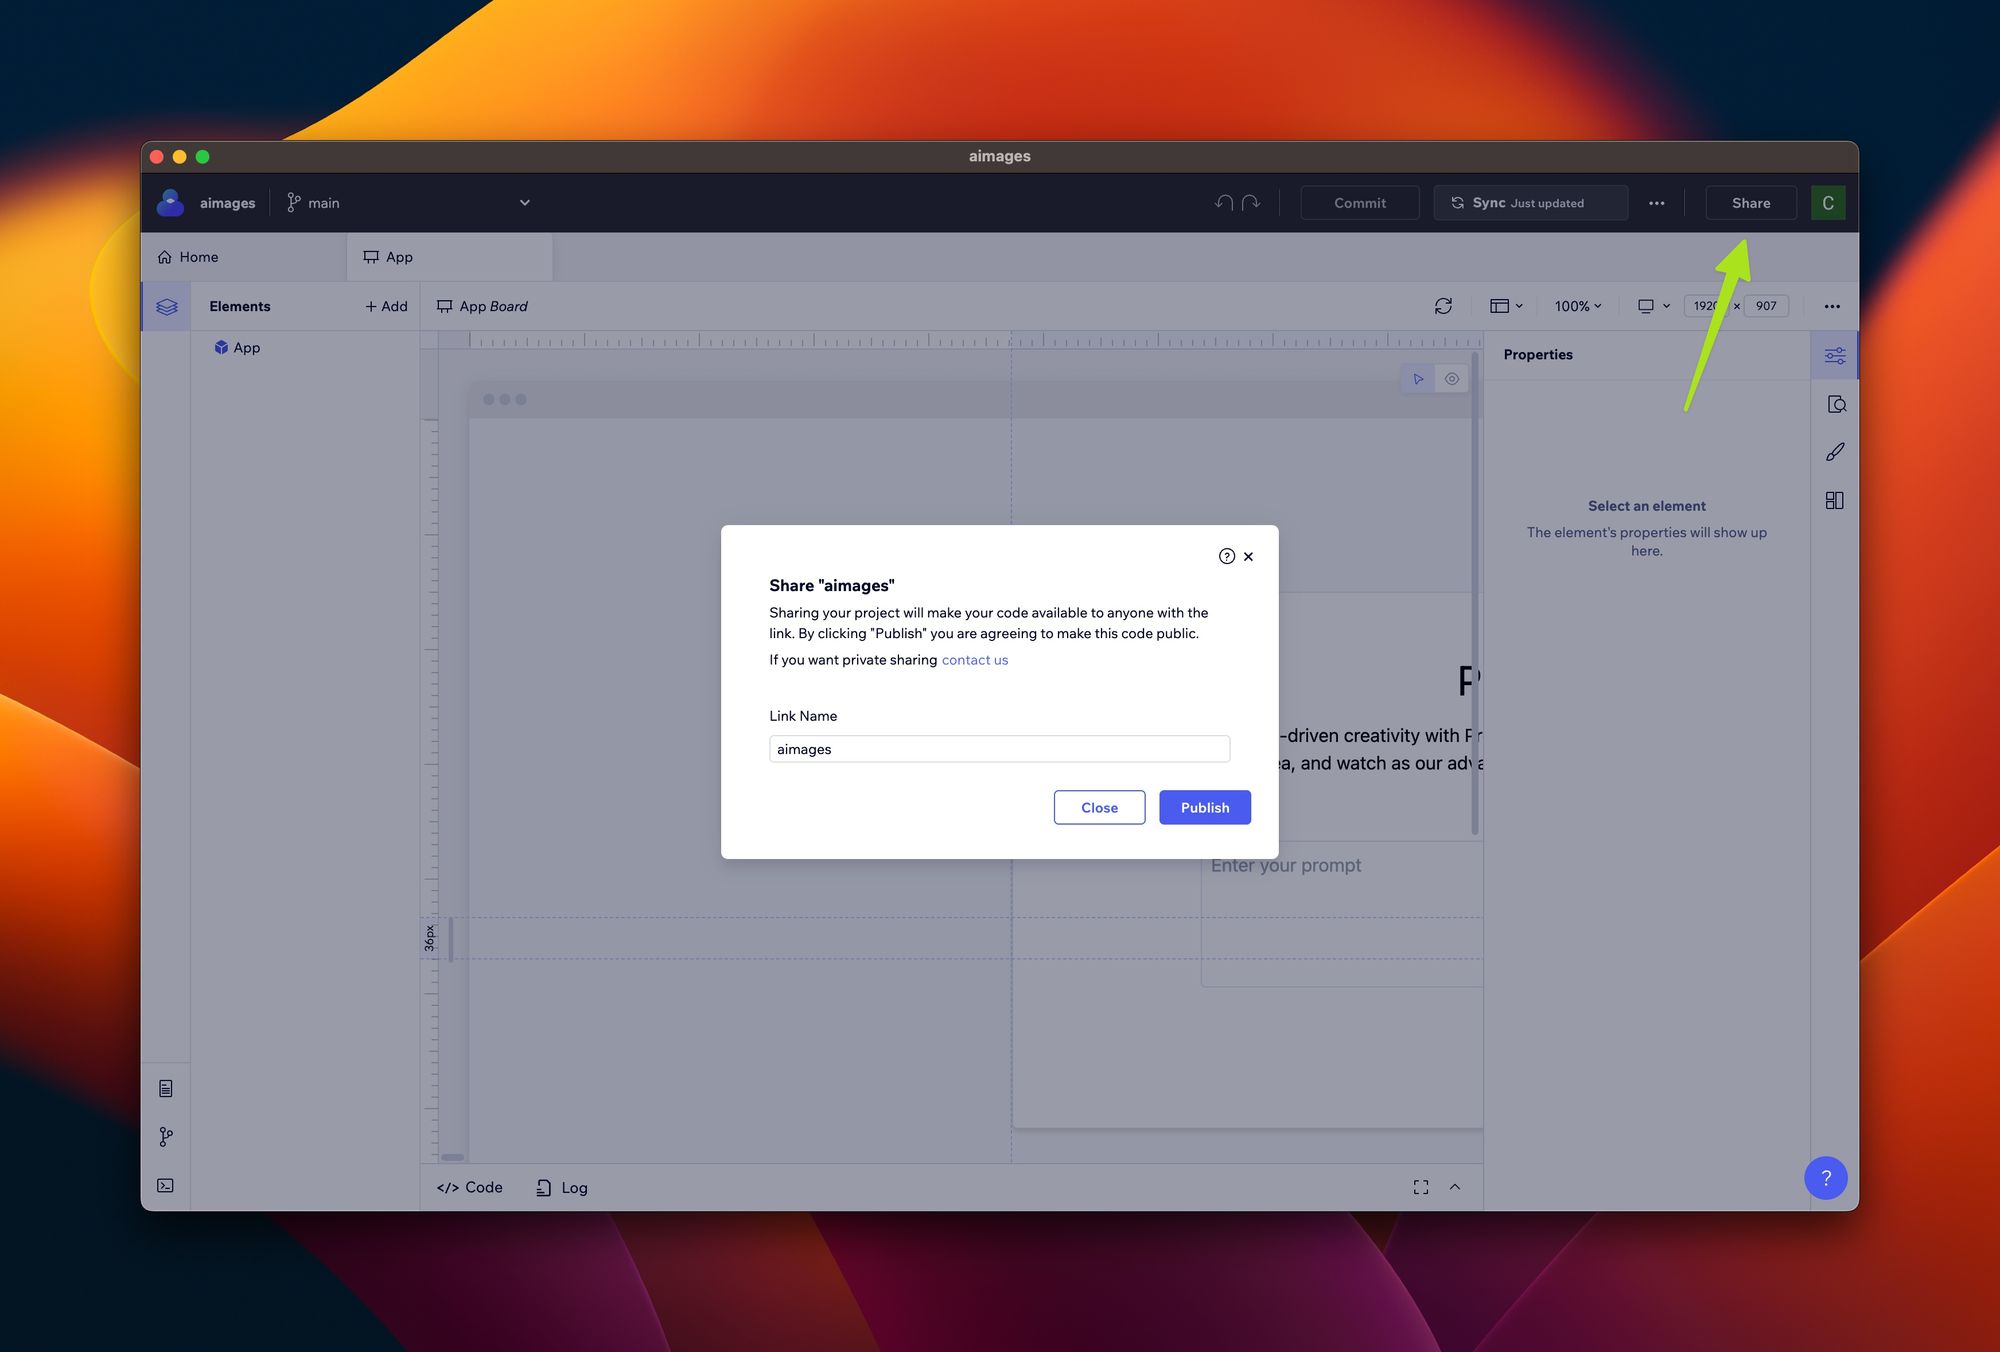
To share your board (or component), click the "Share" button on the right.
Mention: The shared board is public, which means anyone with the link can see it. Be careful.
Codux will then ask you to create a link name for the board. Choose a name and click the button "Create Link" (the first time you do it) and "Publish" (afterwards).
Mention: Each time you make a change, you need to click the "Update Link" button before sharing the board. Otherwise, your changes won't be applied & visible on the shared board.
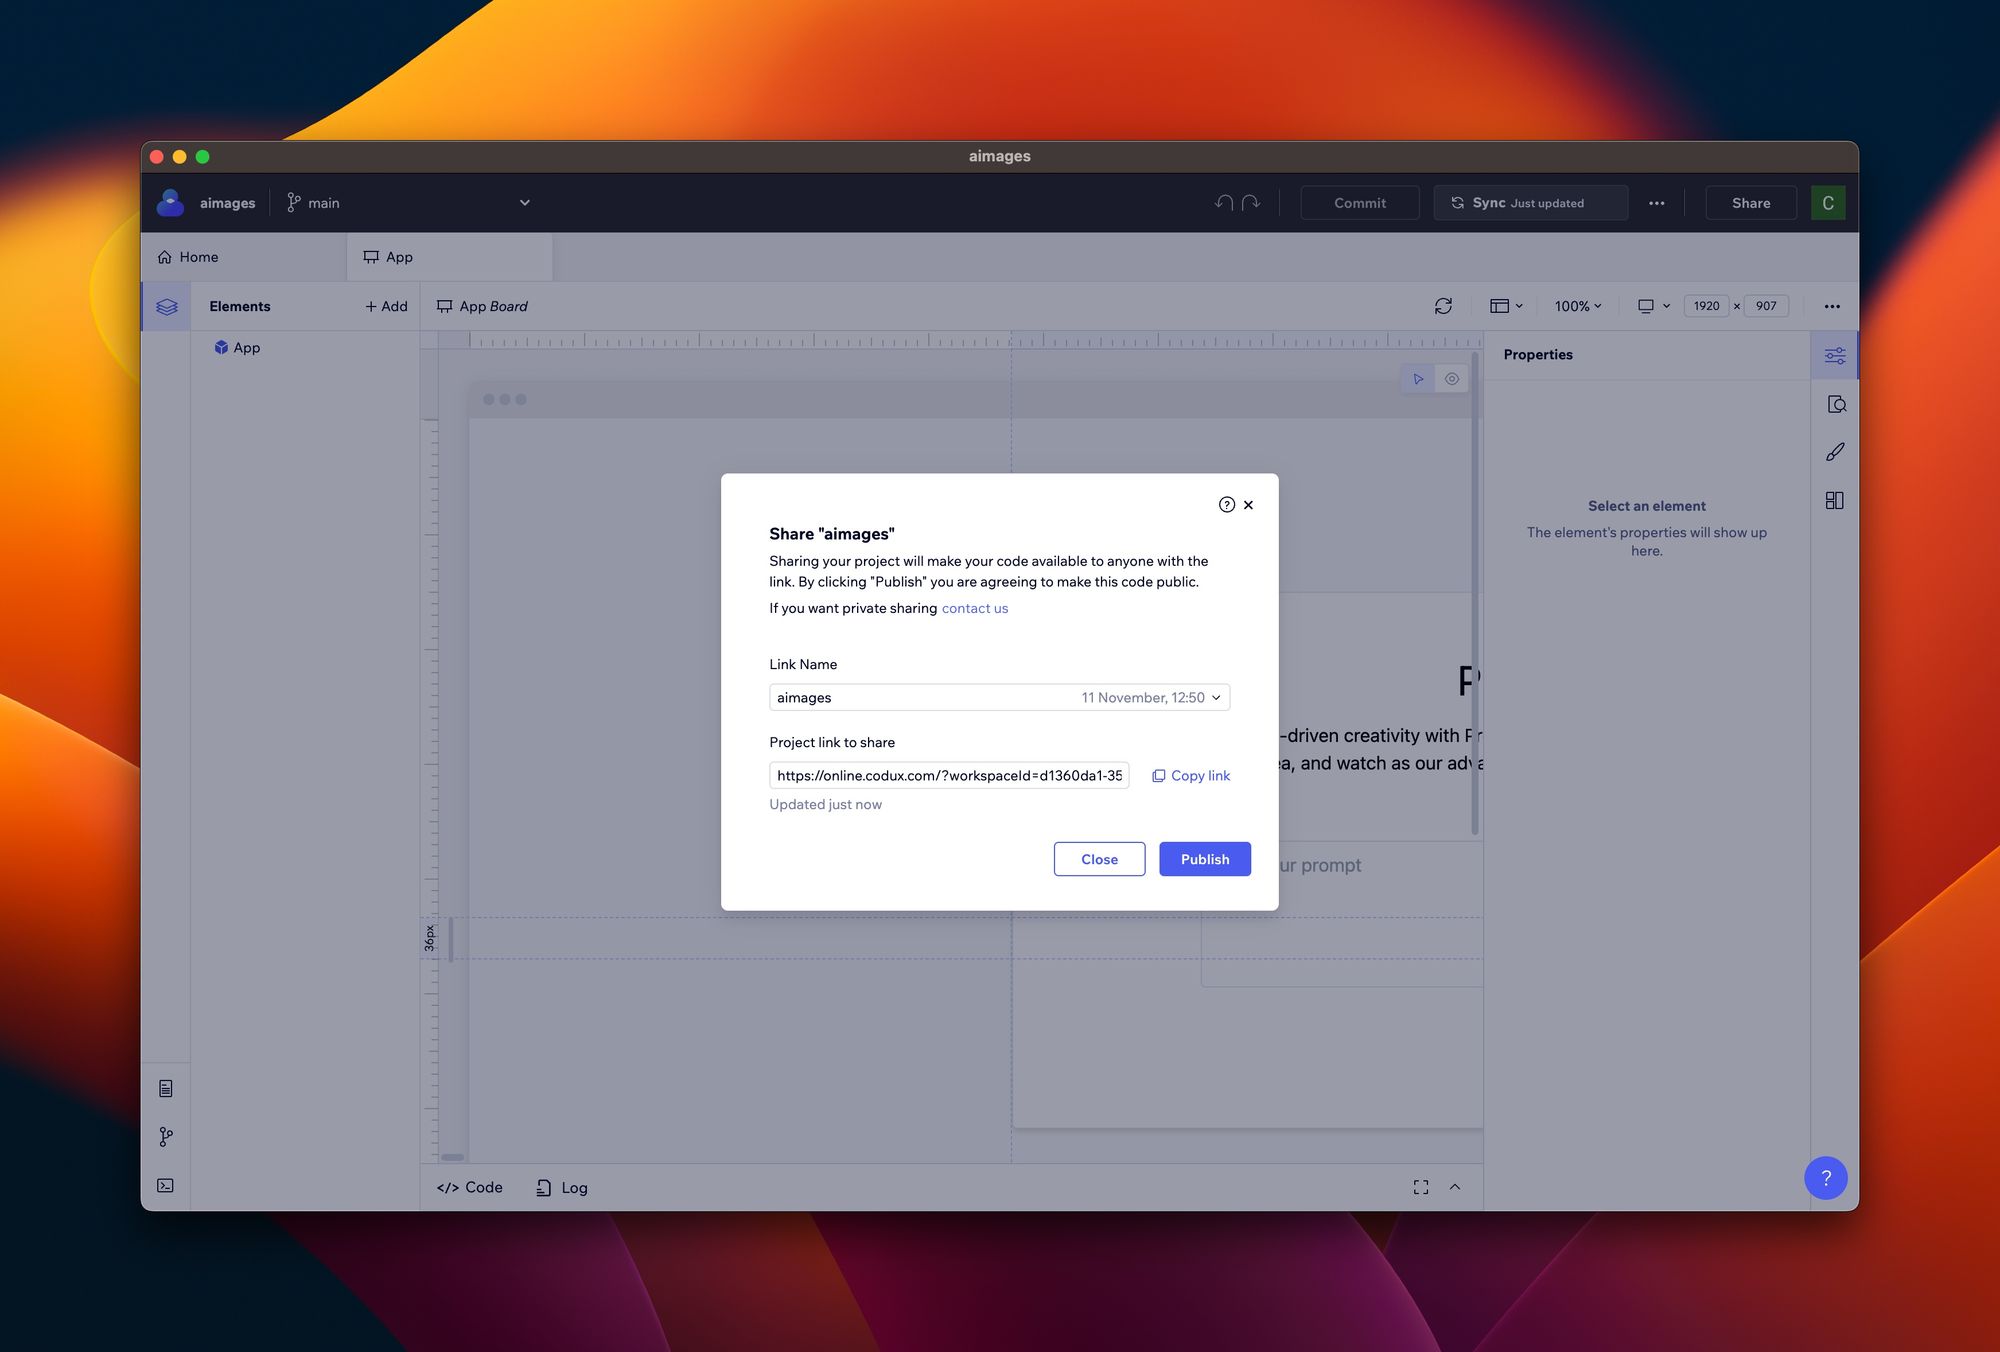
You can now copy the link and share it with other people. When they access the link, they'll see the online version of Codux (see the picture below).
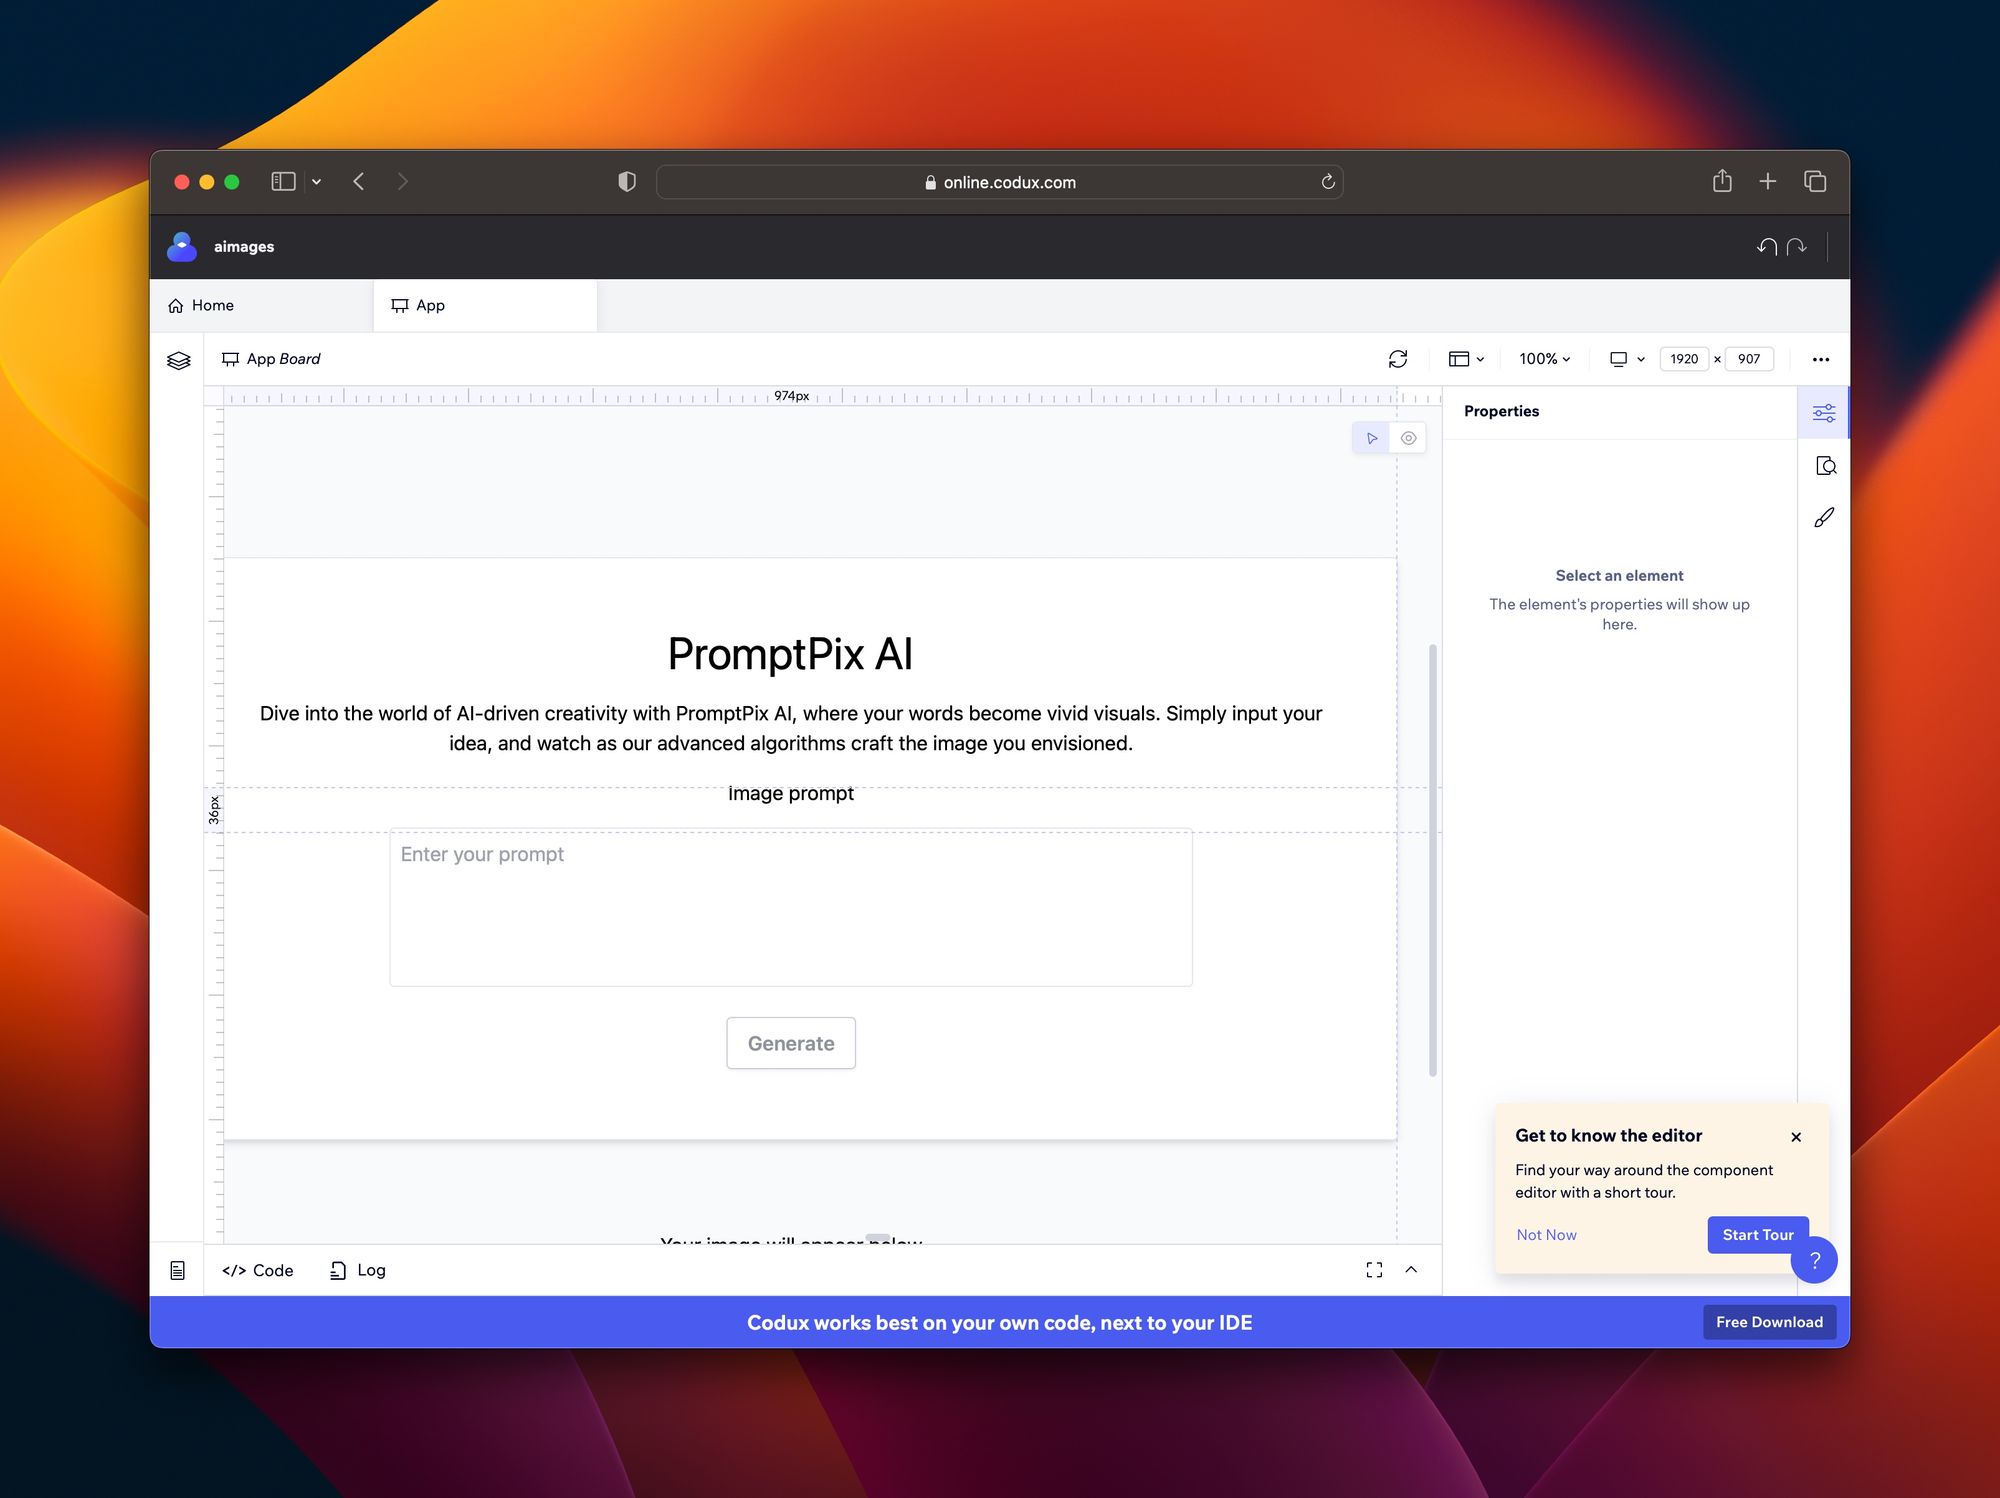
Anyone with the link to the shared board can see it and make changes, including the text, colors, images, and even the code. That makes it an ideal tool for collaborating, where everyone can share & apply their feedback in a simple and direct way.
This way, developers can focus on the work that matters rather than wasting valuable time pushing and pulling changes to/from each other.
It's important to mention, though, that the changes on the shared board don't affect the original board and won't be applied to it. That would be a cool feature, though!
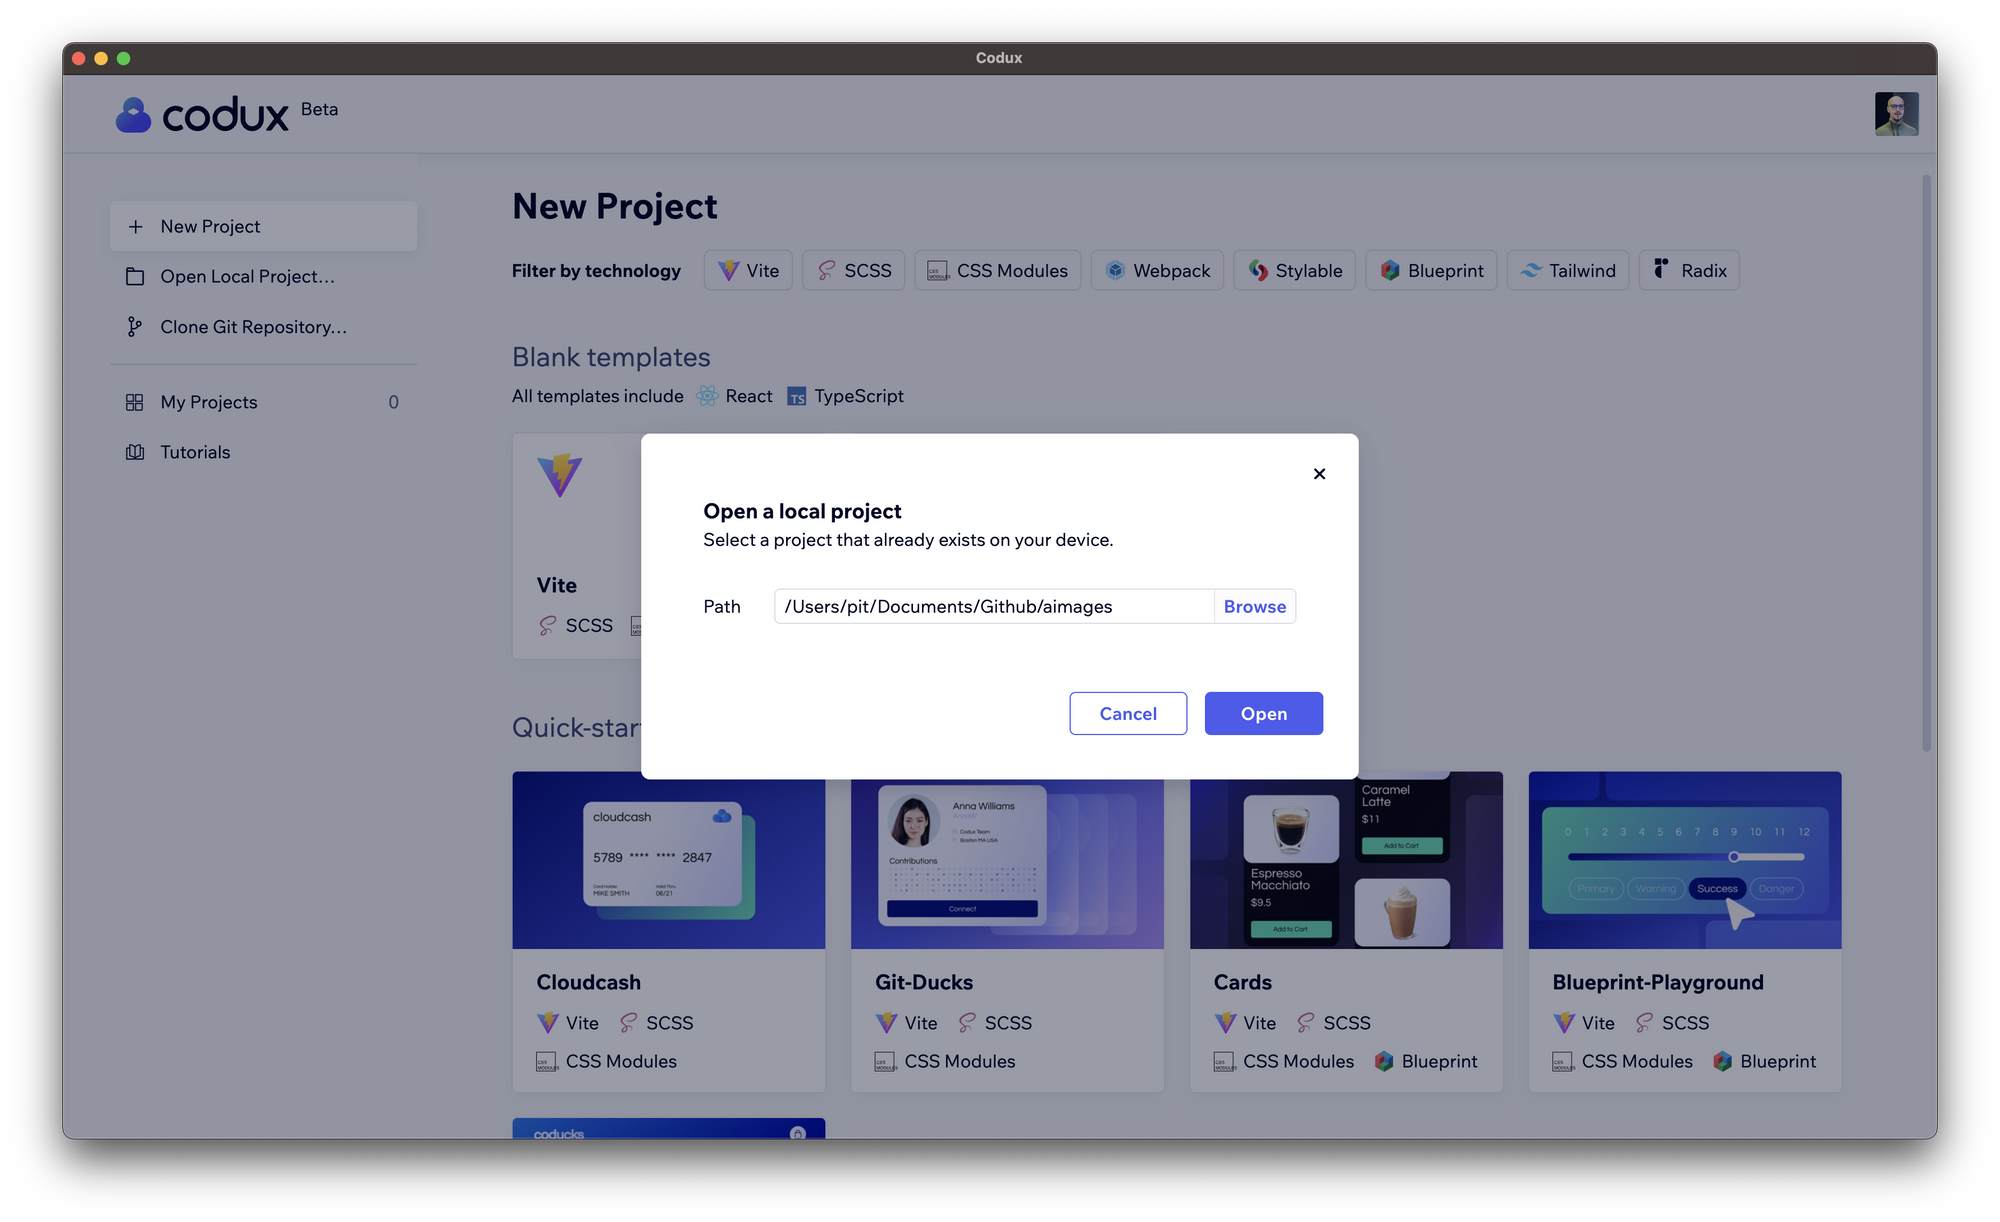
Add the project to Codux
Let's continue by importing the project we created earlier into Codux. Click on the "Open Local Project" option and select the project folder.
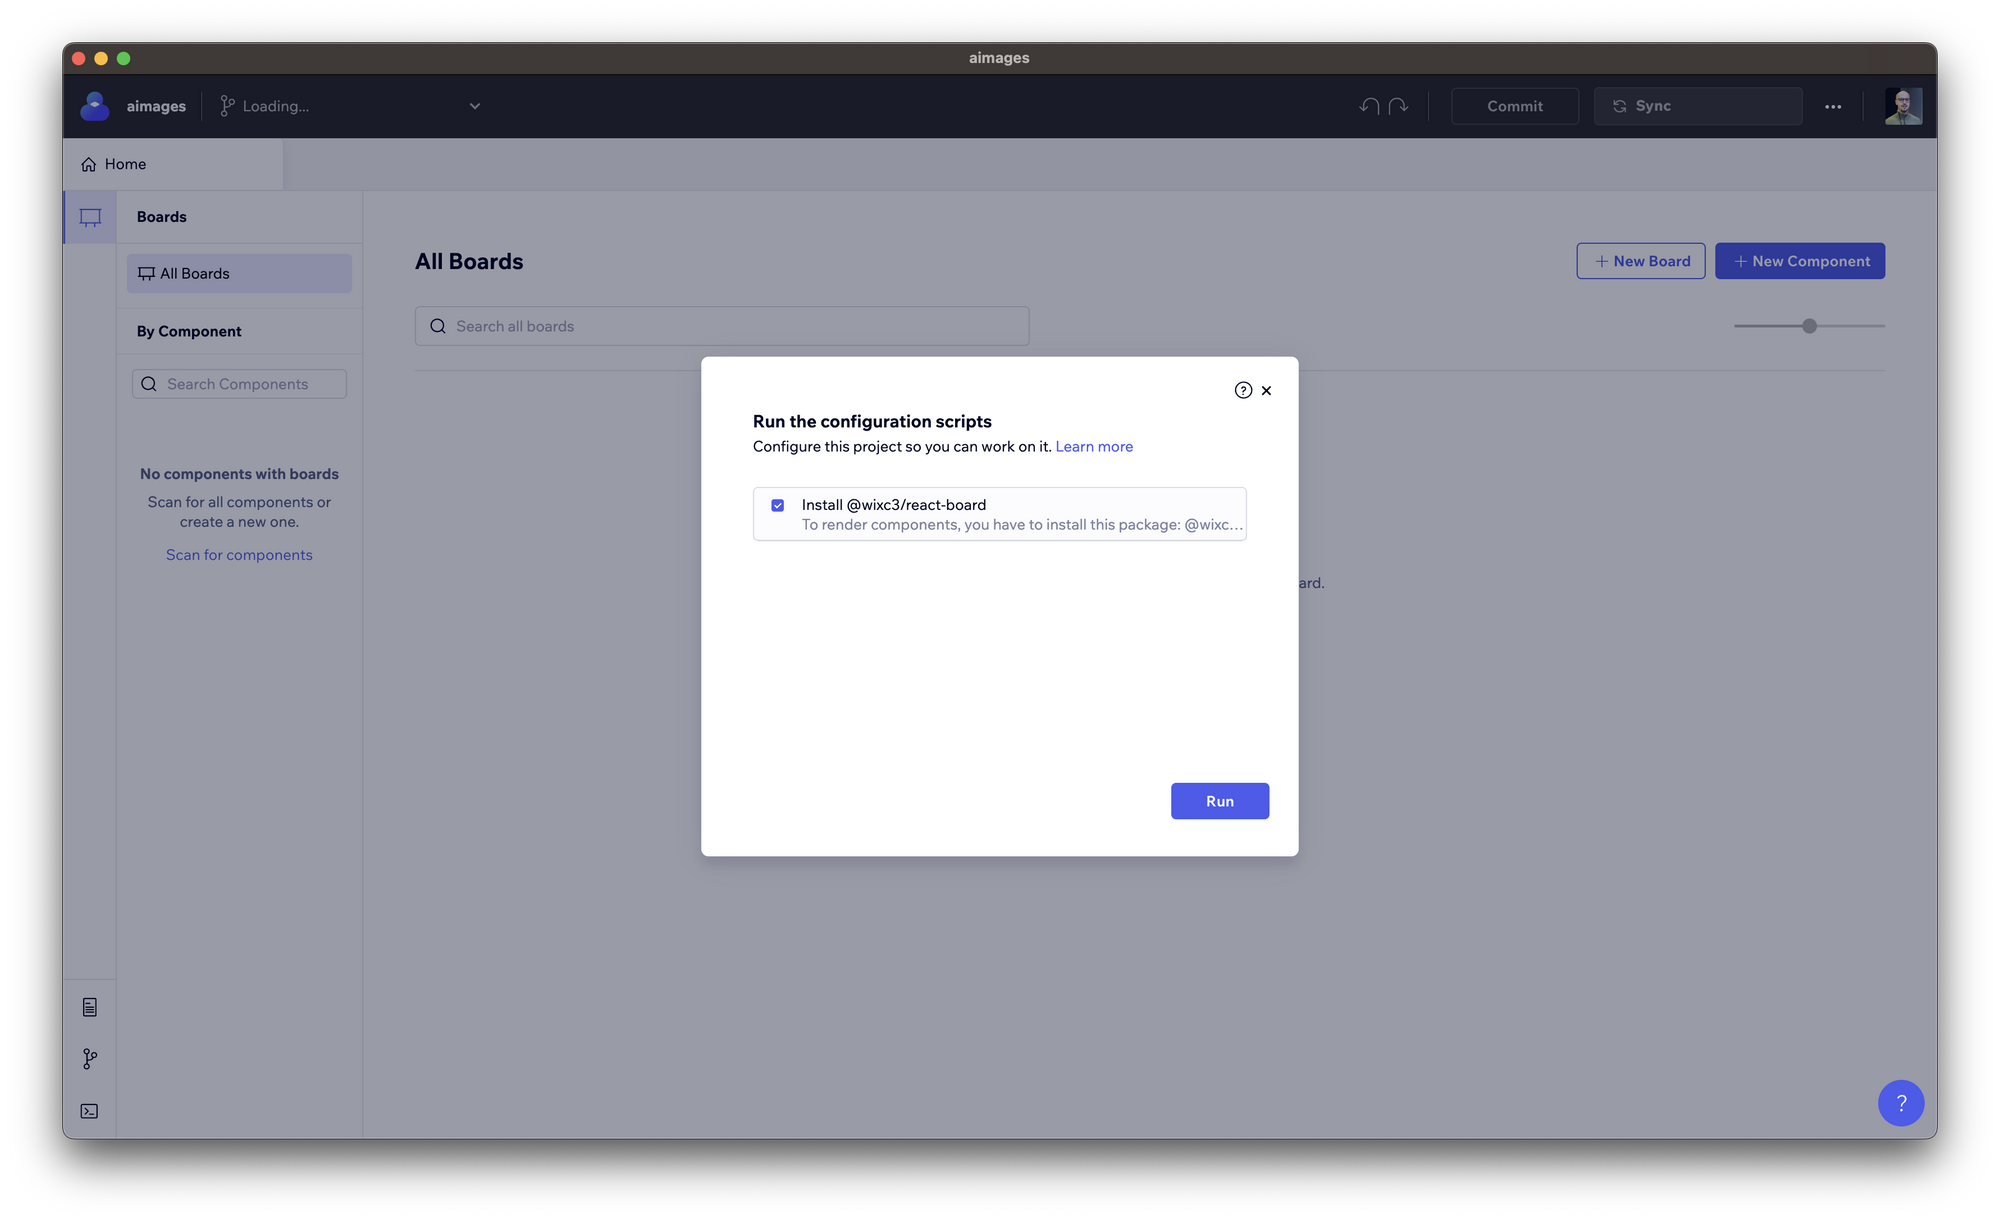
After that, Codux prompts you to run the configuration scripts, which install the required package to work on the project in this IDE.
Once the installation is done, click "Scan for components" so Codux imports all the components.
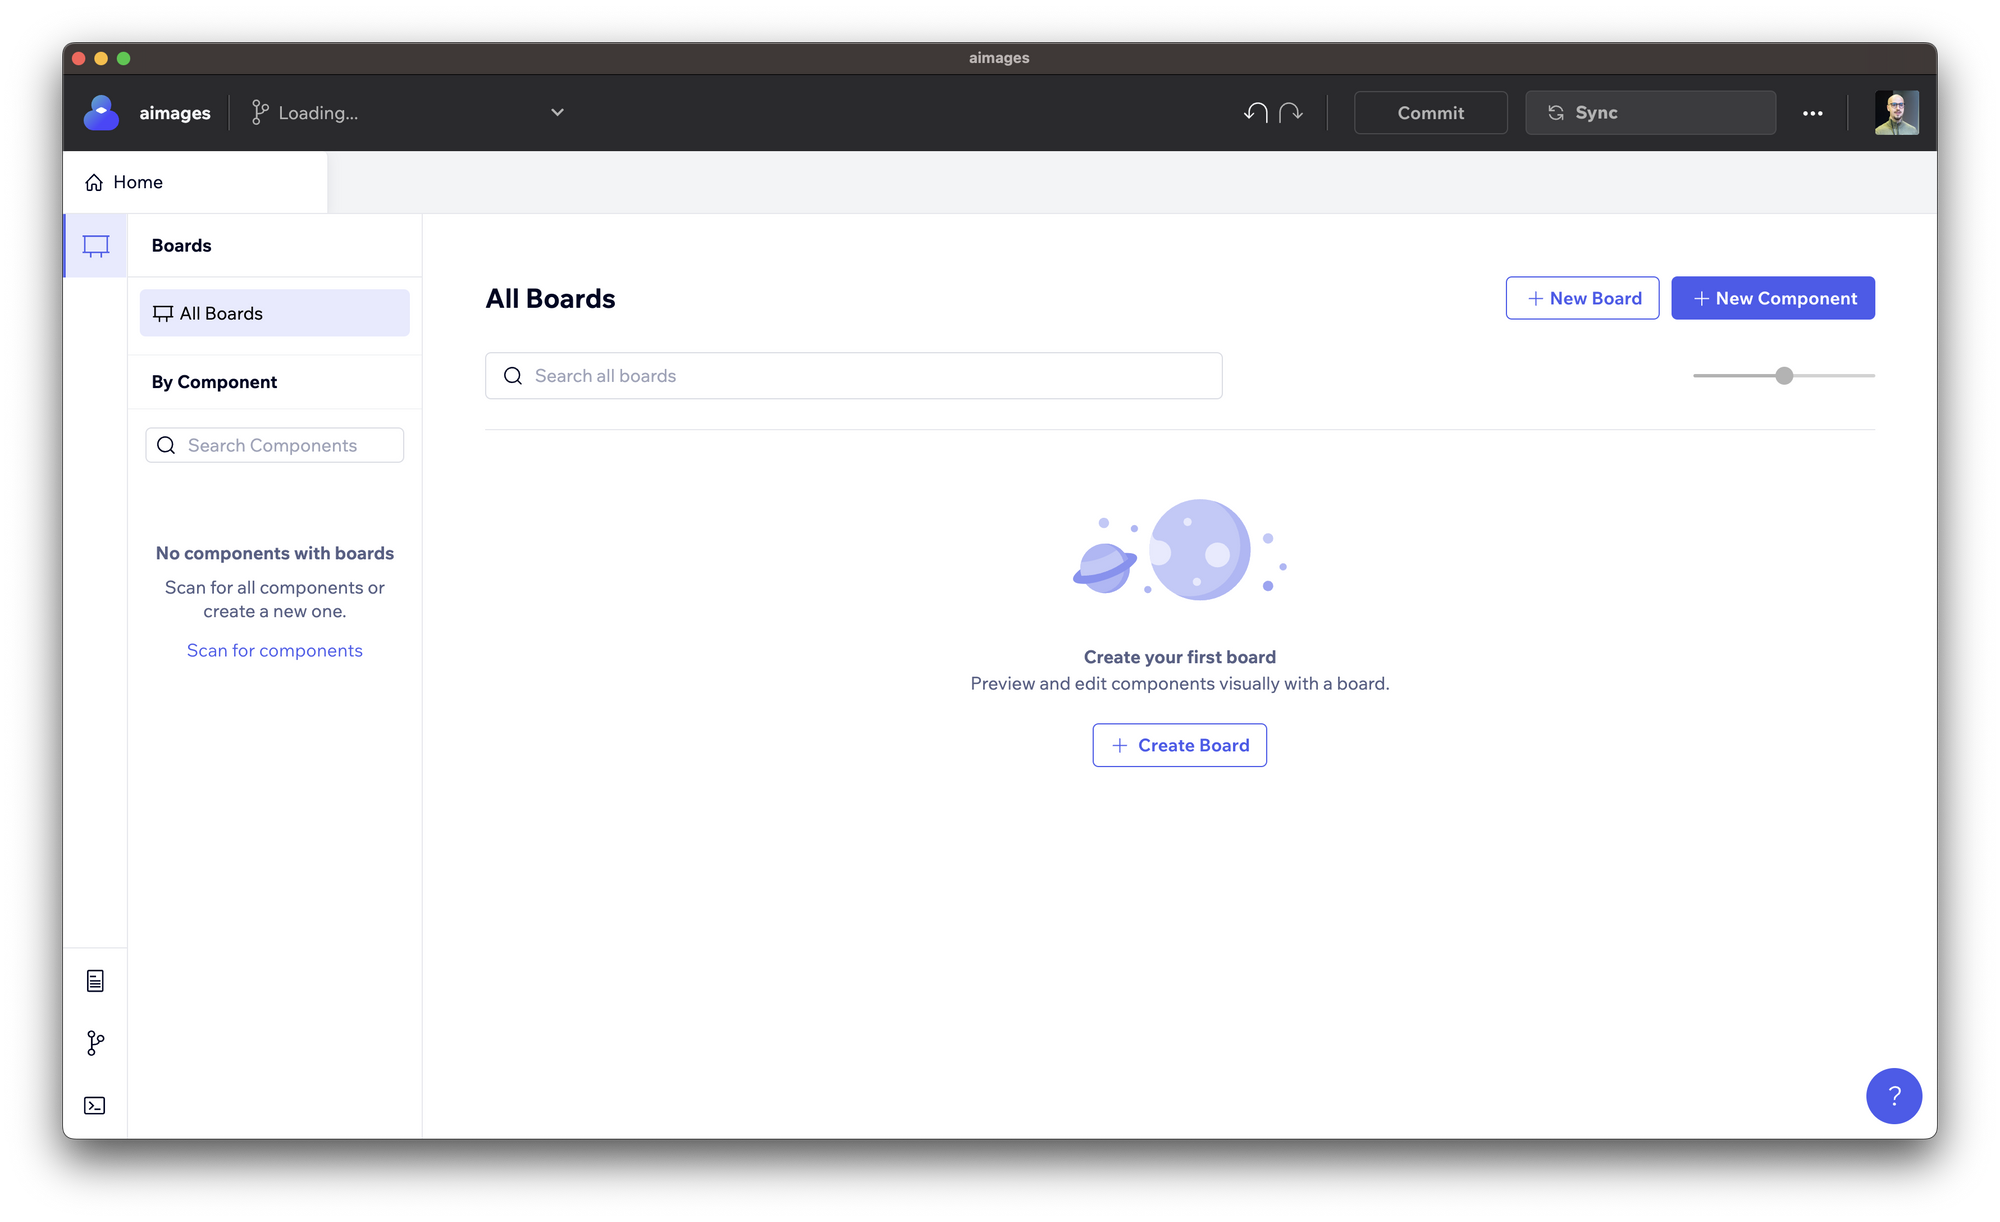
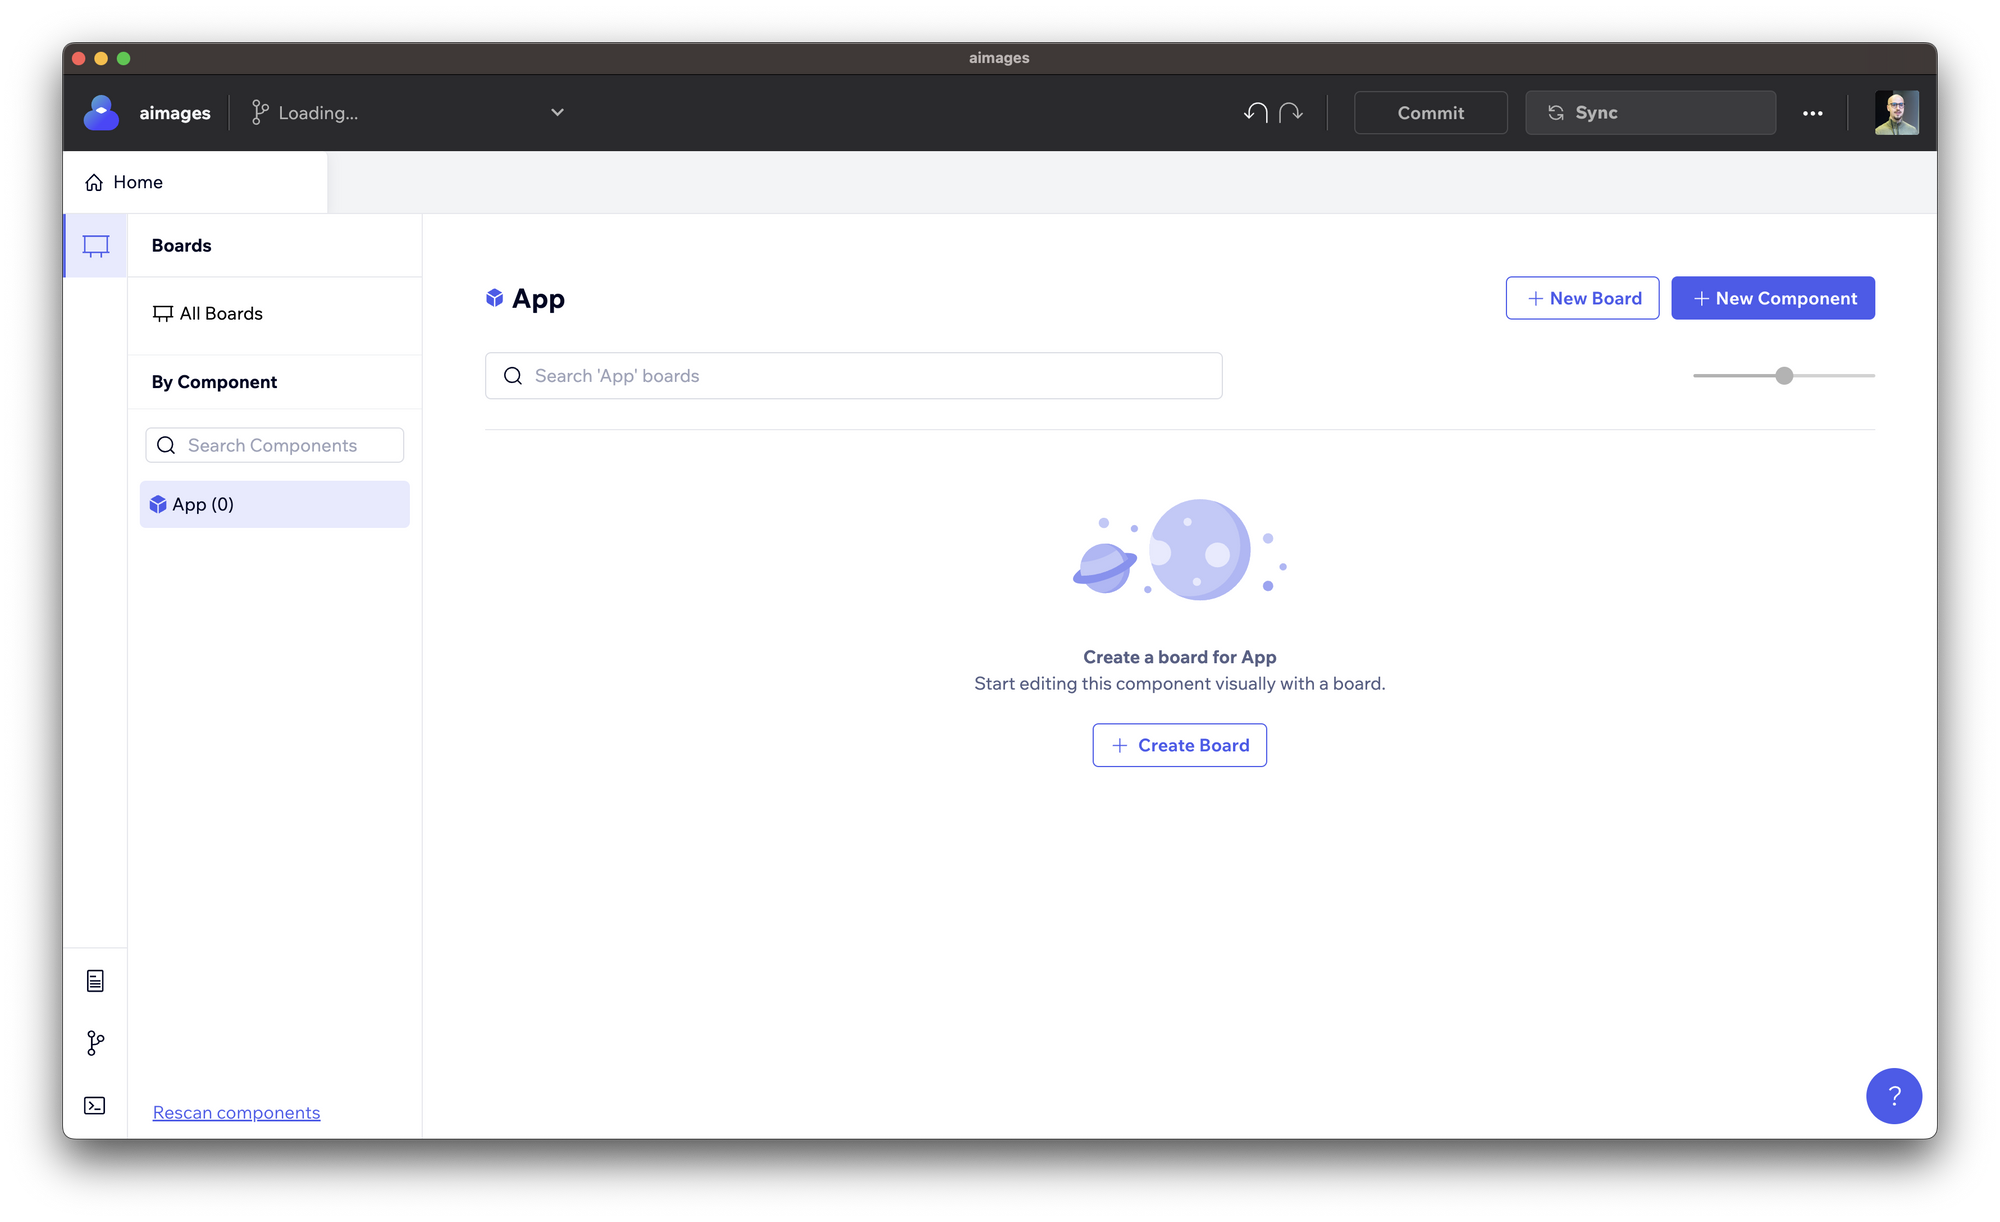
Then, you can see all the available components in the sidebar. In our case, we only have one - App - since it's a new project.
You can create new components by clicking the "+ New Component" button, but more on that later.
As you might've observed, there are "components" and "boards". A "Board" is a concept introduced by Codux, and it represents a fixture for your components so that Codux can automatically render it and allow you to edit it visually.
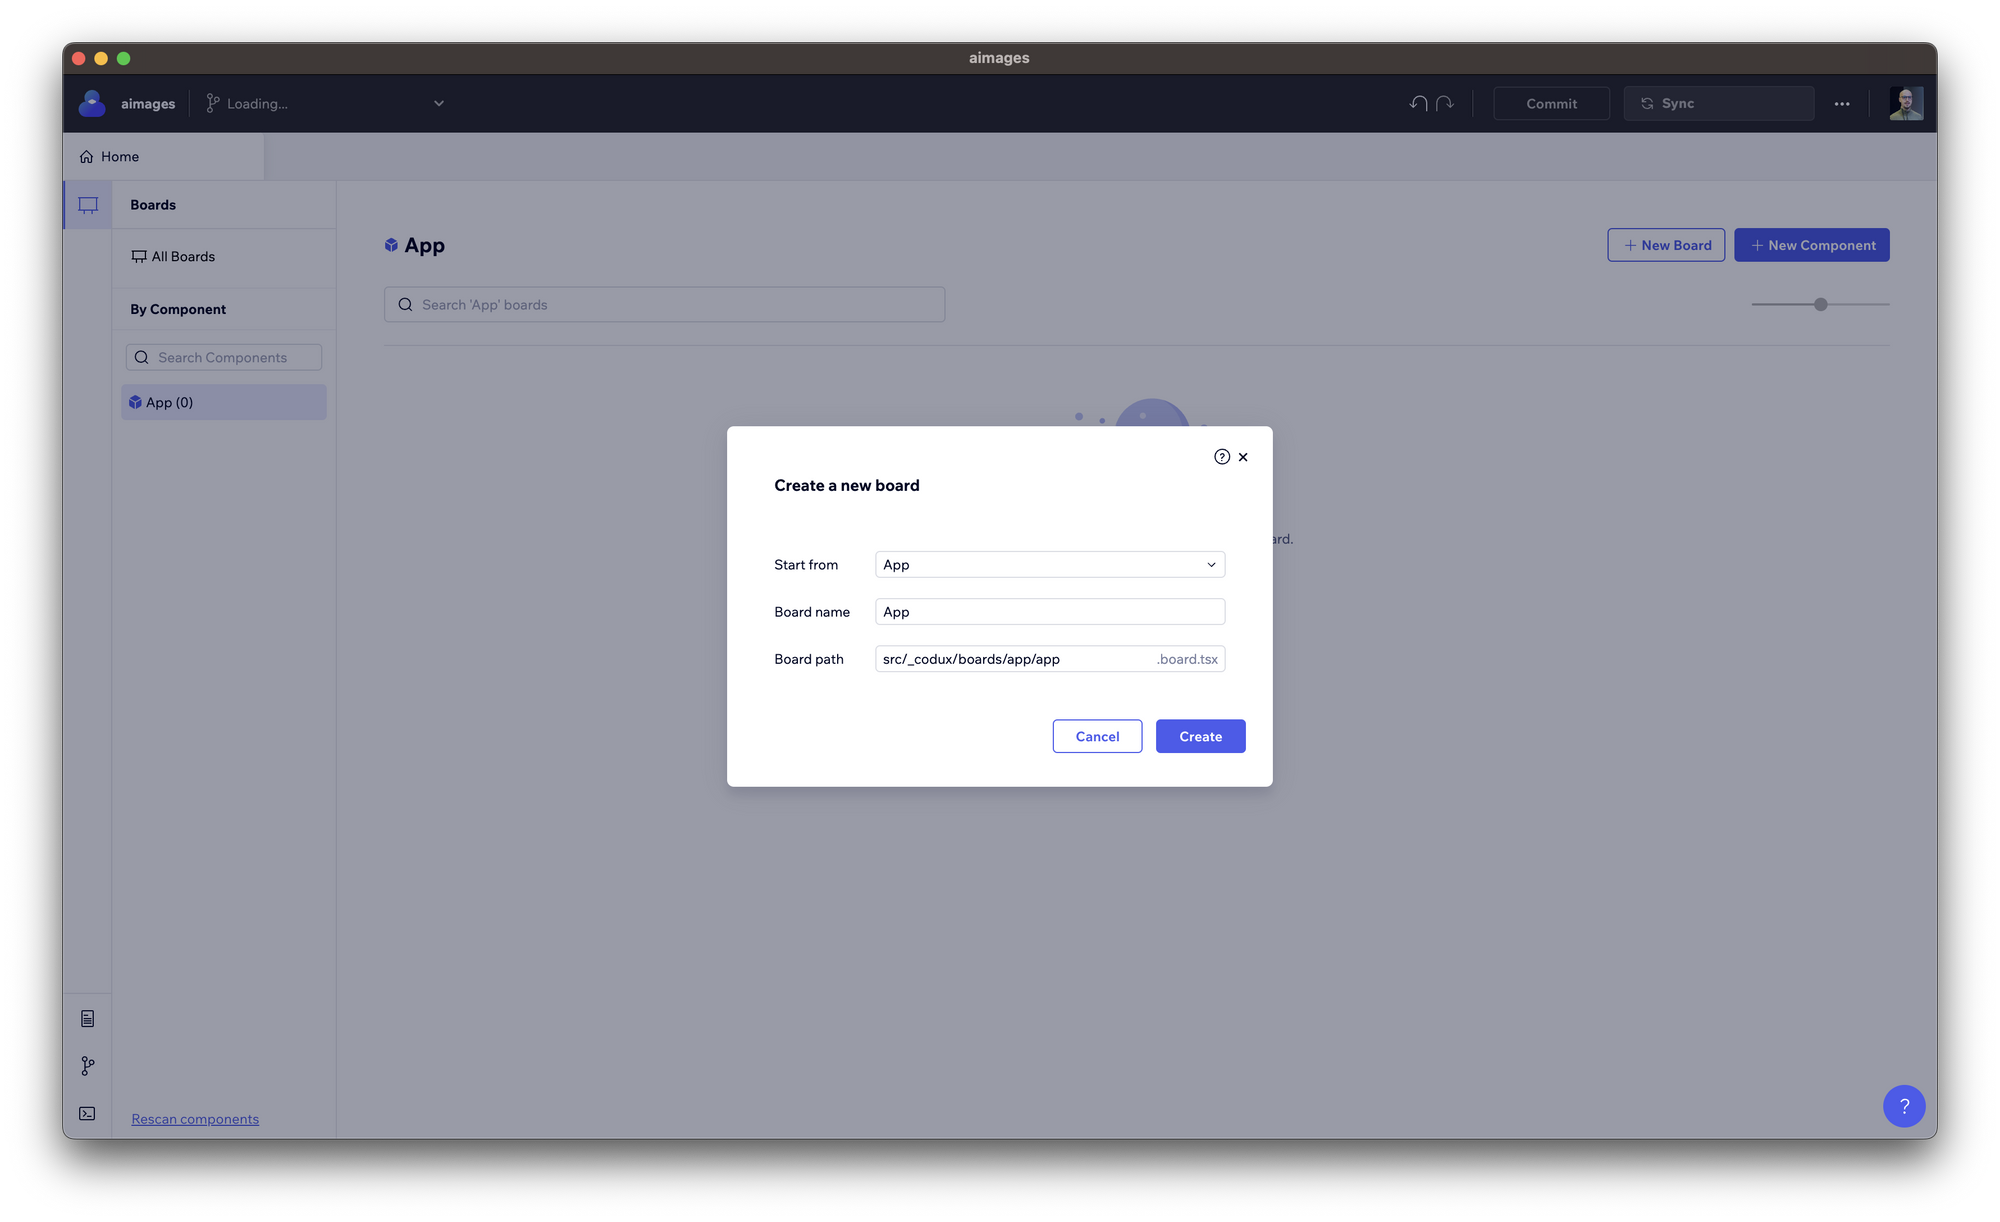
To create a "board", click on the component and then click the button "+ Create Board". That'll open a menu where you can set the starting point, the board name, and the board path.
You can leave the default options and click "Create".
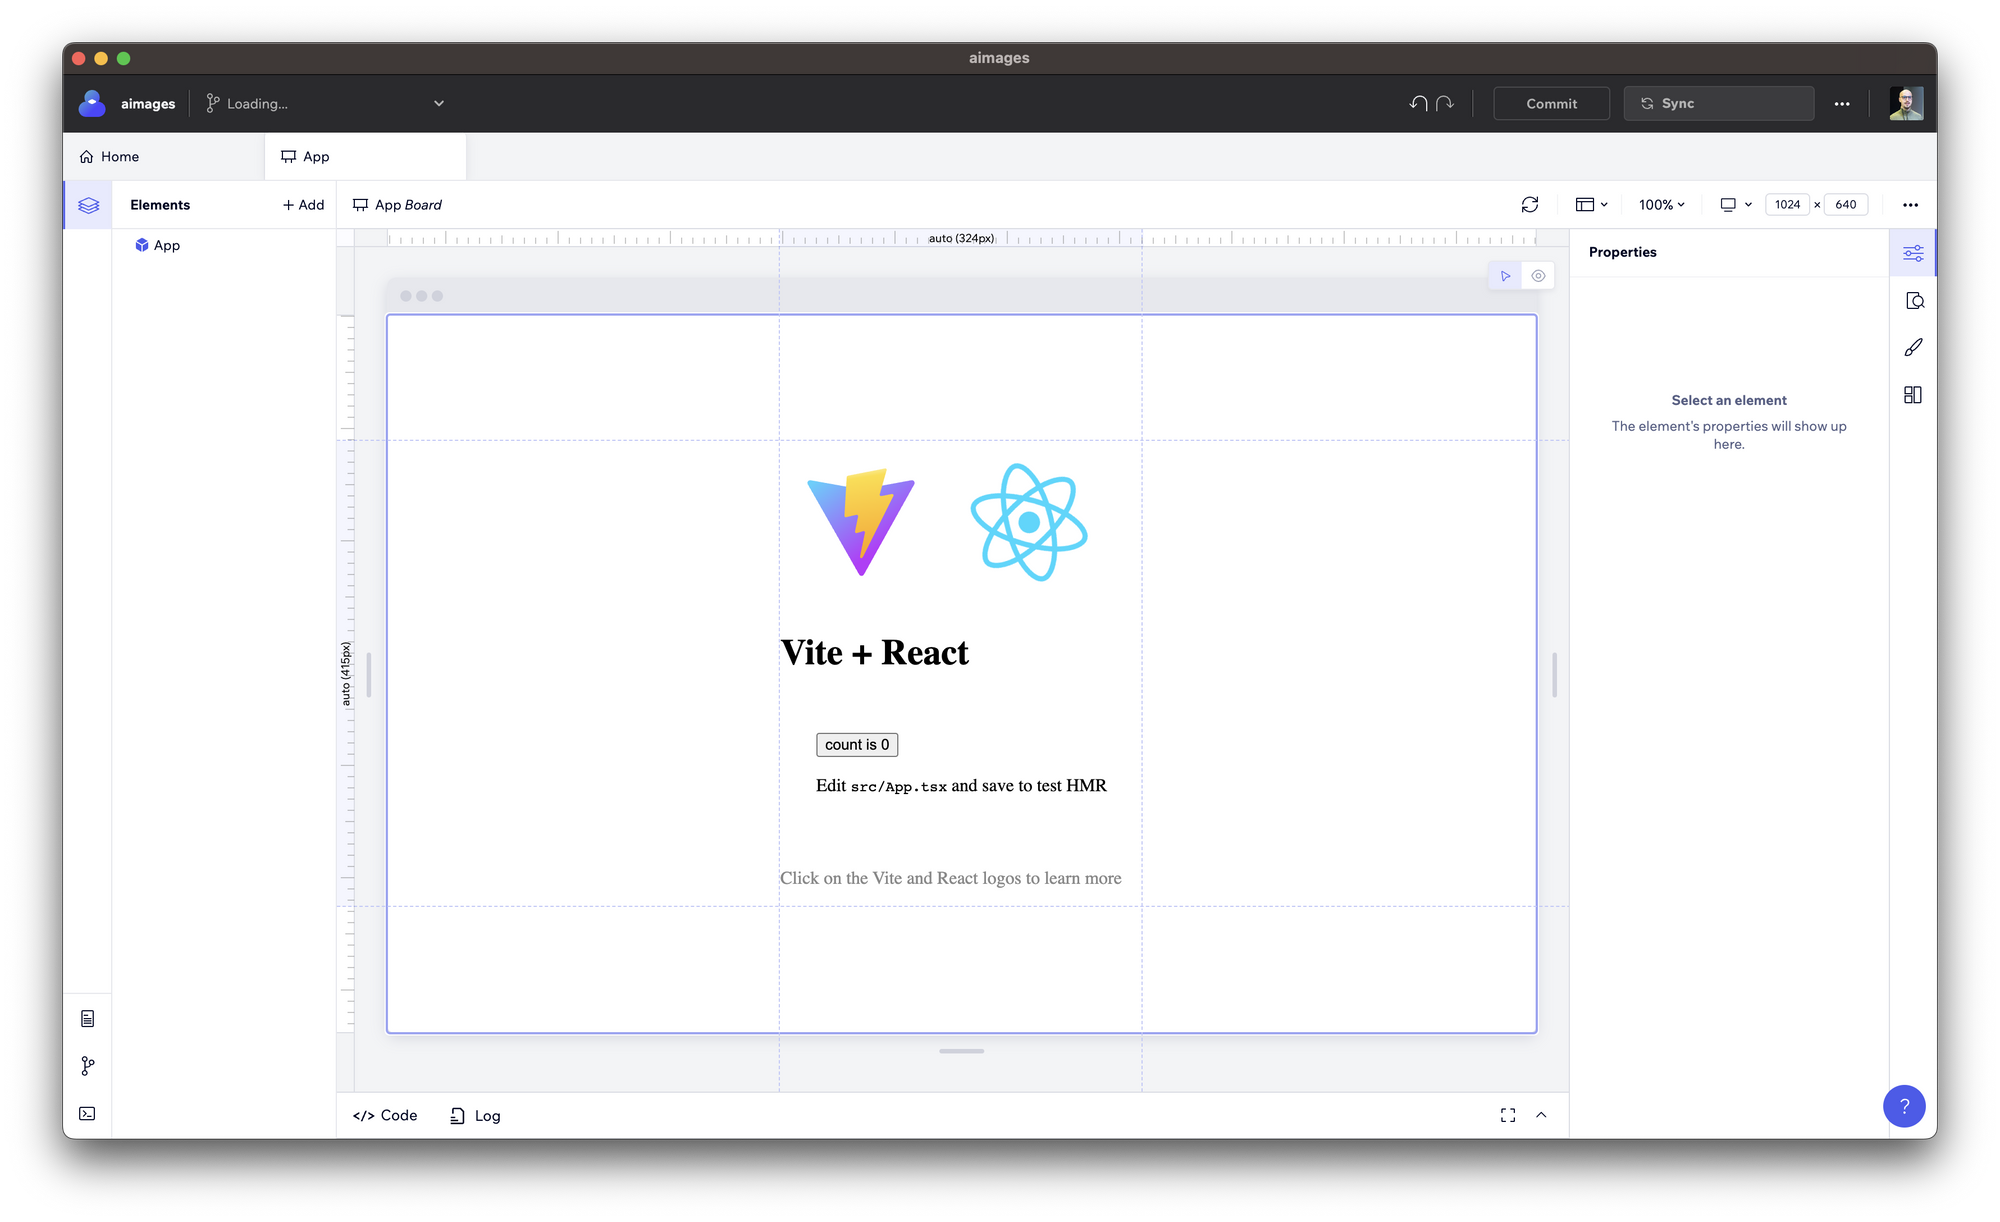
And this is the board view, where you can edit the components visually.
Configure TailwindCSS
For TailwindCSS to work in Codux, you need to perform some customizations in addition to the Tailwind setup process you did at the beginning of the article.
Create the codux.config.js in the root folder of the project, and add the following object:
{
  "$schema": "https://wixplosives.github.io/codux-config-schema/codux.config.schema.json",
  "boardGlobalSetup": "./src/_codux/board-global-setup.ts"
}
Then, create the board-global-setup.ts in the ./src/_codux folder and add the following import:
import "../index.css";
Done! Now, you can see the TailwindCSS classes in the Codux IDE.
For more information about this configuration, check this link.
Build the app
In the following sections, we'll start building the application.
Create the components folder
Let's start by creating a component folder for all the components. You can either do it from your IDE, terminal, or Codux. This is how you can do it from Codux:

Click the highlighted icon to see the project files. After that, create the folder as you would create it on your machine. Right-click on the src folder and click New Folder.
Creating components from Codux
If you want to create components using the interactive process from Codux, you need to set the components path. You can do that by adding this code in codux.config.json:
{
  "$schema": "https://wixplosives.github.io/codux-config-schema/codux.config.schema.json",
  "boardGlobalSetup": "./src/_codux/board-global-setup.ts",
  "newComponent": {
    "componentsPath": "src/components"
  }
}
Now, you can create components using the visual interface.
Layout component
Create the Layout component in the components folder. We'll use the layout on all the pages.
You can follow the next steps using your usual IDE or Codux.
Tip 💡: You're fine either way because the code is automatically in sync between the two. Whether you use Codux or your editor, both will contain the same code without you having to do anything. That's neat!
Now open the Layout component and add the following code:
type LayoutProps = {
  children: React.ReactNode;
};

export default function Layout({ children }: LayoutProps) {
  return (
    <>
      <main>{children}</main>
    </>
  );
}
Refactor App.tsx
Then go to the App.tsx file and replace the content with the following code:
import Layout from "./components/Layout";
import "./App.css";
import { useState } from "react";

function App() {
  const [inputValue, setInputValue] = useState("");
  const [imageURL, setImageURL] = useState("");
  const [loading, setLoading] = useState(false);
  const [error, setError] = useState<null | string>(null);

  const fetchImage = async (prompt: string) => {
    const response = await fetch("http://localhost:3000/api/genimg", {
      method: "POST",
      headers: {
        "Content-Type": "application/json",
      },
      body: JSON.stringify({ value: prompt }),
    });

    if (response.ok) {
      const data = await response.json();

      if (Array.isArray(data) && data.length > 0) {
        return data[0];
      }

      throw new Error("Unexpected server response");
    } else {
      throw new Error(response.statusText);
    }
  };

  const onInputChange = (e: React.ChangeEvent<HTMLTextAreaElement>) => {
    setInputValue(e.target.value);
  };

  const handleSubmit = async (e: React.FormEvent<HTMLFormElement>) => {
    e.preventDefault();
    setLoading(true);
    setError(null);

    try {
      const url = await fetchImage(inputValue);
      setImageURL(url);
    } catch (err) {
      if (err instanceof Error) {
        setError(err.message);
      } else {
        setError("An unexpected error occurred");
      }
    } finally {
      setLoading(false);
    }
  };

  return (
    <>
      <Layout>
        <section>
          <div>
            <div>
              <h1>PromptPix AI</h1>
              <p>
                Dive into the world of AI-driven creativity with PromptPix AI,
                where your words become vivid visuals. Simply input your idea,
                and watch as our advanced algorithms craft the image you
                envisioned.
              </p>
            </div>
            <form onSubmit={handleSubmit}>
              <div>
                <label htmlFor="prompt">Image prompt</label>
                <textarea
                  id="prompt"
                  placeholder="Enter your prompt"
                  value={inputValue}
                  onChange={onInputChange}
                />
              </div>
              <button type="submit" disabled={inputValue.length === 0}>
                Generate
              </button>
            </form>
          </div>
          <div>
            {loading && (
              <div>
                <p>Your image is being generated...</p>
                <div>
                  <div>
                    <div>
                      <svg
                        xmlns="http://www.w3.org/2000/svg"
                        width="44"
                        height="44"
                        viewBox="0 0 24 24"
                        strokeWidth="2"
                        stroke="currentColor"
                        fill="none"
                        strokeLinecap="round"
                        strokeLinejoin="round"
                      >
                        <path
                          stroke="none"
                          d="M0 0h24v24H0z"
                          fill="none"
                        ></path>
                        <path d="M12 6l0 -3"></path>
                        <path d="M16.25 7.75l2.15 -2.15"></path>
                        <path d="M18 12l3 0"></path>
                        <path d="M16.25 16.25l2.15 2.15"></path>
                        <path d="M12 18l0 3"></path>
                        <path d="M7.75 16.25l-2.15 2.15"></path>
                        <path d="M6 12l-3 0"></path>
                        <path d="M7.75 7.75l-2.15 -2.15"></path>
                      </svg>
                    </div>
                  </div>
                </div>
              </div>
            )}

            {imageURL && !loading && (
              <div>
                <p>Find your generated image below</p>
                <img
                  src={imageURL}
                  width={600}
                  height={600}
                  alt="Generated image"
                />
              </div>
            )}

            {!imageURL && !loading && (
              <div>
                <p>Your image will appear below</p>
                <div>
                  <div>
                    <div>
                      <svg
                        xmlns="http://www.w3.org/2000/svg"
                        width="44"
                        height="44"
                        viewBox="0 0 24 24"
                        strokeWidth="2"
                        stroke="currentColor"
                        fill="none"
                        strokeLinecap="round"
                        strokeLinejoin="round"
                      >
                        <path
                          stroke="none"
                          d="M0 0h24v24H0z"
                          fill="none"
                        ></path>
                        <path d="M15 8h.01"></path>
                        <path d="M11.5 21h-5.5a3 3 0 0 1 -3 -3v-12a3 3 0 0 1 3 -3h12a3 3 0 0 1 3 3v5.5"></path>
                        <path d="M18 18m-3 0a3 3 0 1 0 6 0a3 3 0 1 0 -6 0"></path>
                        <path d="M20.2 20.2l1.8 1.8"></path>
                        <path d="M3 16l5 -5c.928 -.893 2.072 -.893 3 0l2 2"></path>
                      </svg>
                    </div>
                  </div>
                </div>
              </div>
            )}

            {error && <div>{error}</div>}
          </div>
        </section>
      </Layout>
    </>
  );
}

export default App;
This component contains the barebone application without any style applied.
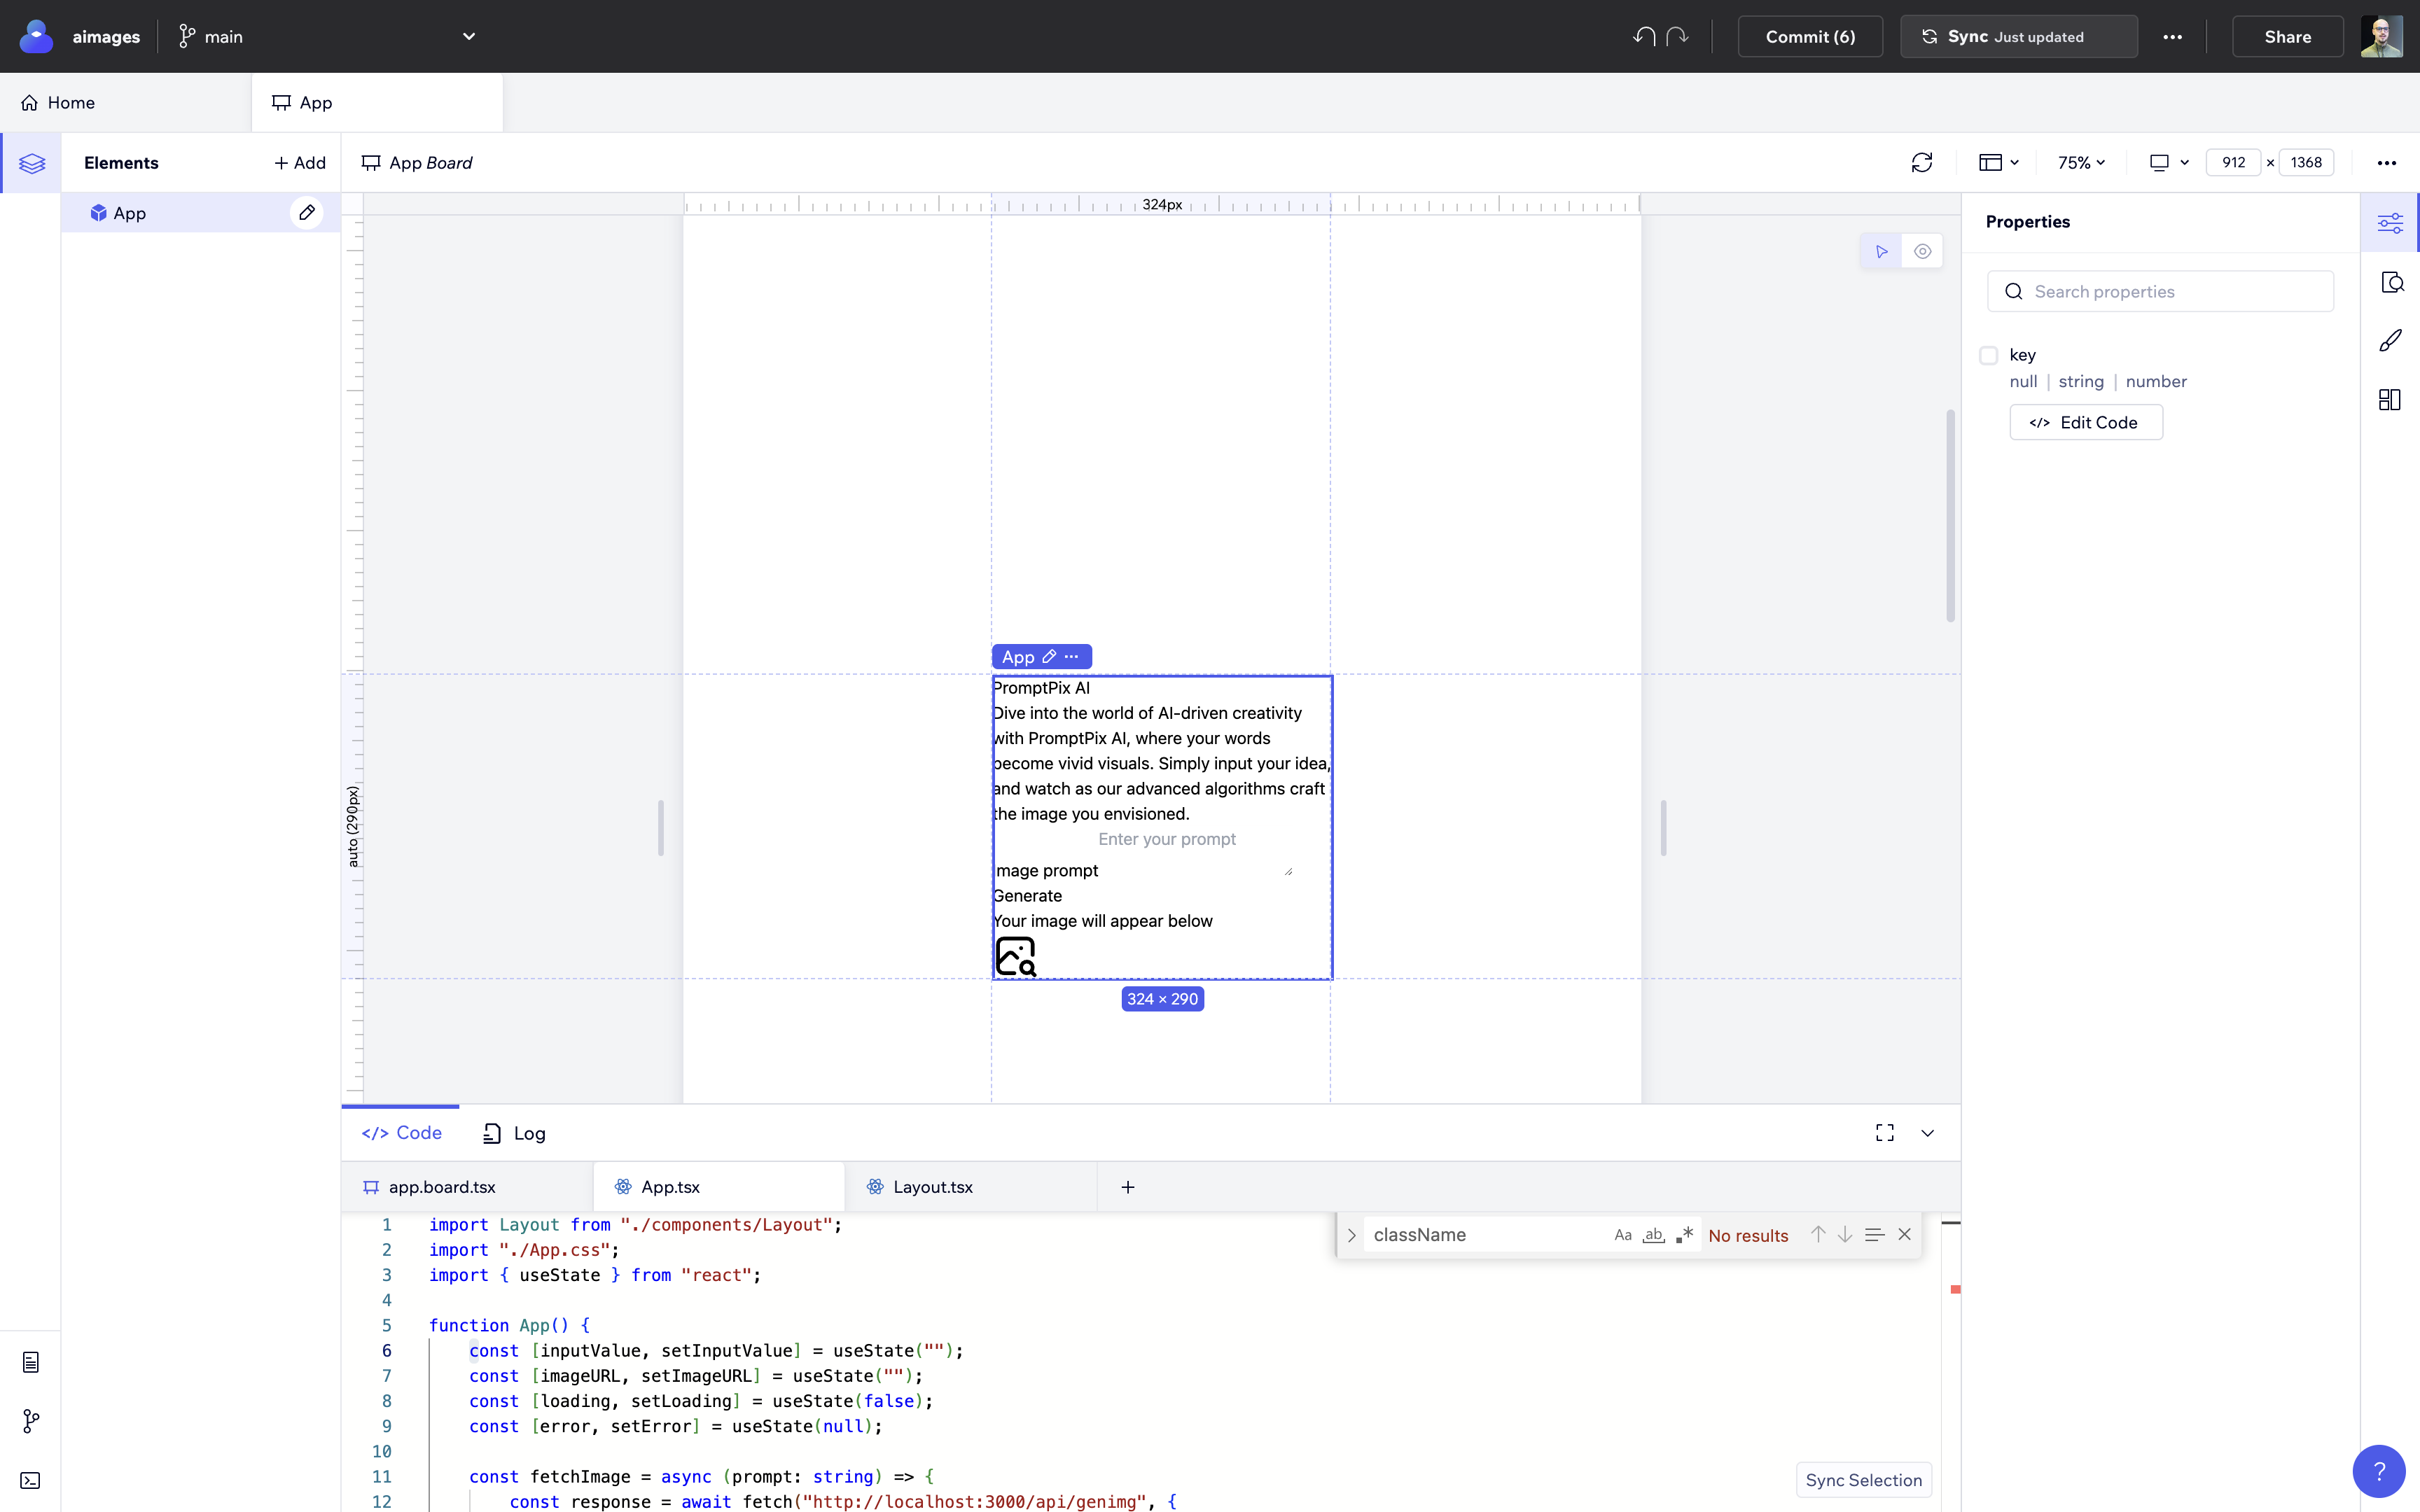
Note: Everything is in the App file for illustrative purposes. It's easier to showcase the tool this way. You'll see the final application on GitHub.
Style the app with Codux
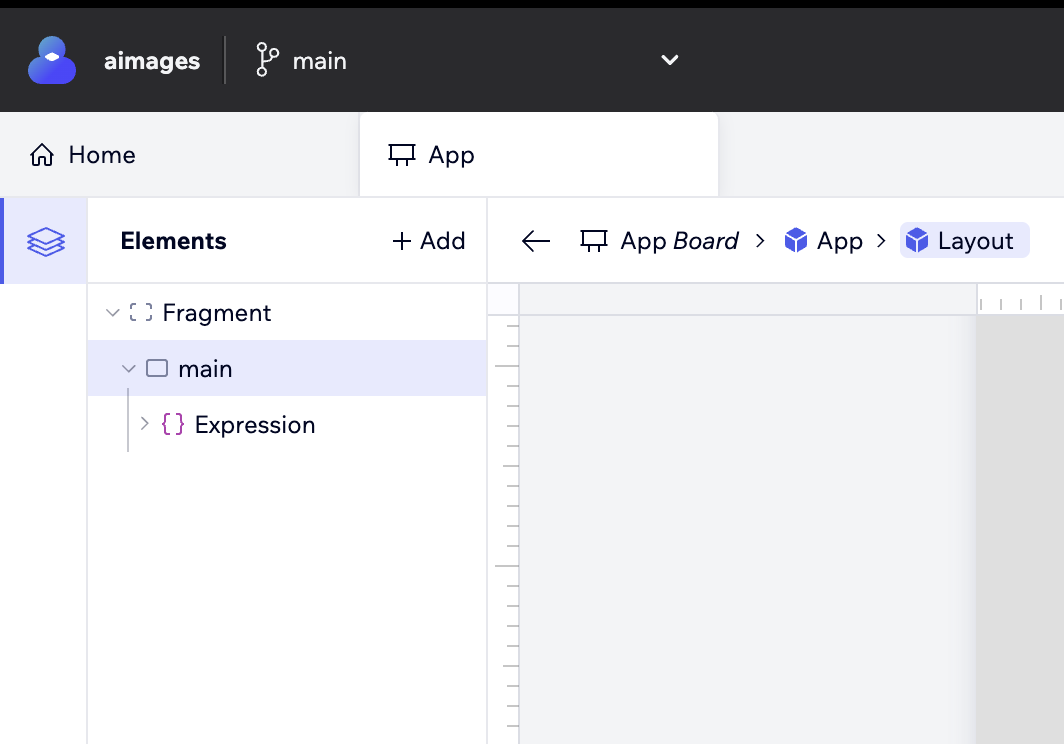
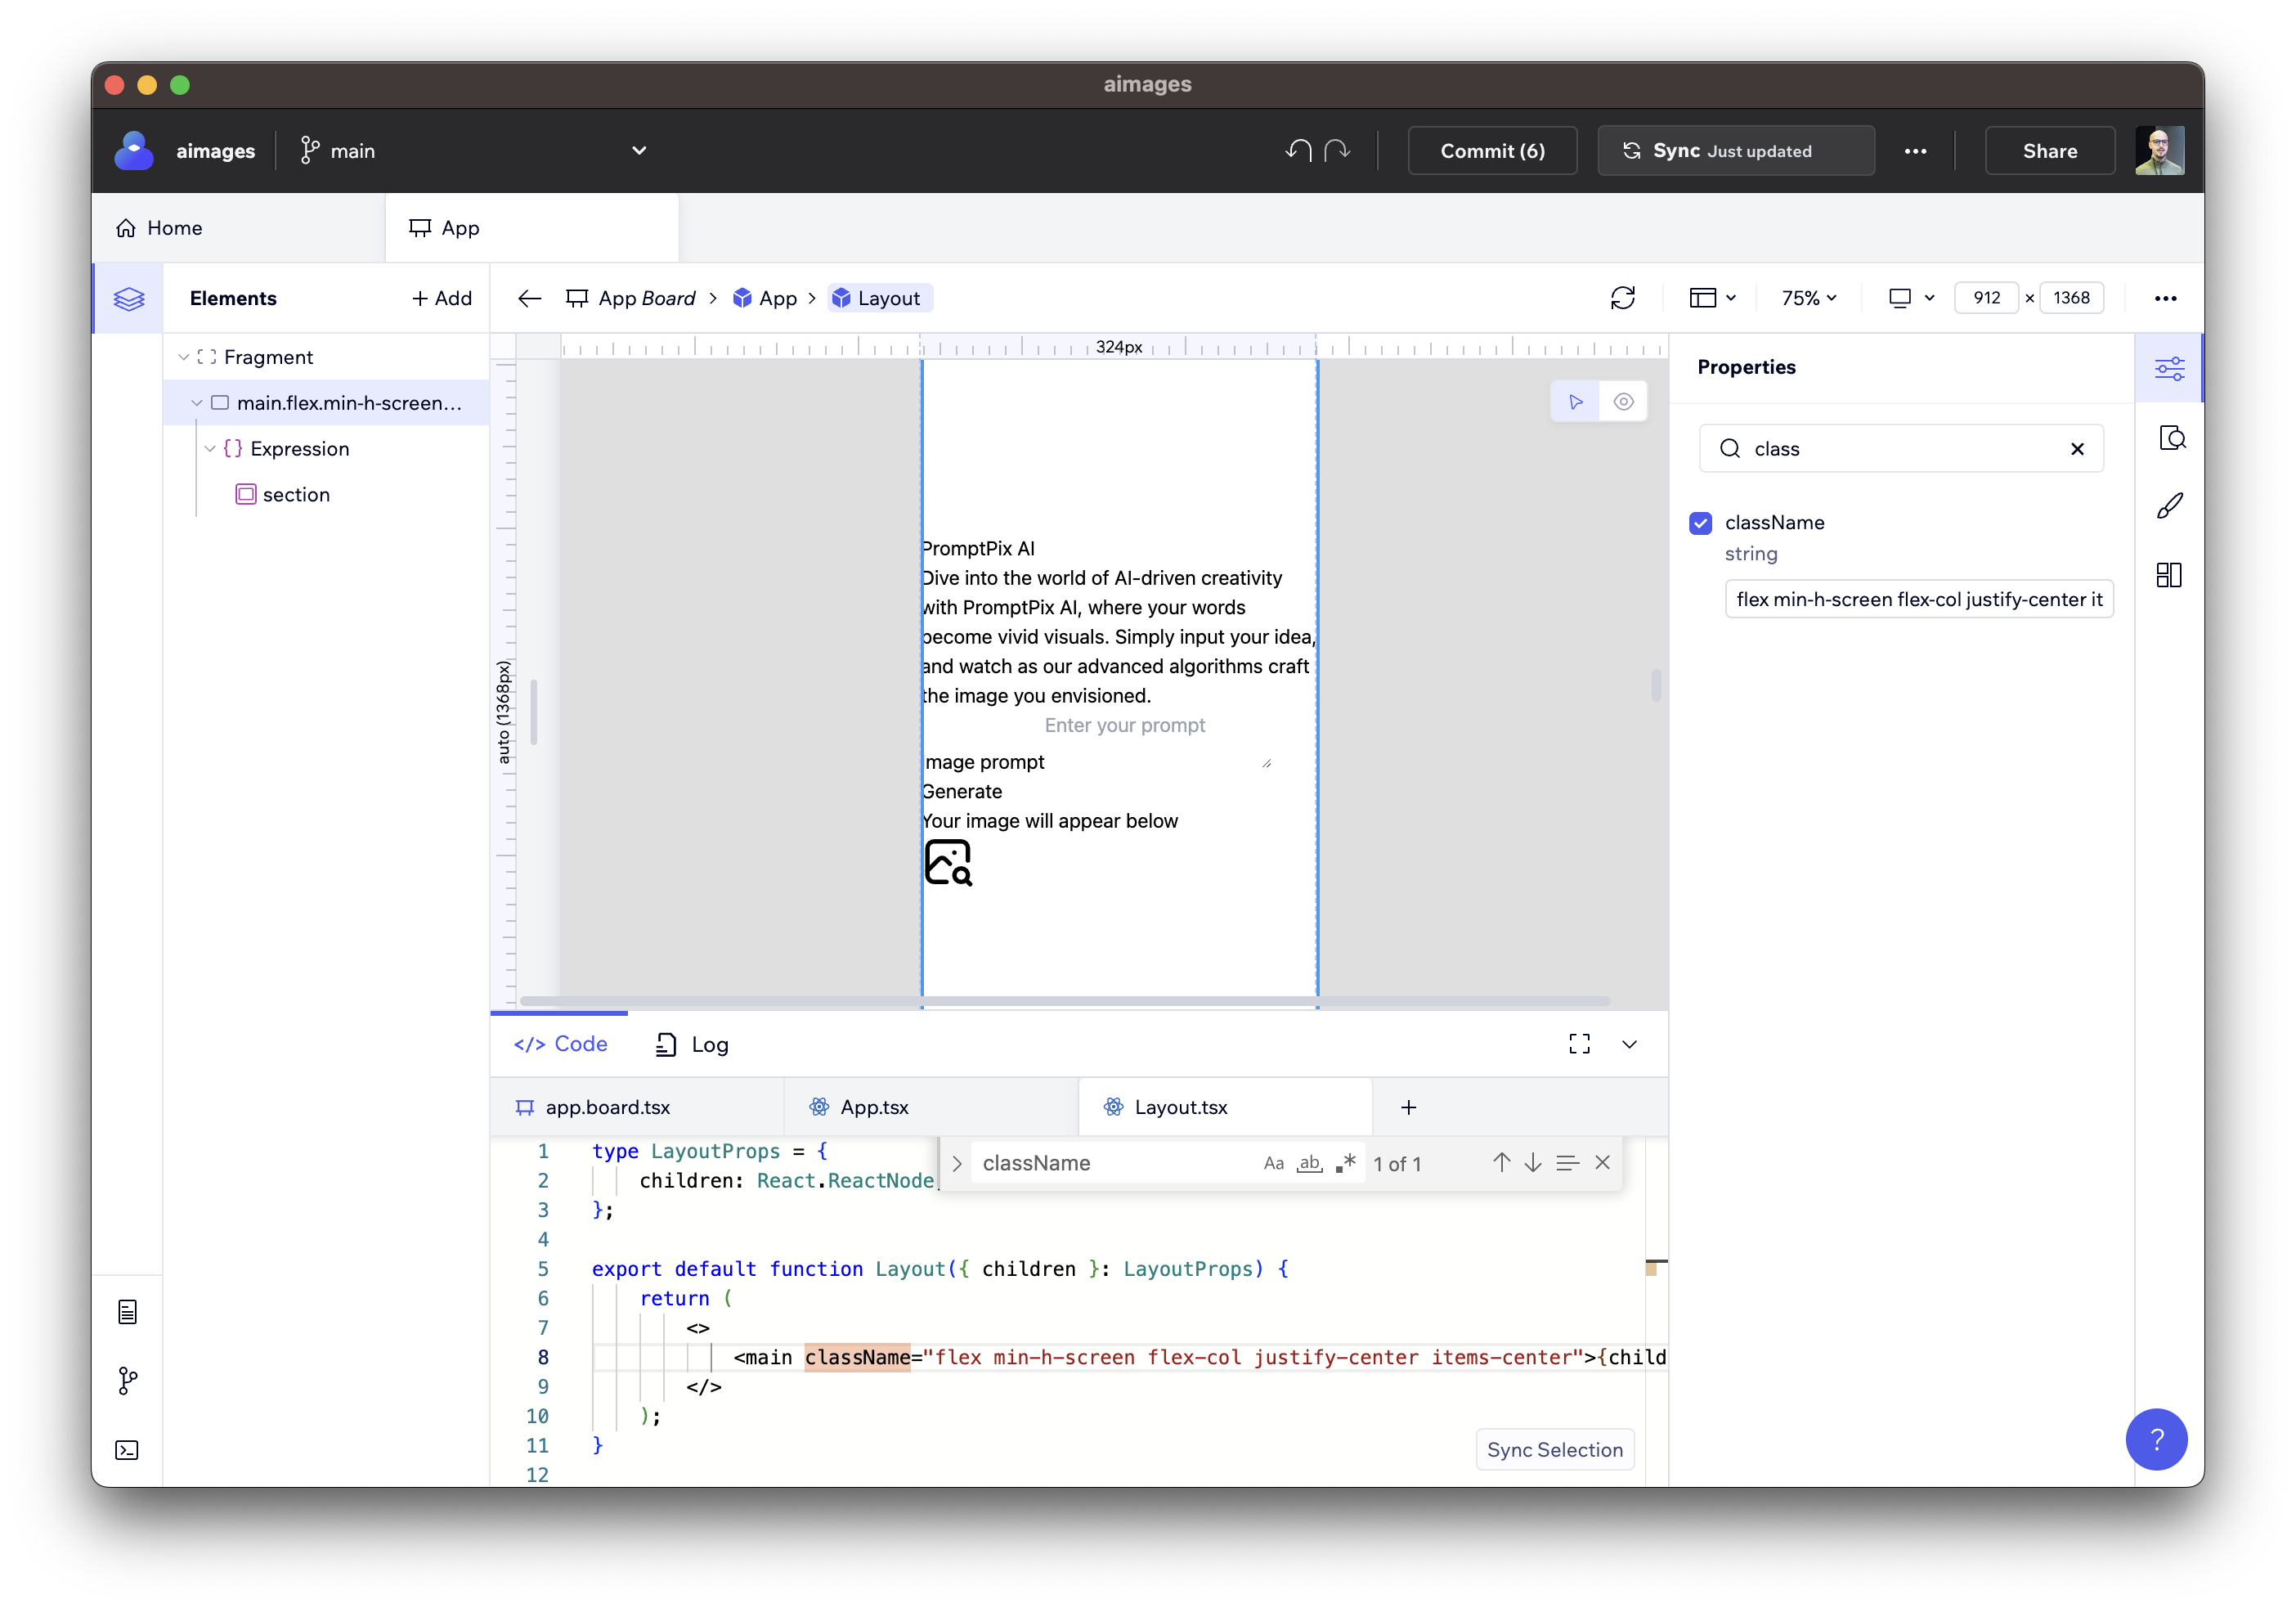
Let's start by styling the Layout component first. Double click App in the Elements tab (left-hand side column).
That opens a new tree, where you should see the Layout component. Double click on Layout, and then select main.
The Elements tab shows you all the HTML elements from your code.
To add Tailwind classes to HTML elements, click the "Properties" icon from the right-hand side. Then, search for the "className" property.
Once there, add the following Tailwind classes:
flex min-h-screen flex-col justify-center items-center
These classes set up a flex container with a minimum height equal to the viewport height, arrange its children in a column, and center them vertically and horizontally within the container.
You should see the changes reflected immediately, both visually and in the code.
Pretty cool, right?
Now, let's switch to your favorite IDE to see how easy it is to use them together. Open the index.css file and add this block:
body {
  @apply bg-gray-50;
}
App component
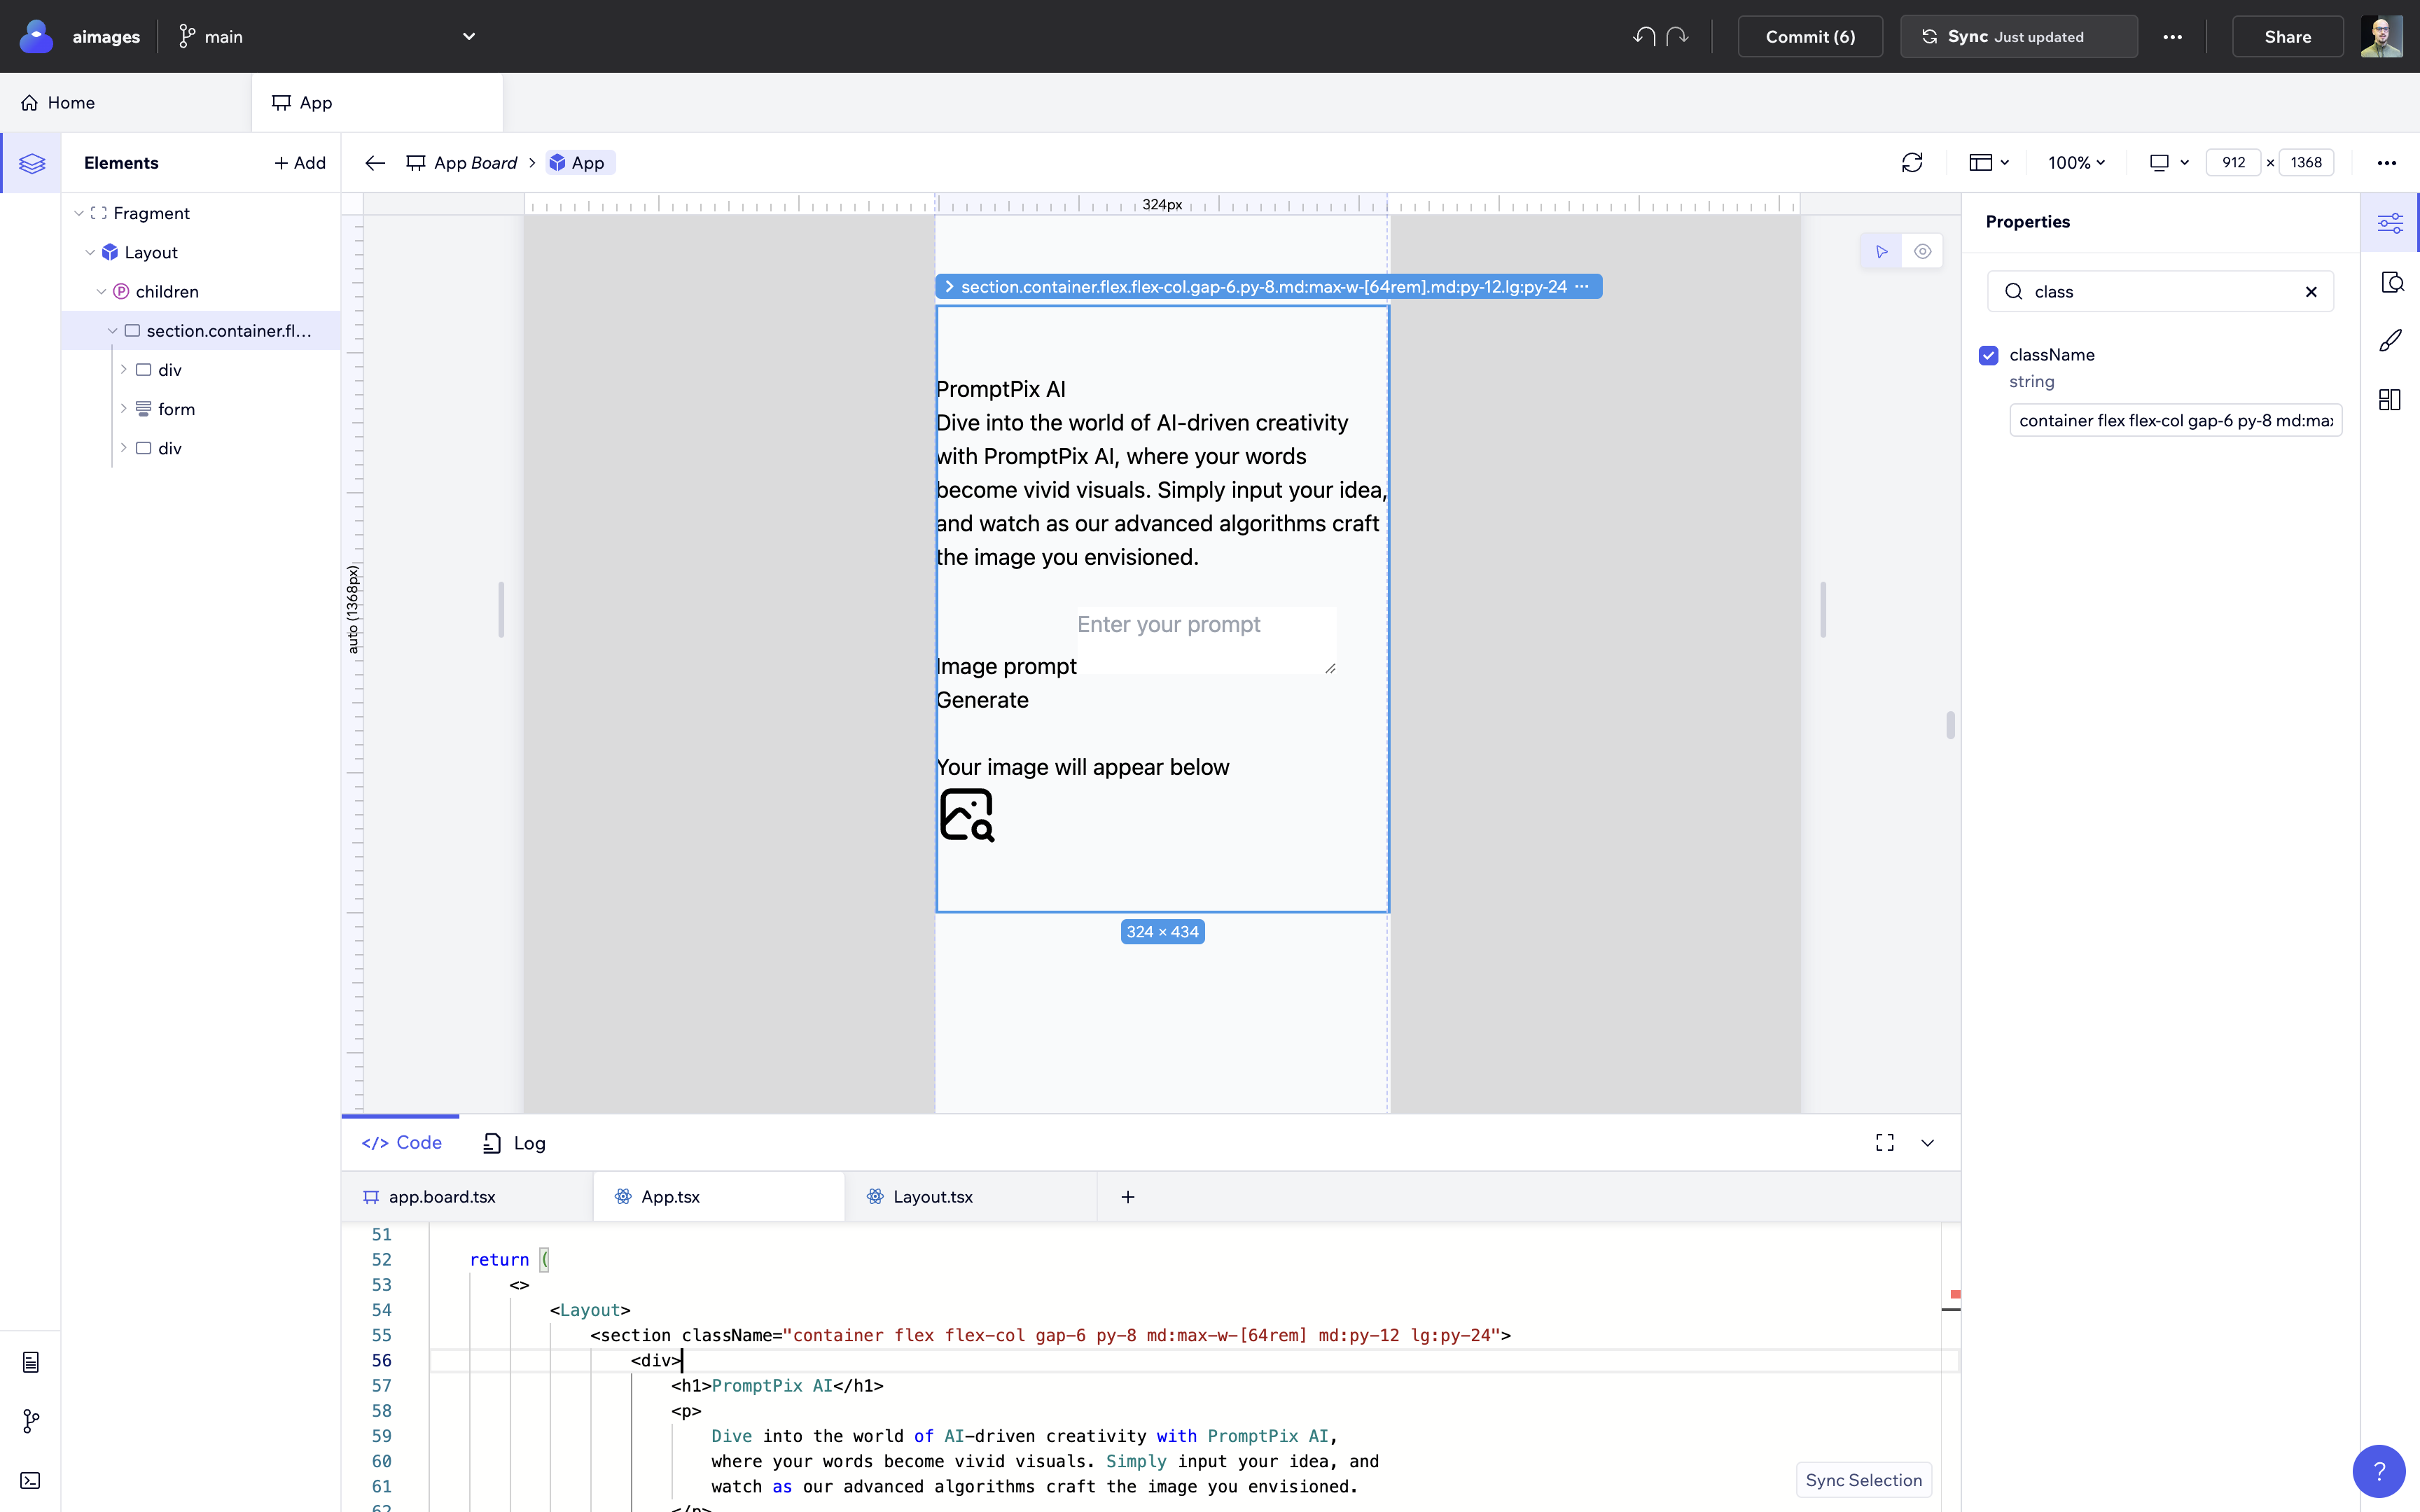
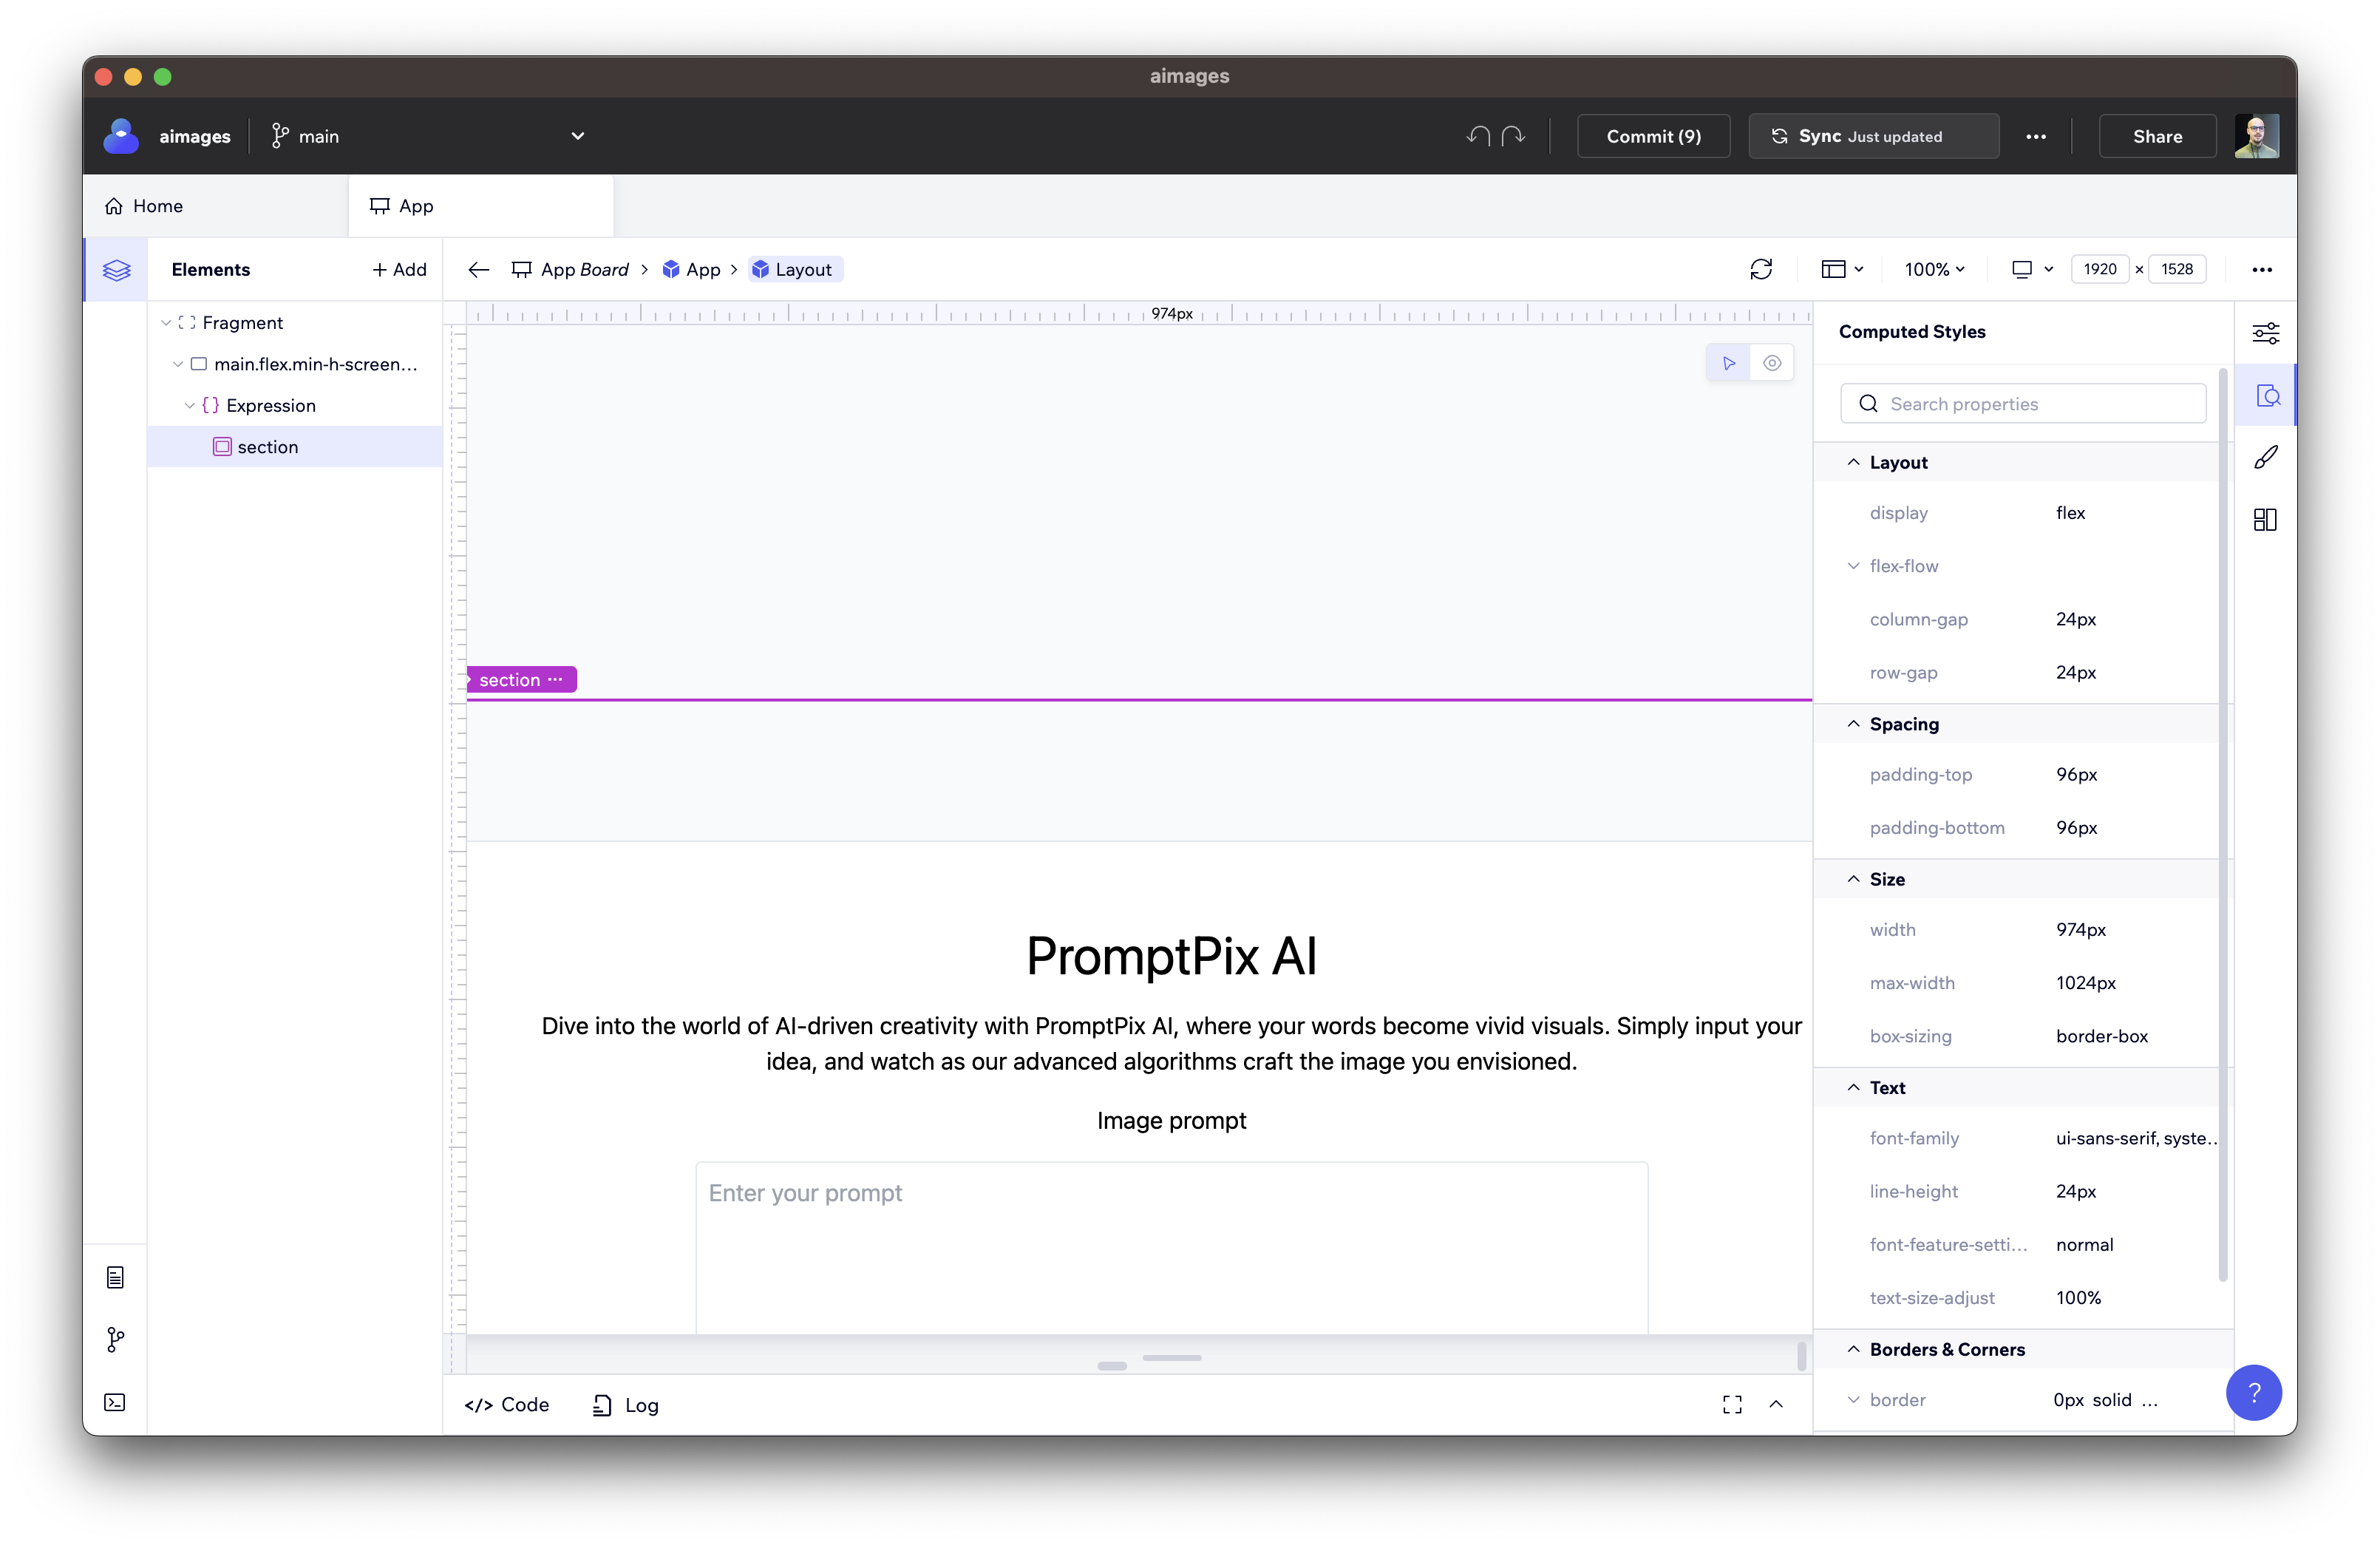
Continue by adding the following classes to the section element from the App component:
container flex flex-col gap-6 py-8 md:max-w-[64rem] md:py-12 lg:py-24
These classes modify the section to be a flexible container with column direction, vertical gap between child elements of 6 units, vertical padding of 8 units (increased to 12 units on medium screens and 24 units on large screens), and a maximum width of 64rem on medium and larger screens.
Similarly, apply the following classes to the first div element:
bg-white shadow-md rounded border border-slate-200 p-14 text-center
These TailwindCSS utility classes apply a white background, a medium shadow, rounded corners, a slate-colored border, padding on all sides of 14 units, and center-aligned text.
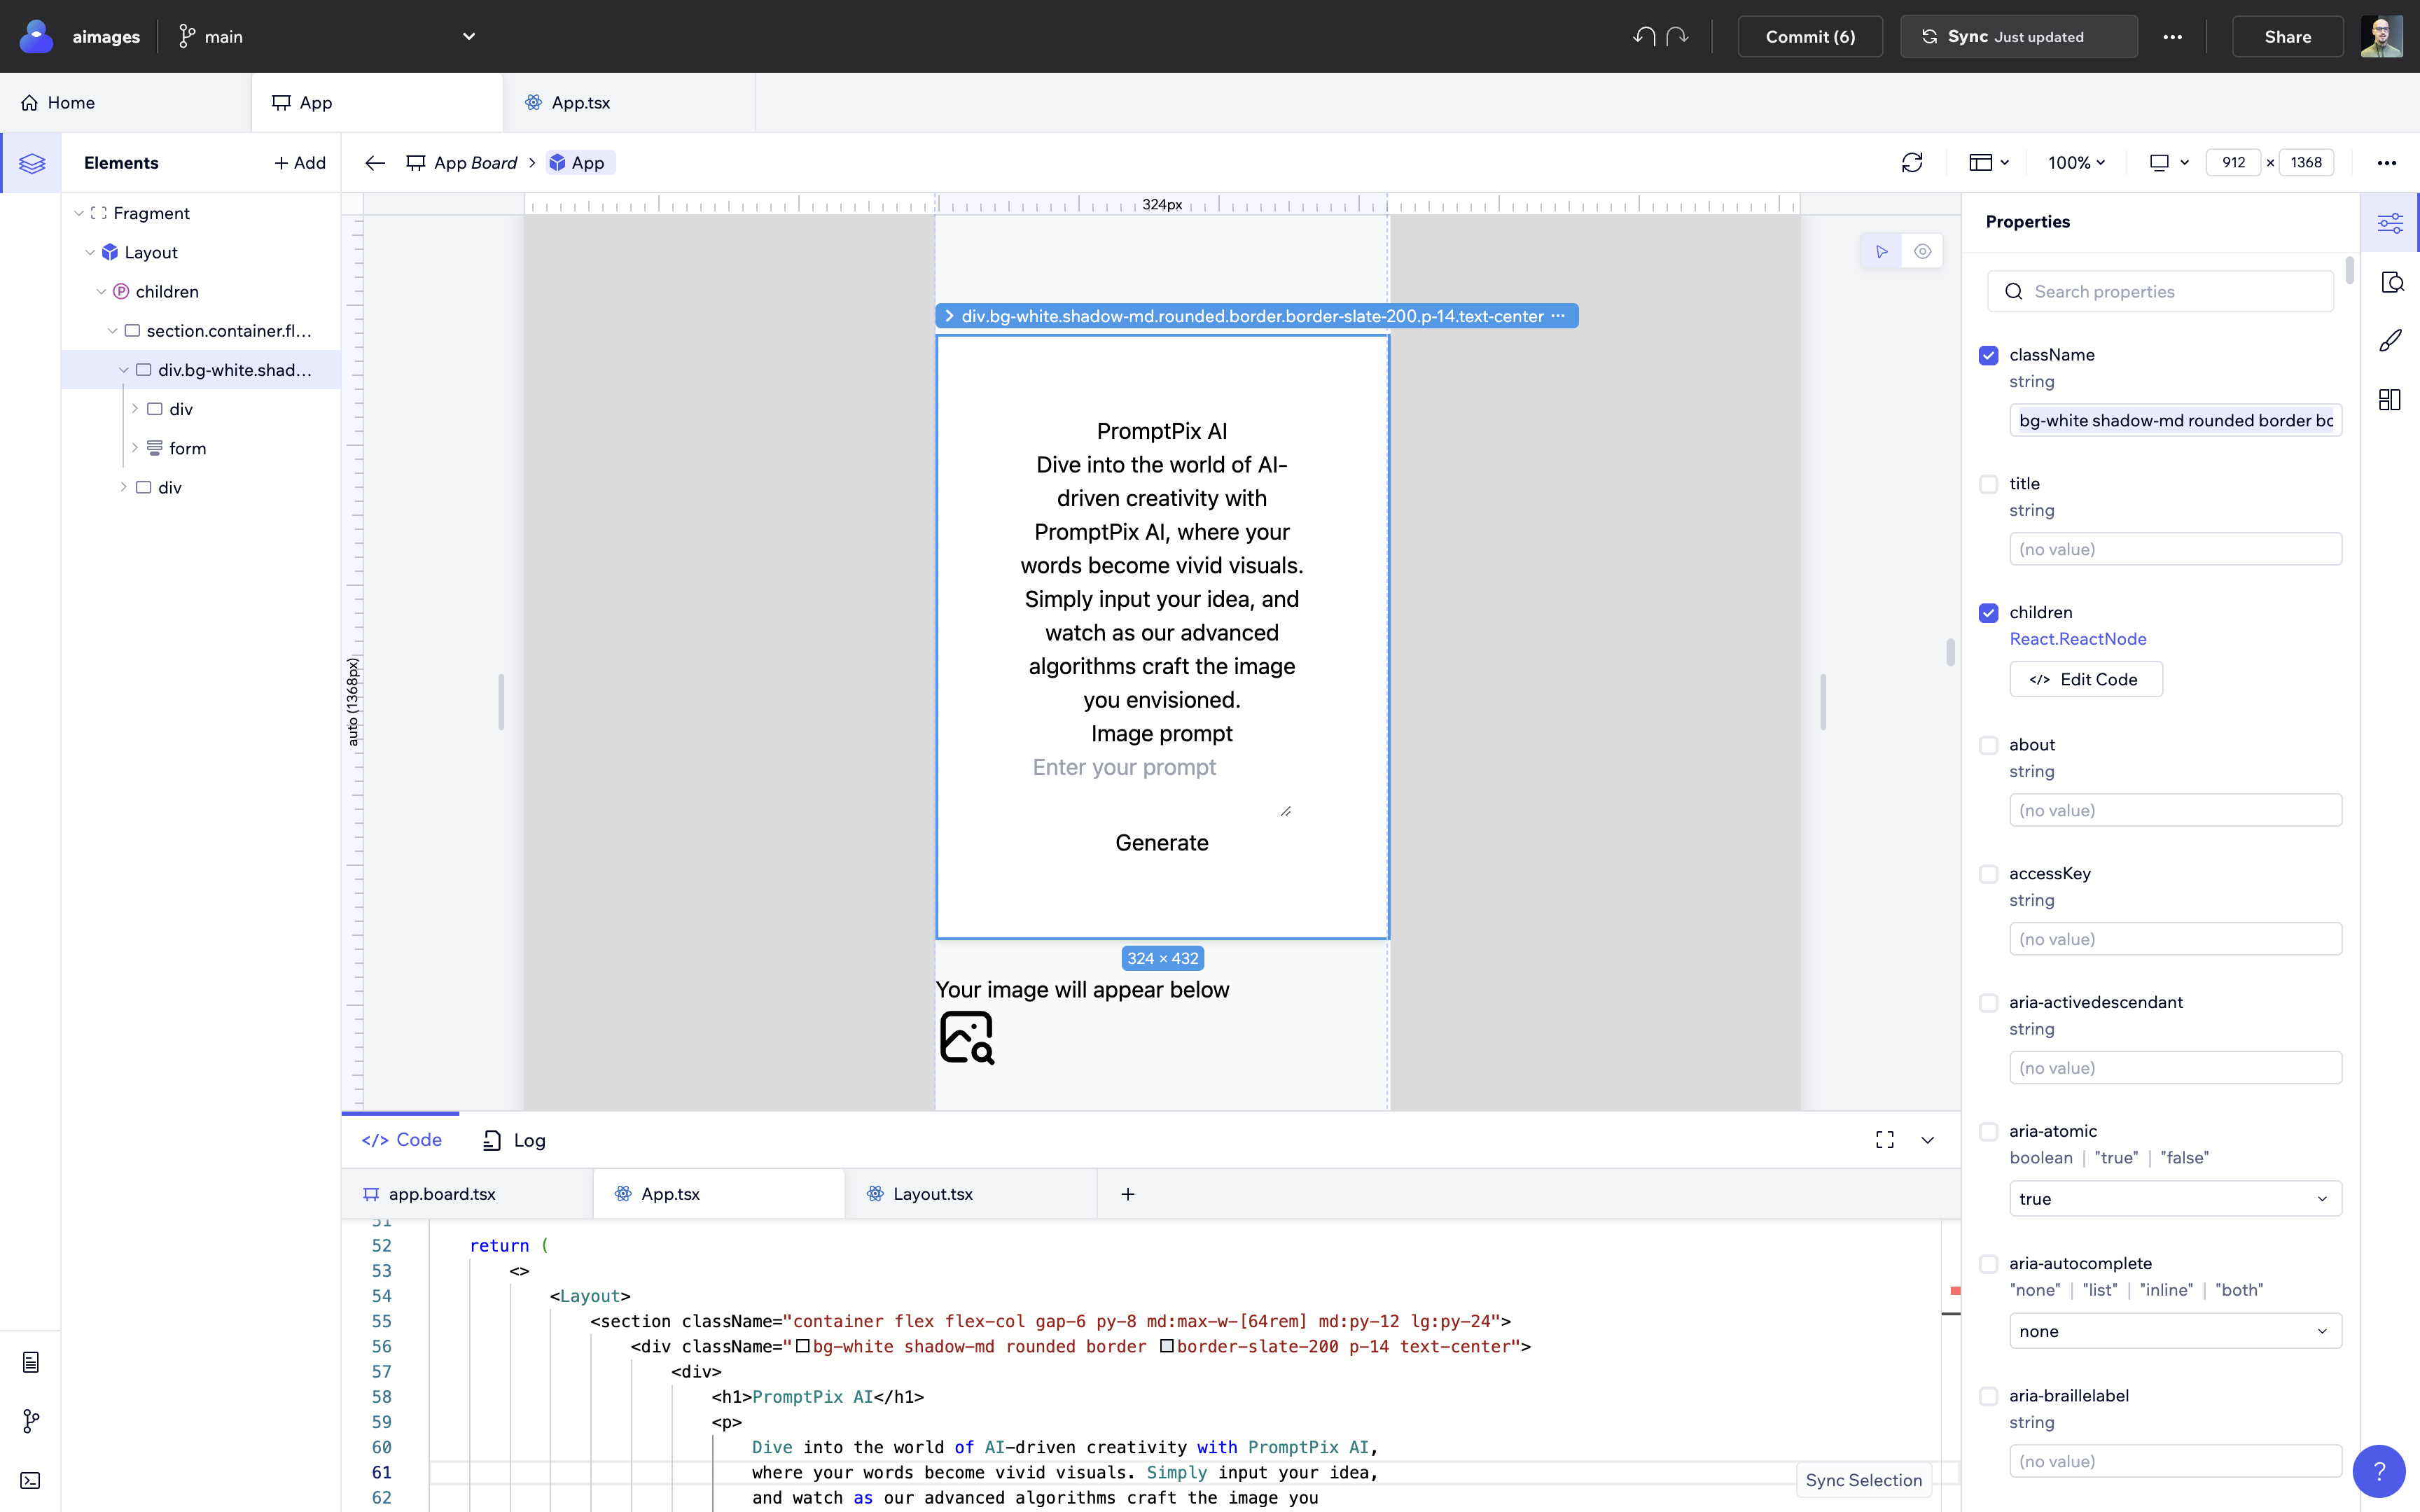
This is how the application looks up to this point.
The next steps are as follows:
- stylize the heading + description
- stylize the form
- stylize the part where the image will appear
- create the API
Let's style the heading and description through your IDE (VS Code, in my case) to see the auto-sync in action.
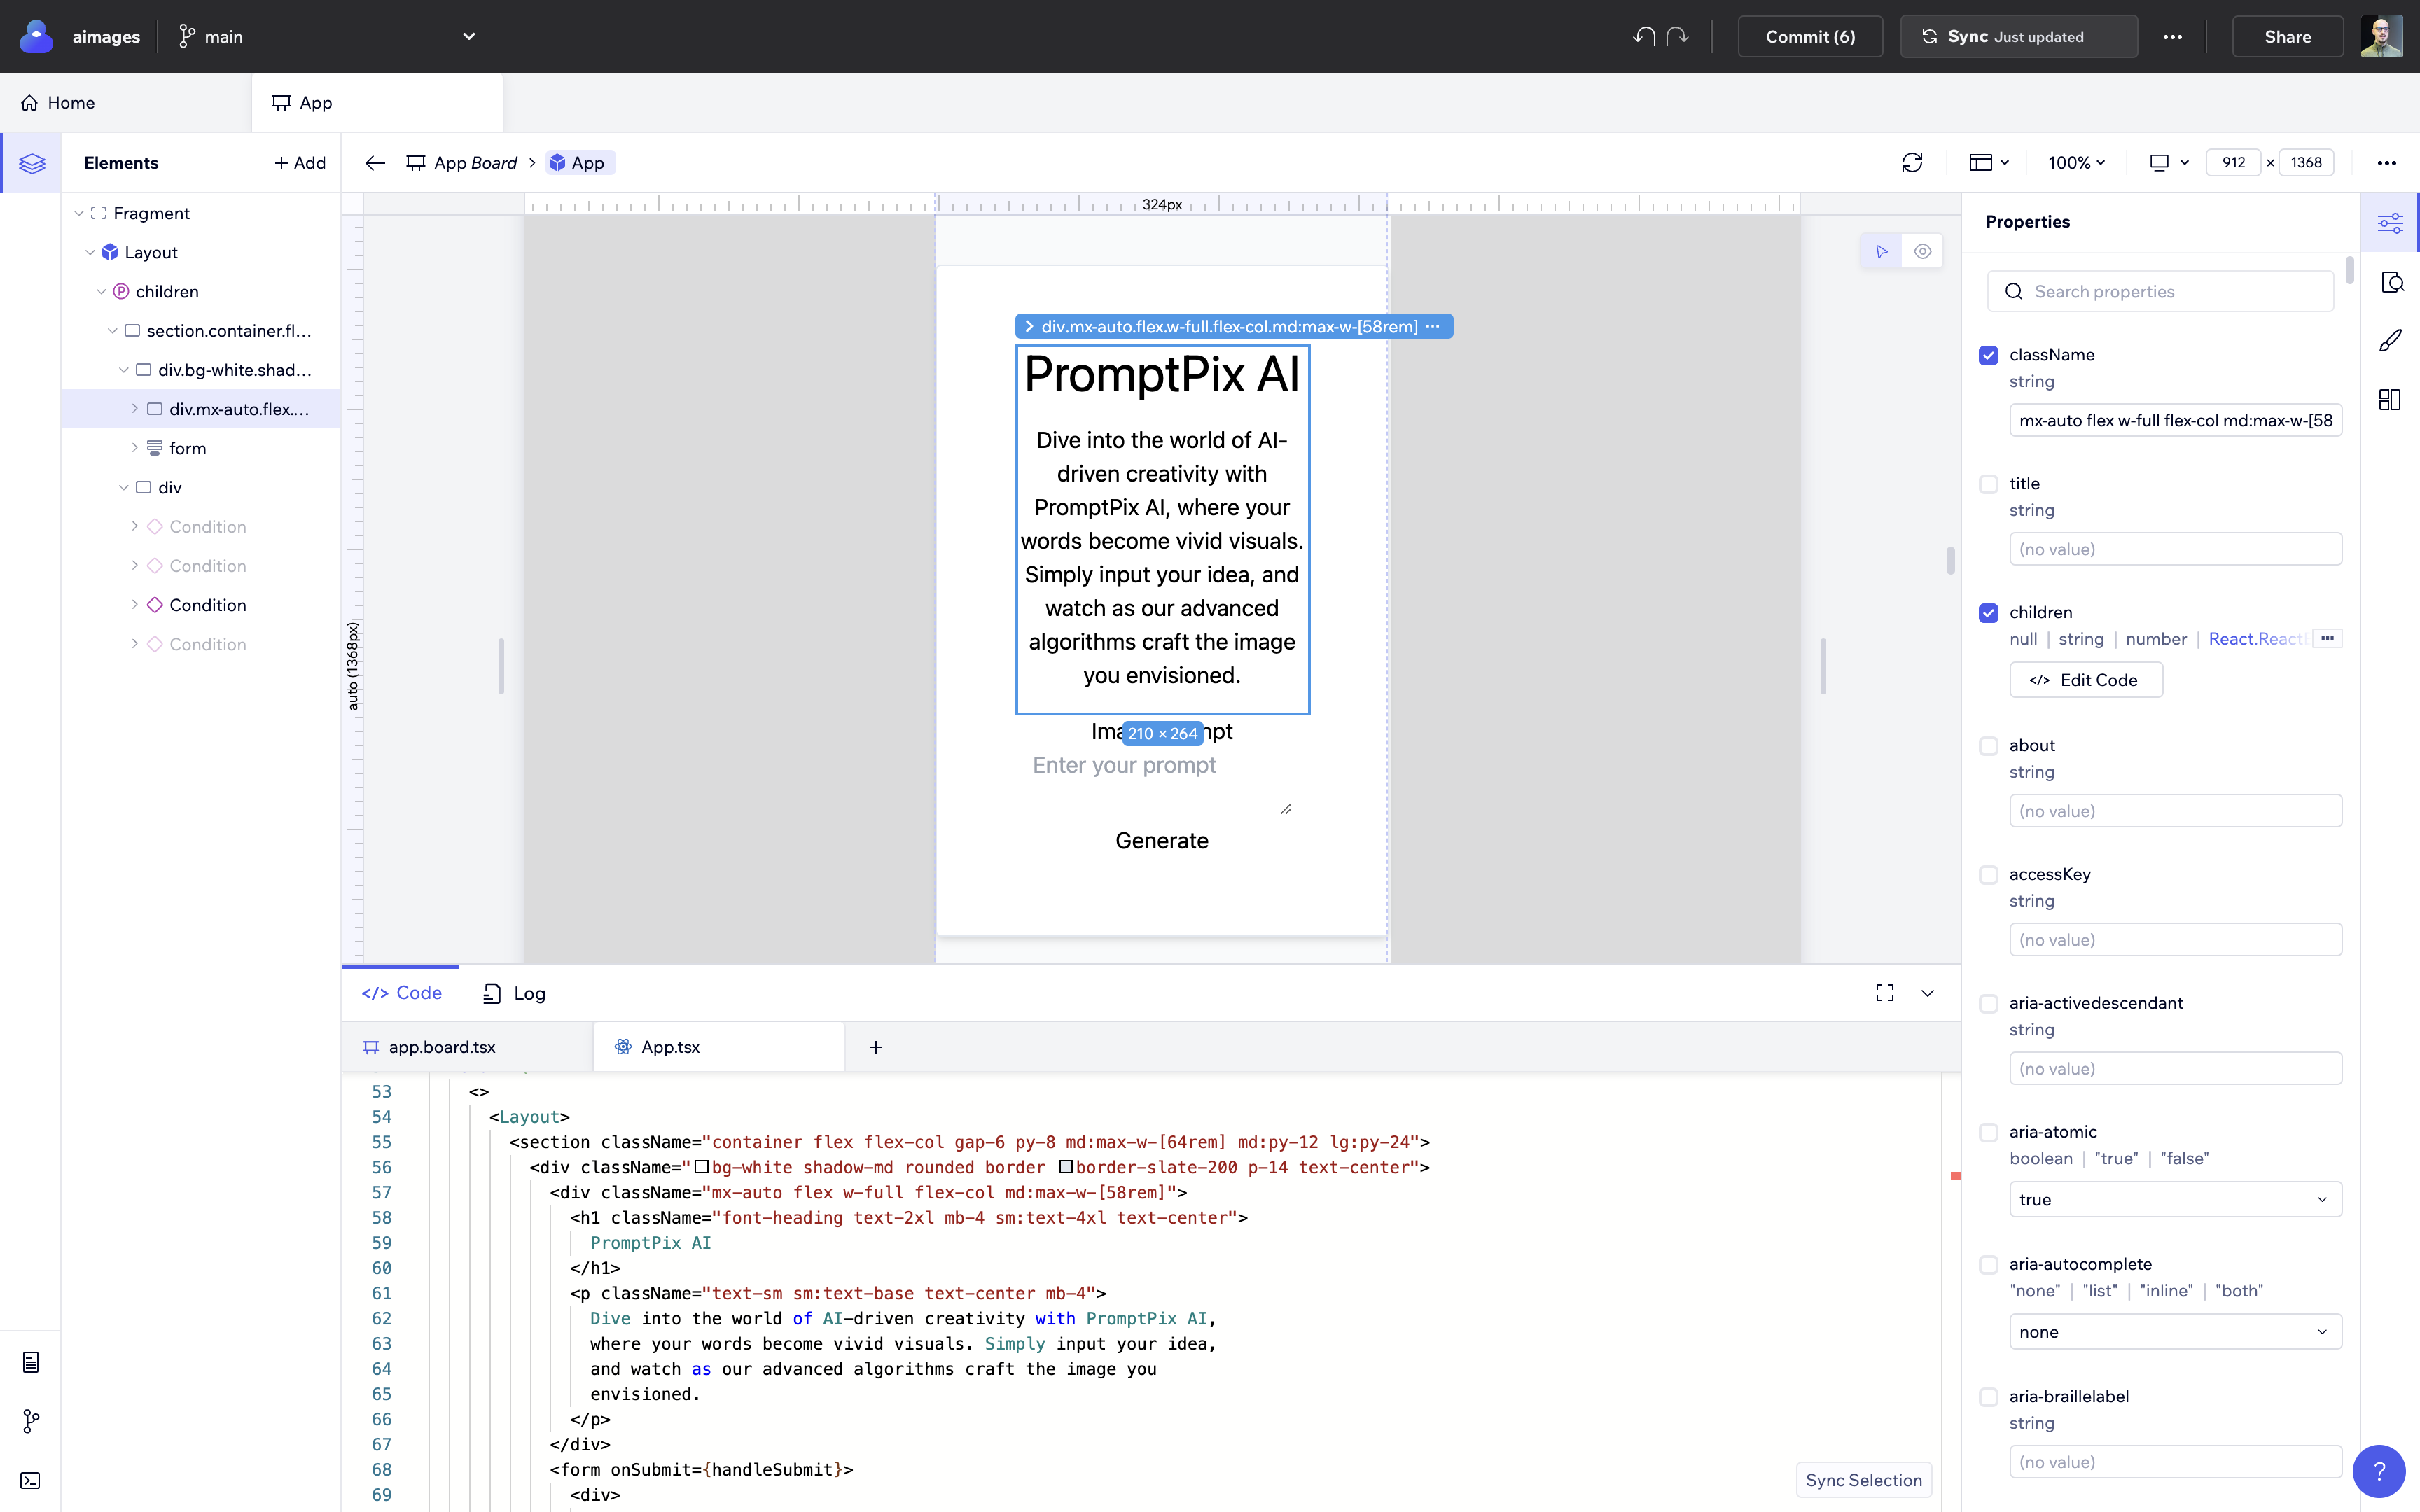
Replace the 2nd div element with the following code:
<div className="mx-auto flex w-full flex-col md:max-w-[58rem]">
   <h1 className="font-heading text-2xl mb-4 sm:text-4xl text-center">
      PromptPix AI
   </h1>
   <p className="text-sm sm:text-base text-center mb-4">
      Dive into the world of AI-driven creativity with PromptPix AI,
      where your words become vivid visuals. Simply input your idea,
      and watch as our advanced algorithms craft the image you
      envisioned.
   </p>
</div>
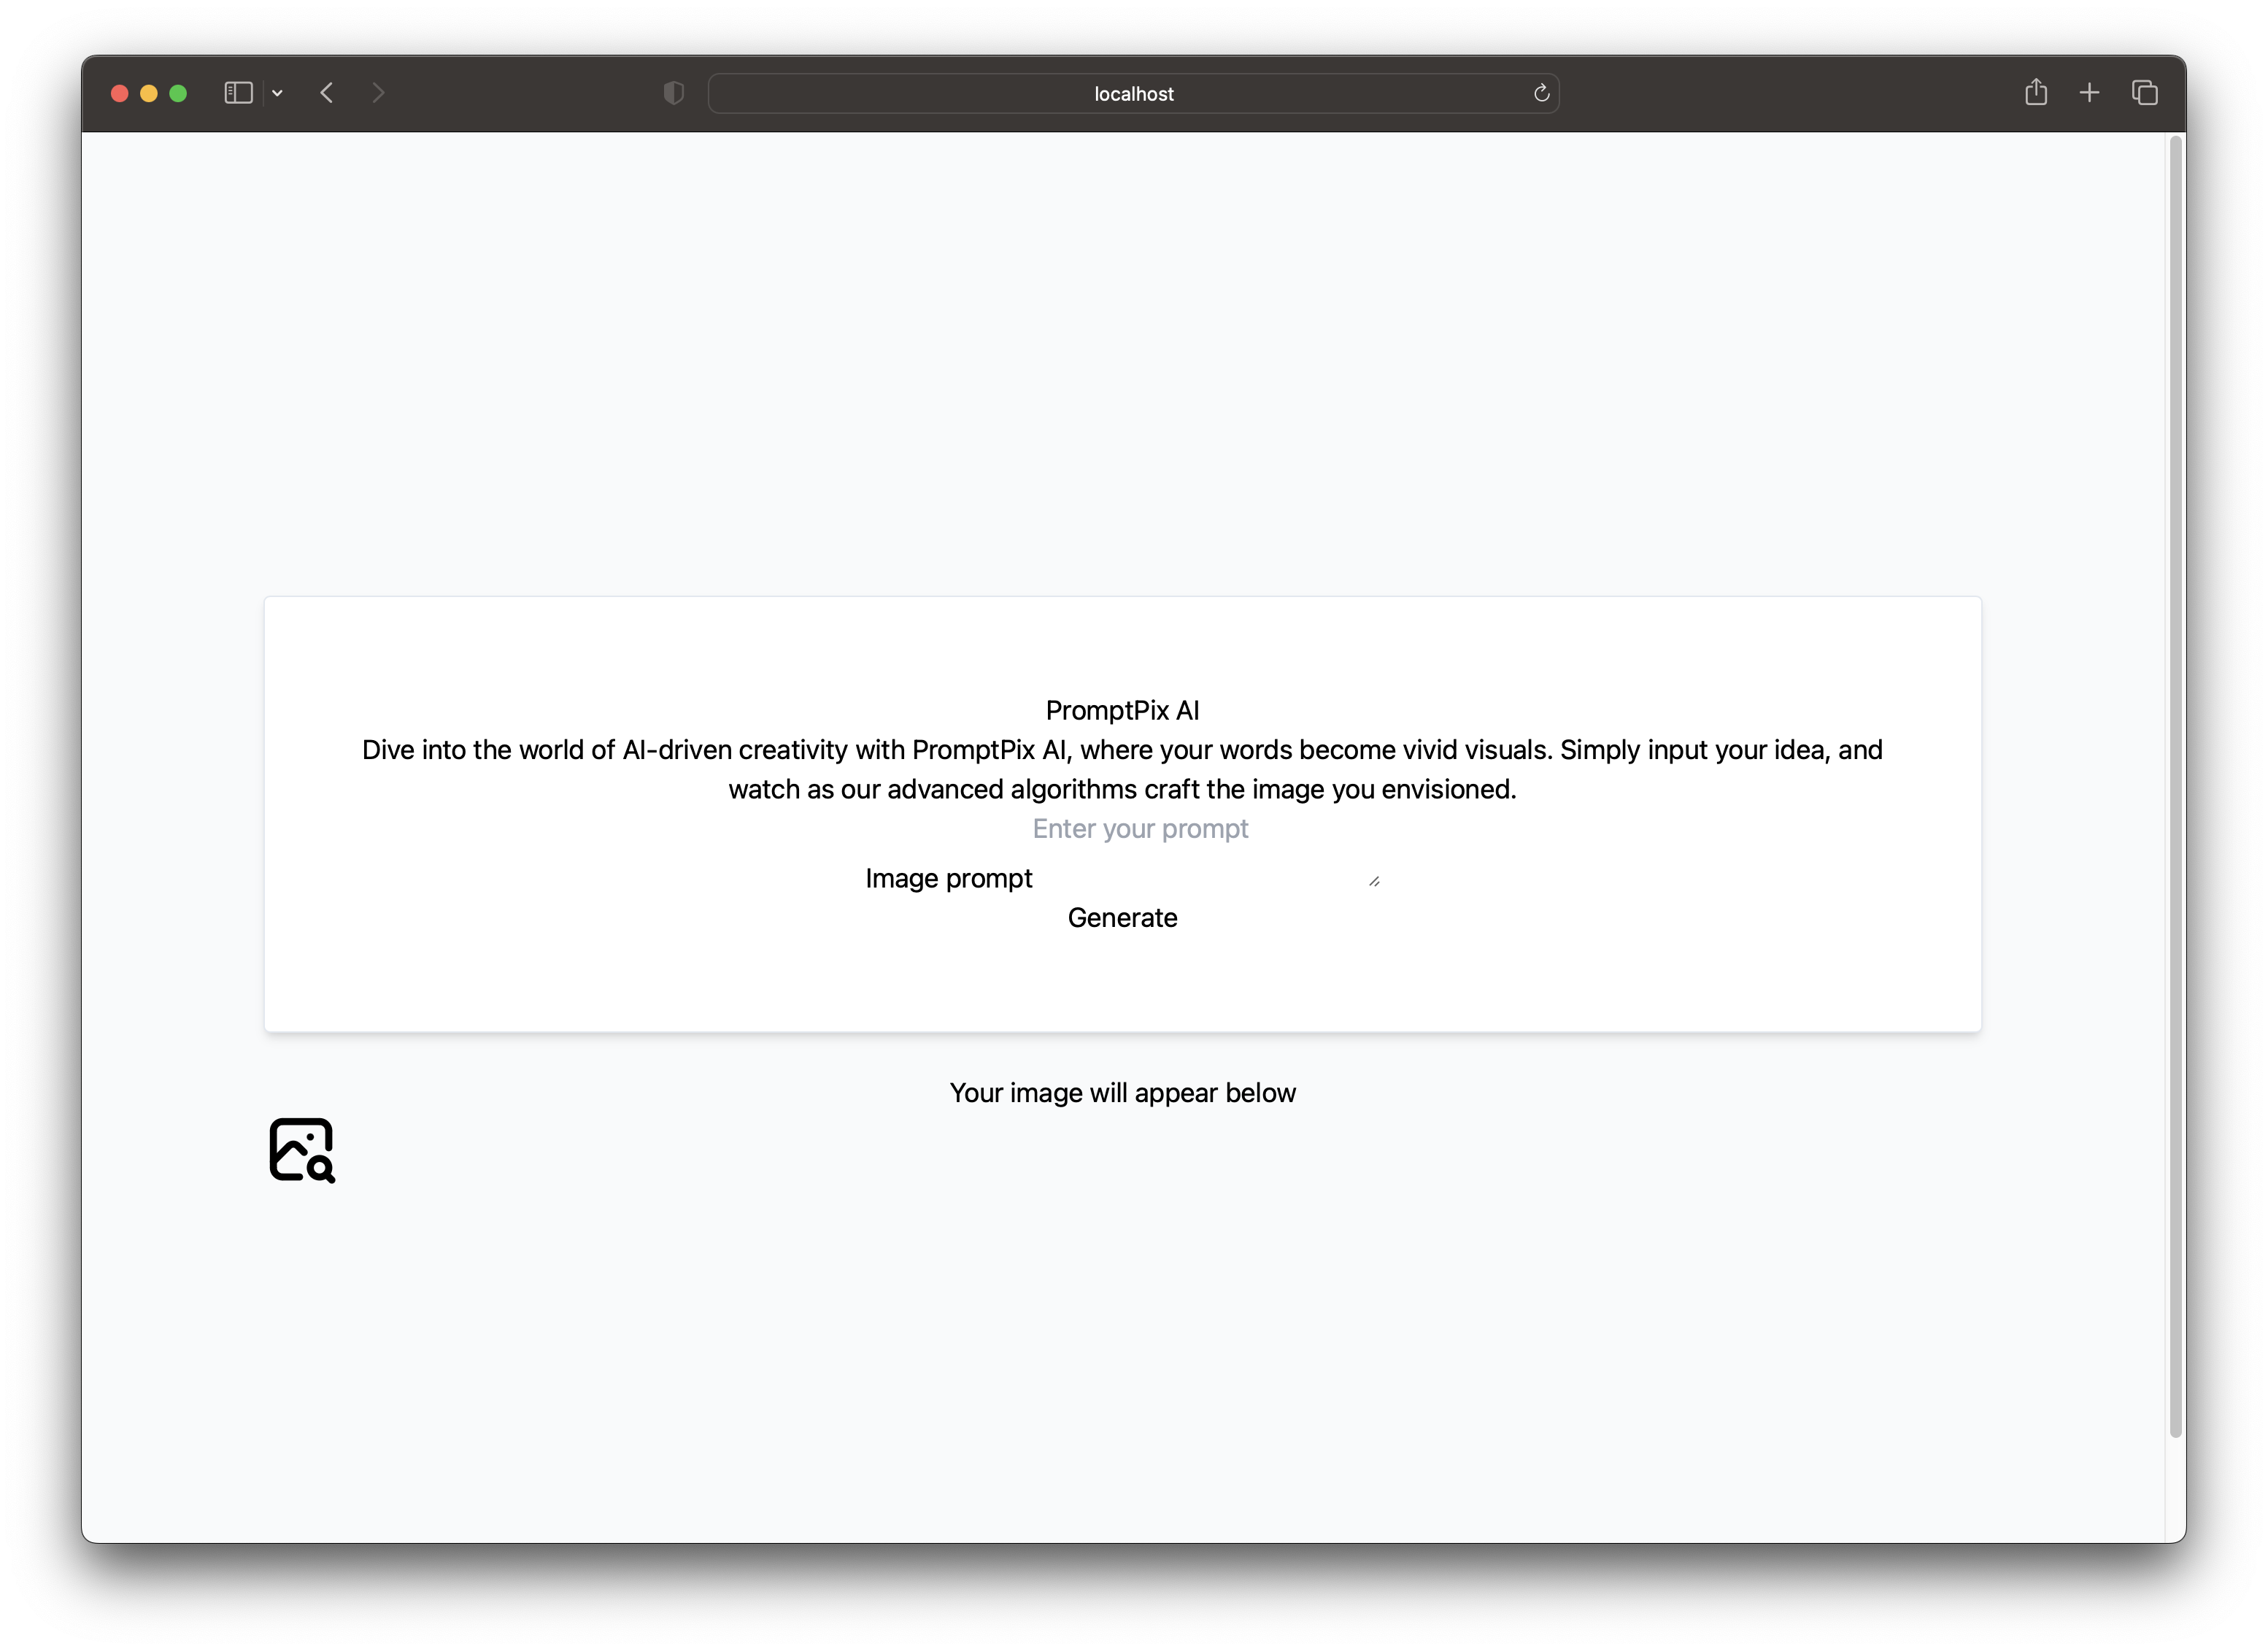
The screenshot below illustrates how your code should look:

If you navigate back to Codux, you will see the changes applied in the visual area and the code editor from the bottom of the page.
Similarly, all the changes made in Codux are available in your IDE.
As an exercise, add the following classes to these elements:
- the
formelement -space-y-6 - the
divelement inside the form -flex flex-col items-center gap-4 - the
labelelement -text-sm sm:text-base - the
textareaelement -border border-slate-200 rounded p-2 w-3/4 h-32 resize-none - the
buttonelement:
`${
inputValue.length === 0
? "bg-white text-gray-800 font-semibold py-2 px-4 border border-slate-400 rounded shadow opacity-50 hover:opacity-50 cursor-not-allowed"
: "bg-white hover:bg-slate-100 text-gray-800 font-semibold py-2 px-4 border border-slate-400 rounded shadow"
}`
This is how the application looks like with all the above classes applied:
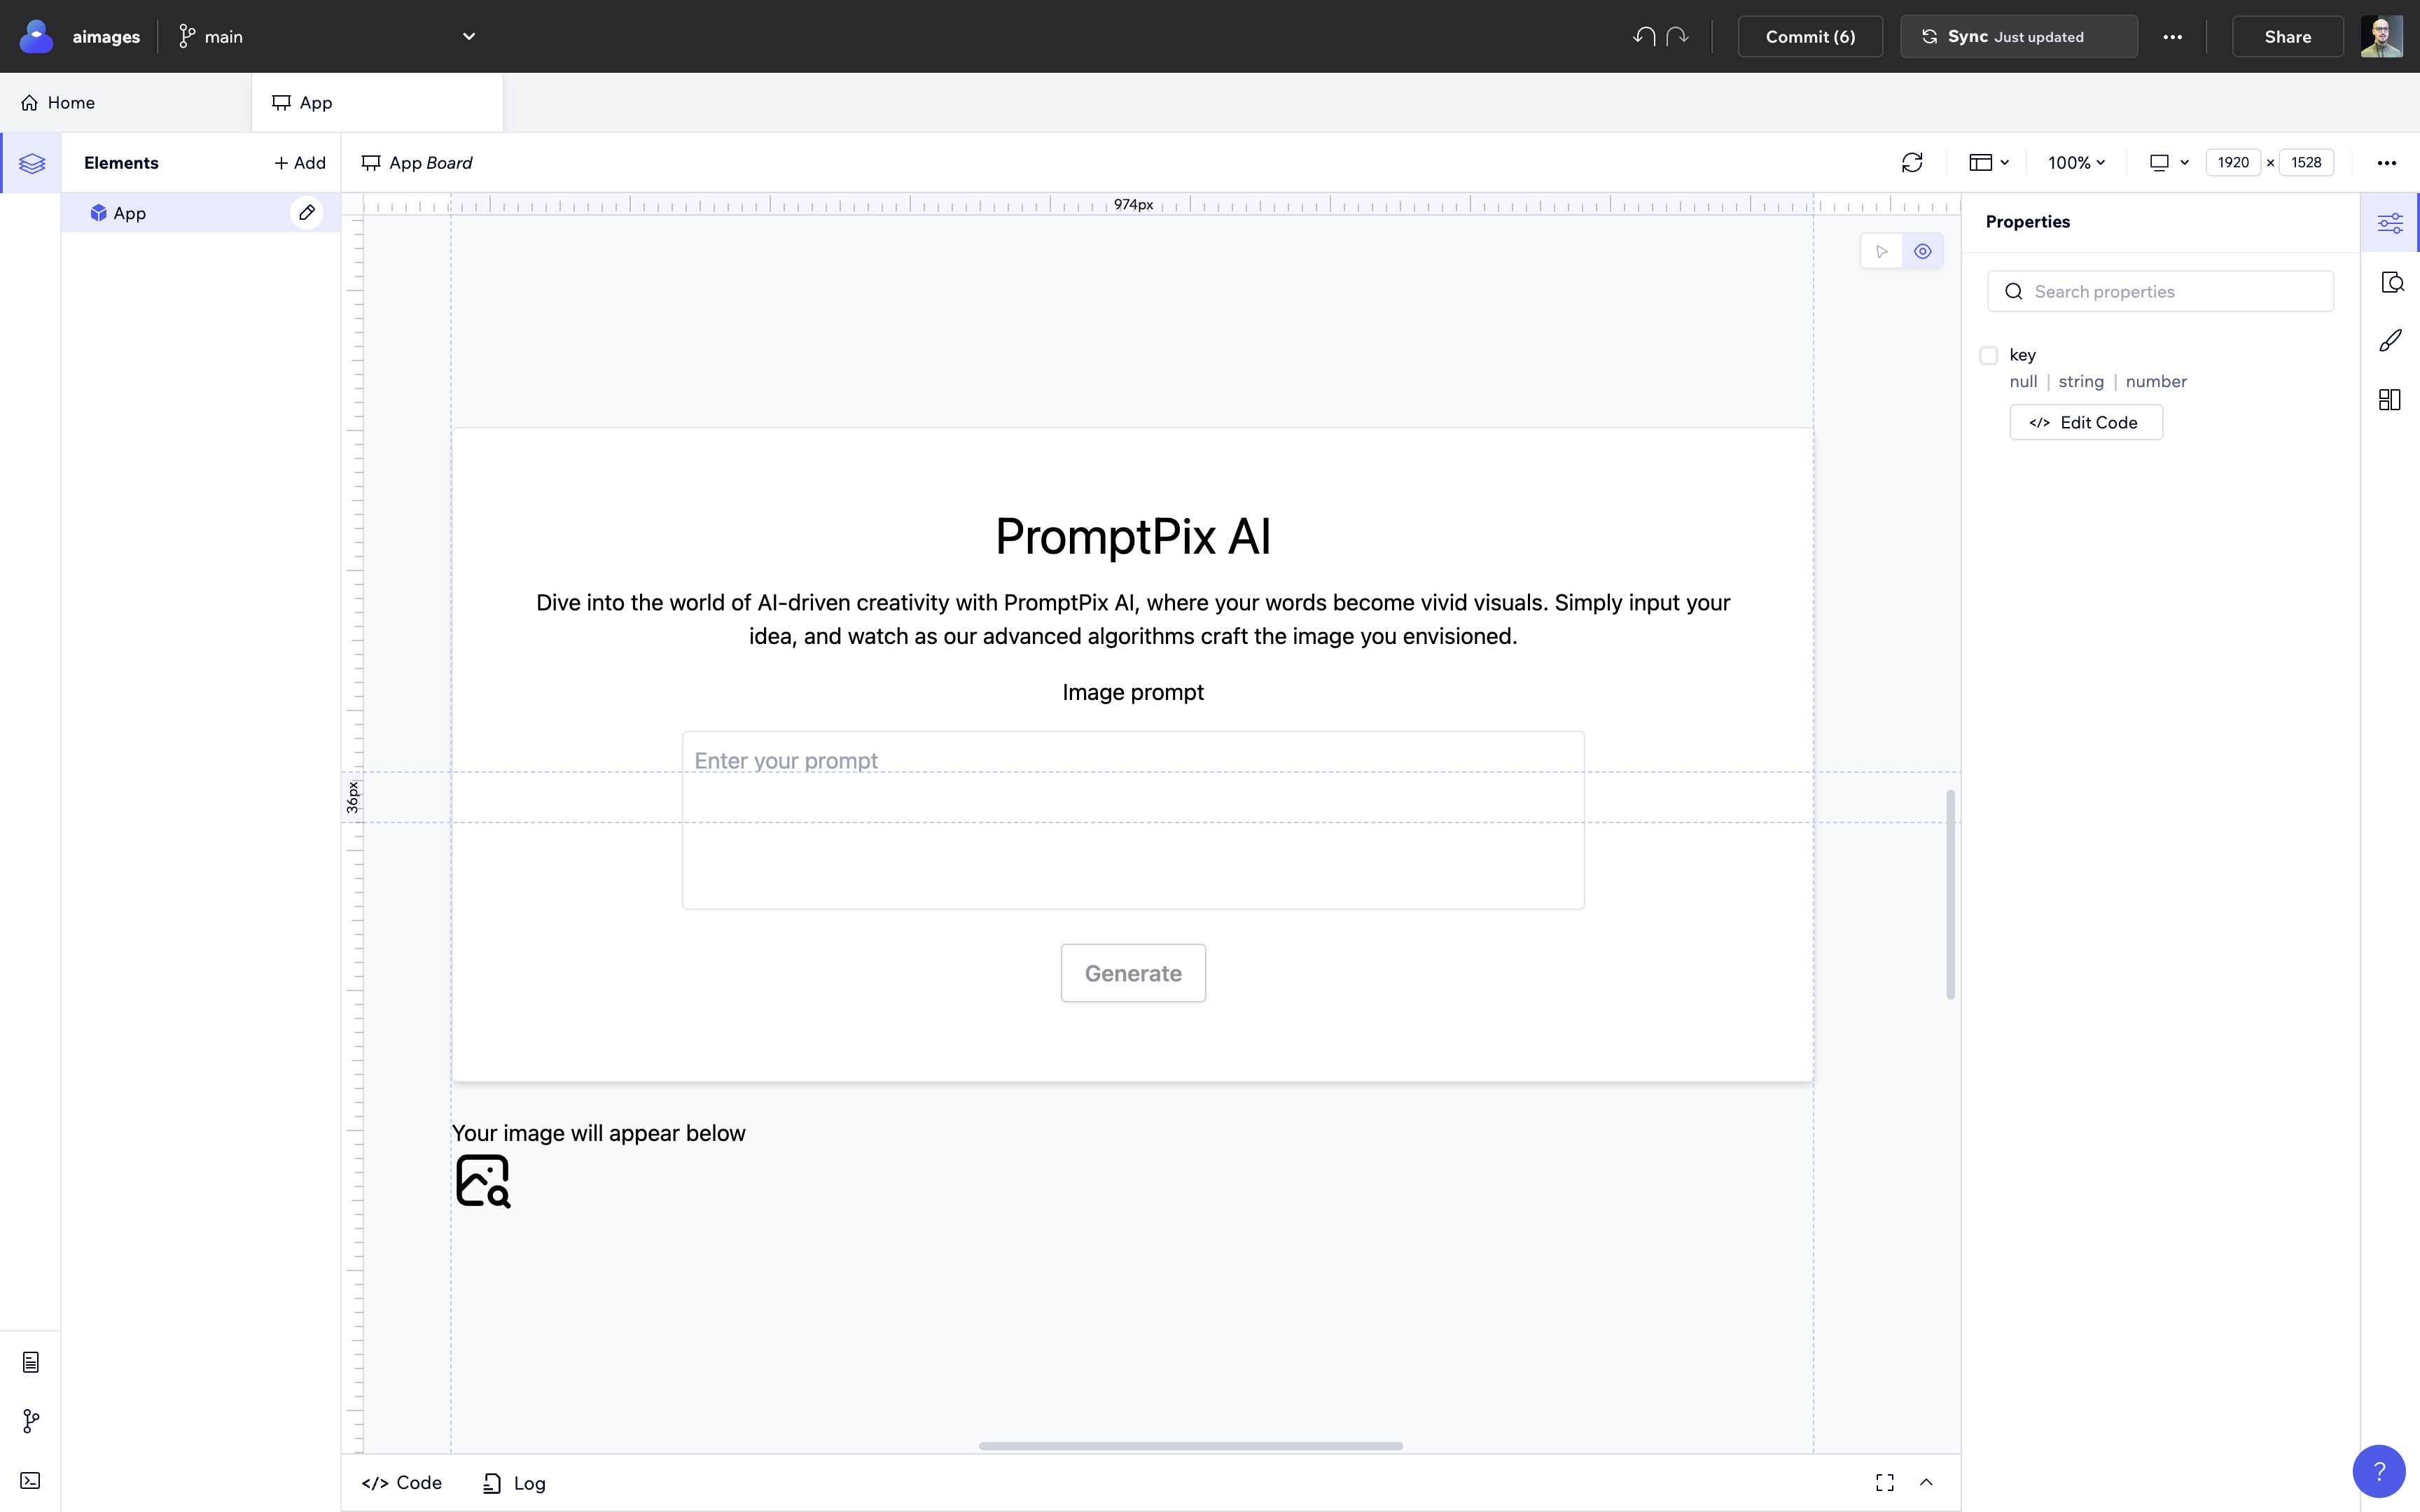
Looks pretty good already, right?
The last step involves styling the part where the generated image will appear. We'll make the initial div element (that's displayed before entering any prompt) a flex container with its children arranged in a column, centered horizontally, with a gap of 24px between each child and a top margin of 48px - flex flex-col items-center gap-6 mt-12.
You can add them as usual using the "className" field from Codux.
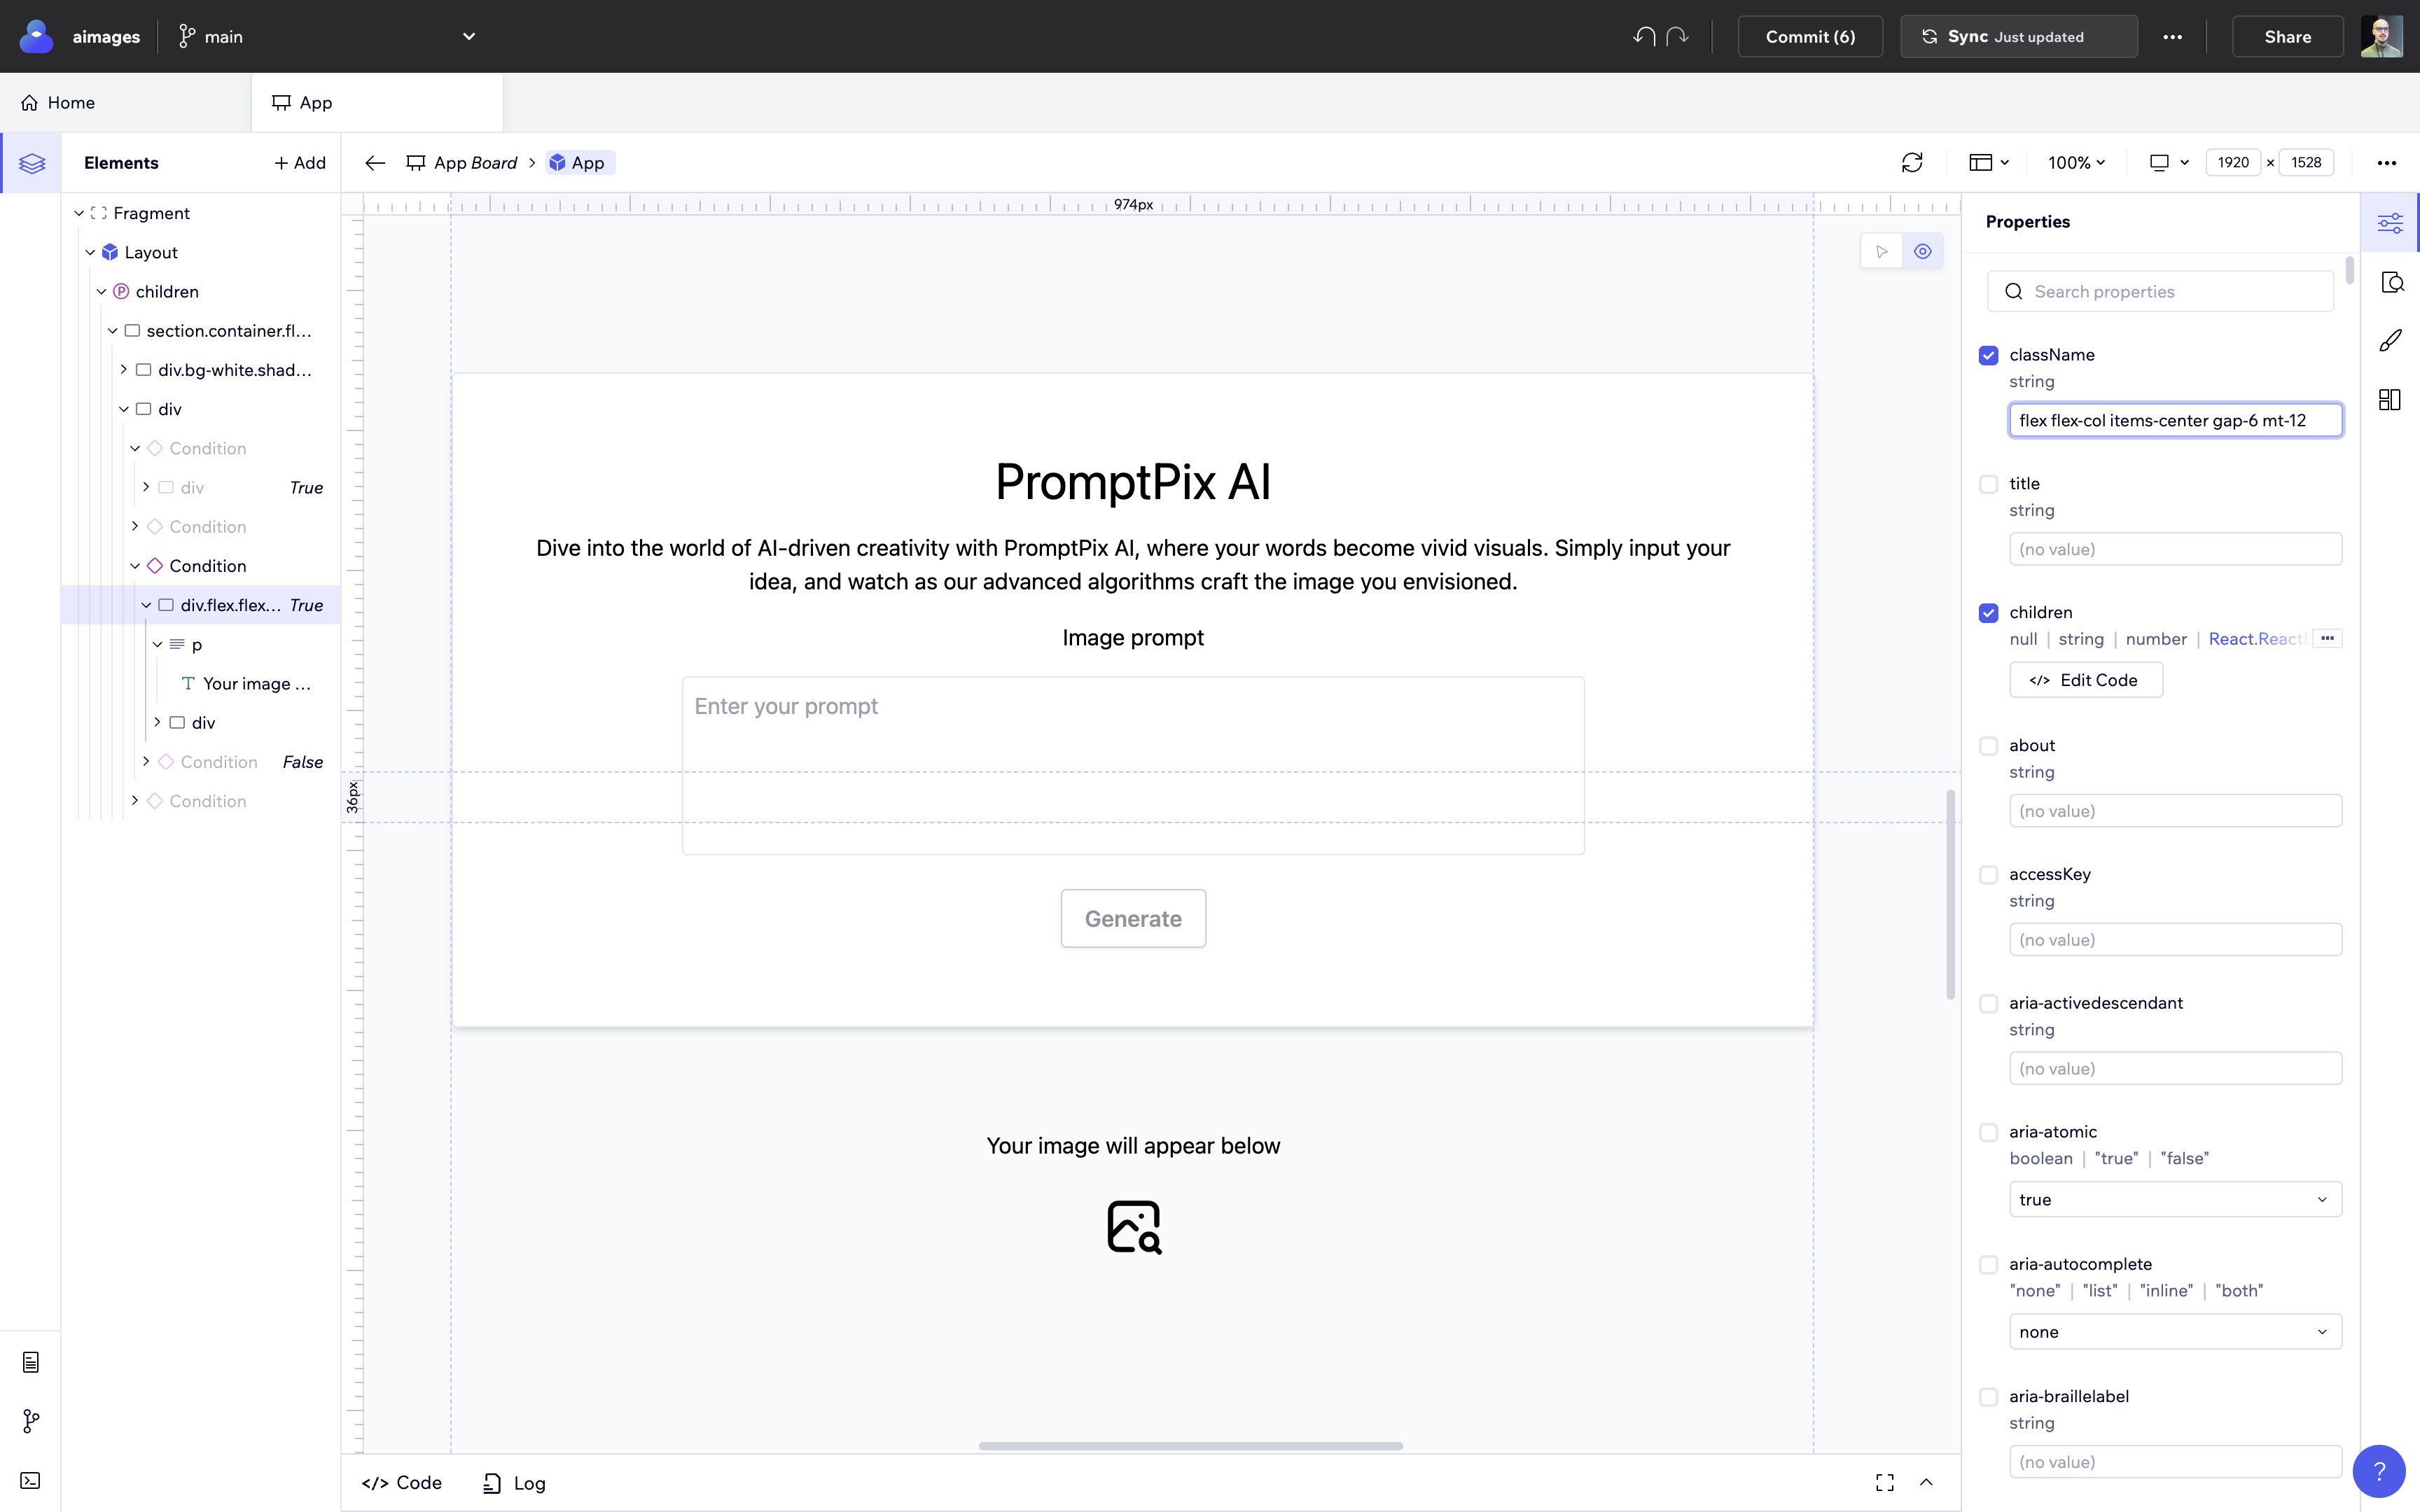
Apply the same Tailwind classes to the other 2 div elements that display the loading state and the generated image.
Lastly, stylize the error:
{error && (
<div className="text-center w-1/2 mx-auto bg-red-500 mt-2 rounded border border-red-800">
   {error}
</div>
)}
Now you're done with the user interface!
Codux offers much more
In building this application, you mostly applied classes and visualized the results in real-time. However, Codux offers much more.
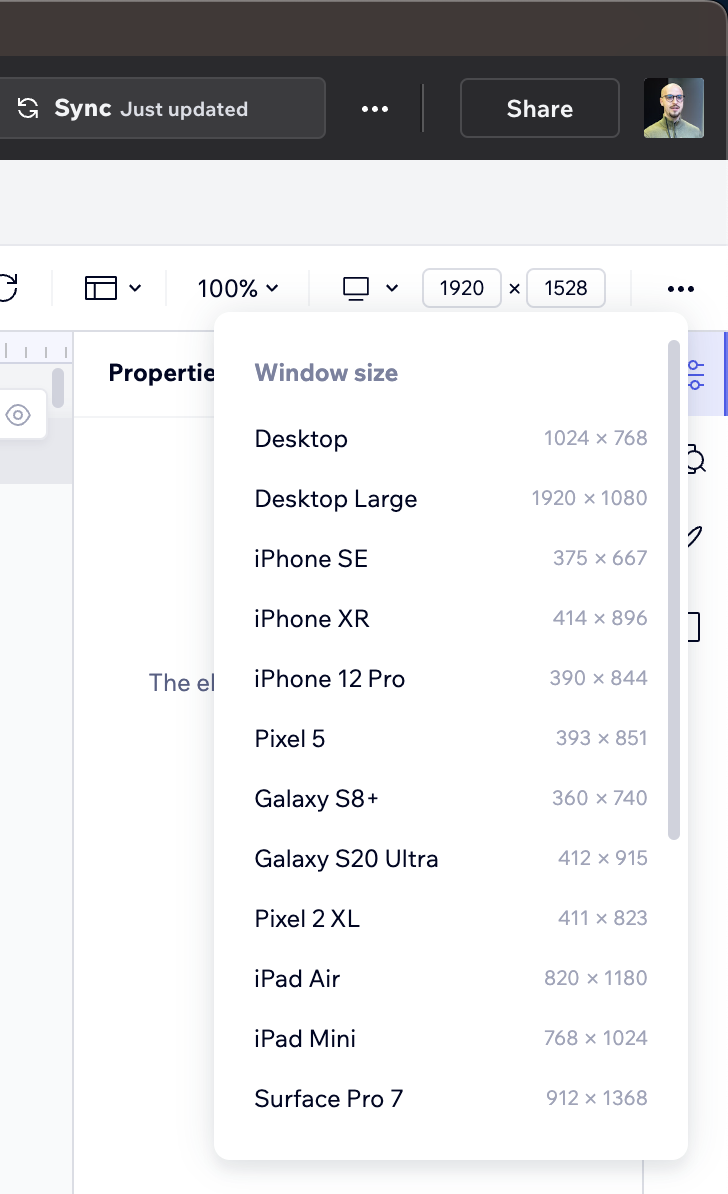
With Codux, you can test your application on multiple viewports and make the changes live for each viewport.
Besides that, we added the classes manually for each element. But you can also use the "Computed Styles" tab to stylize the elements. Instead of writing code manually, you can style elements interactively.
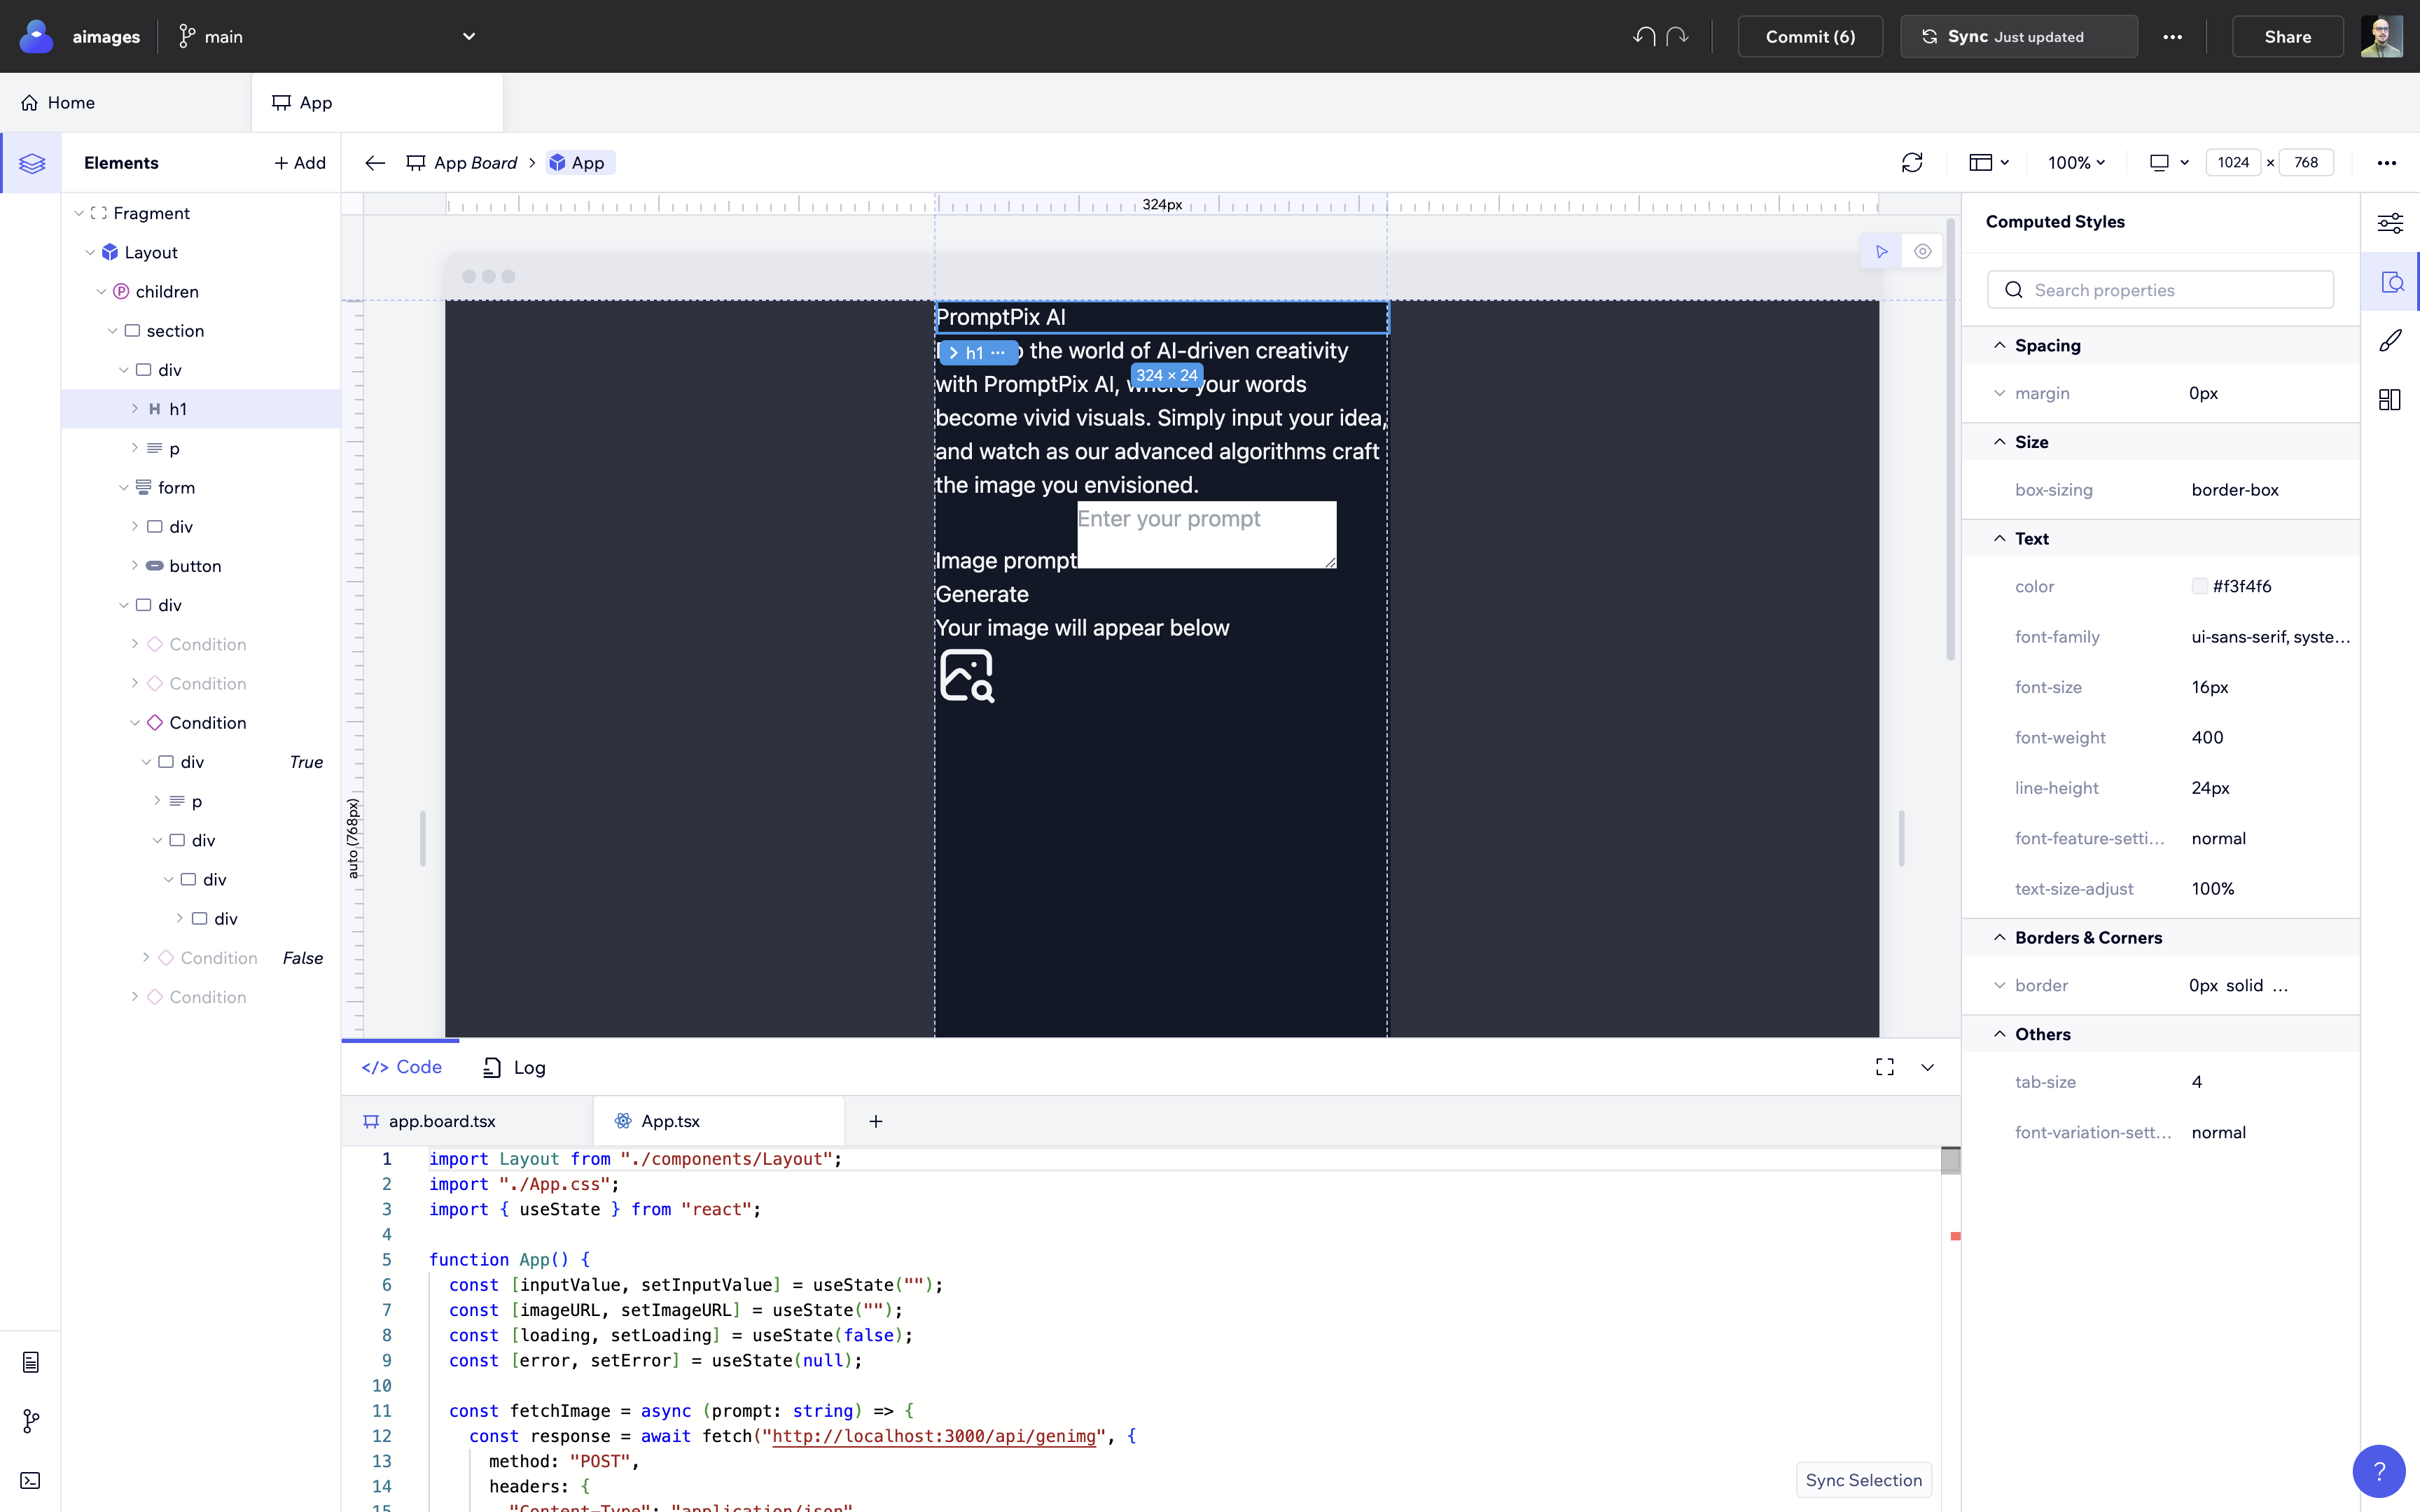
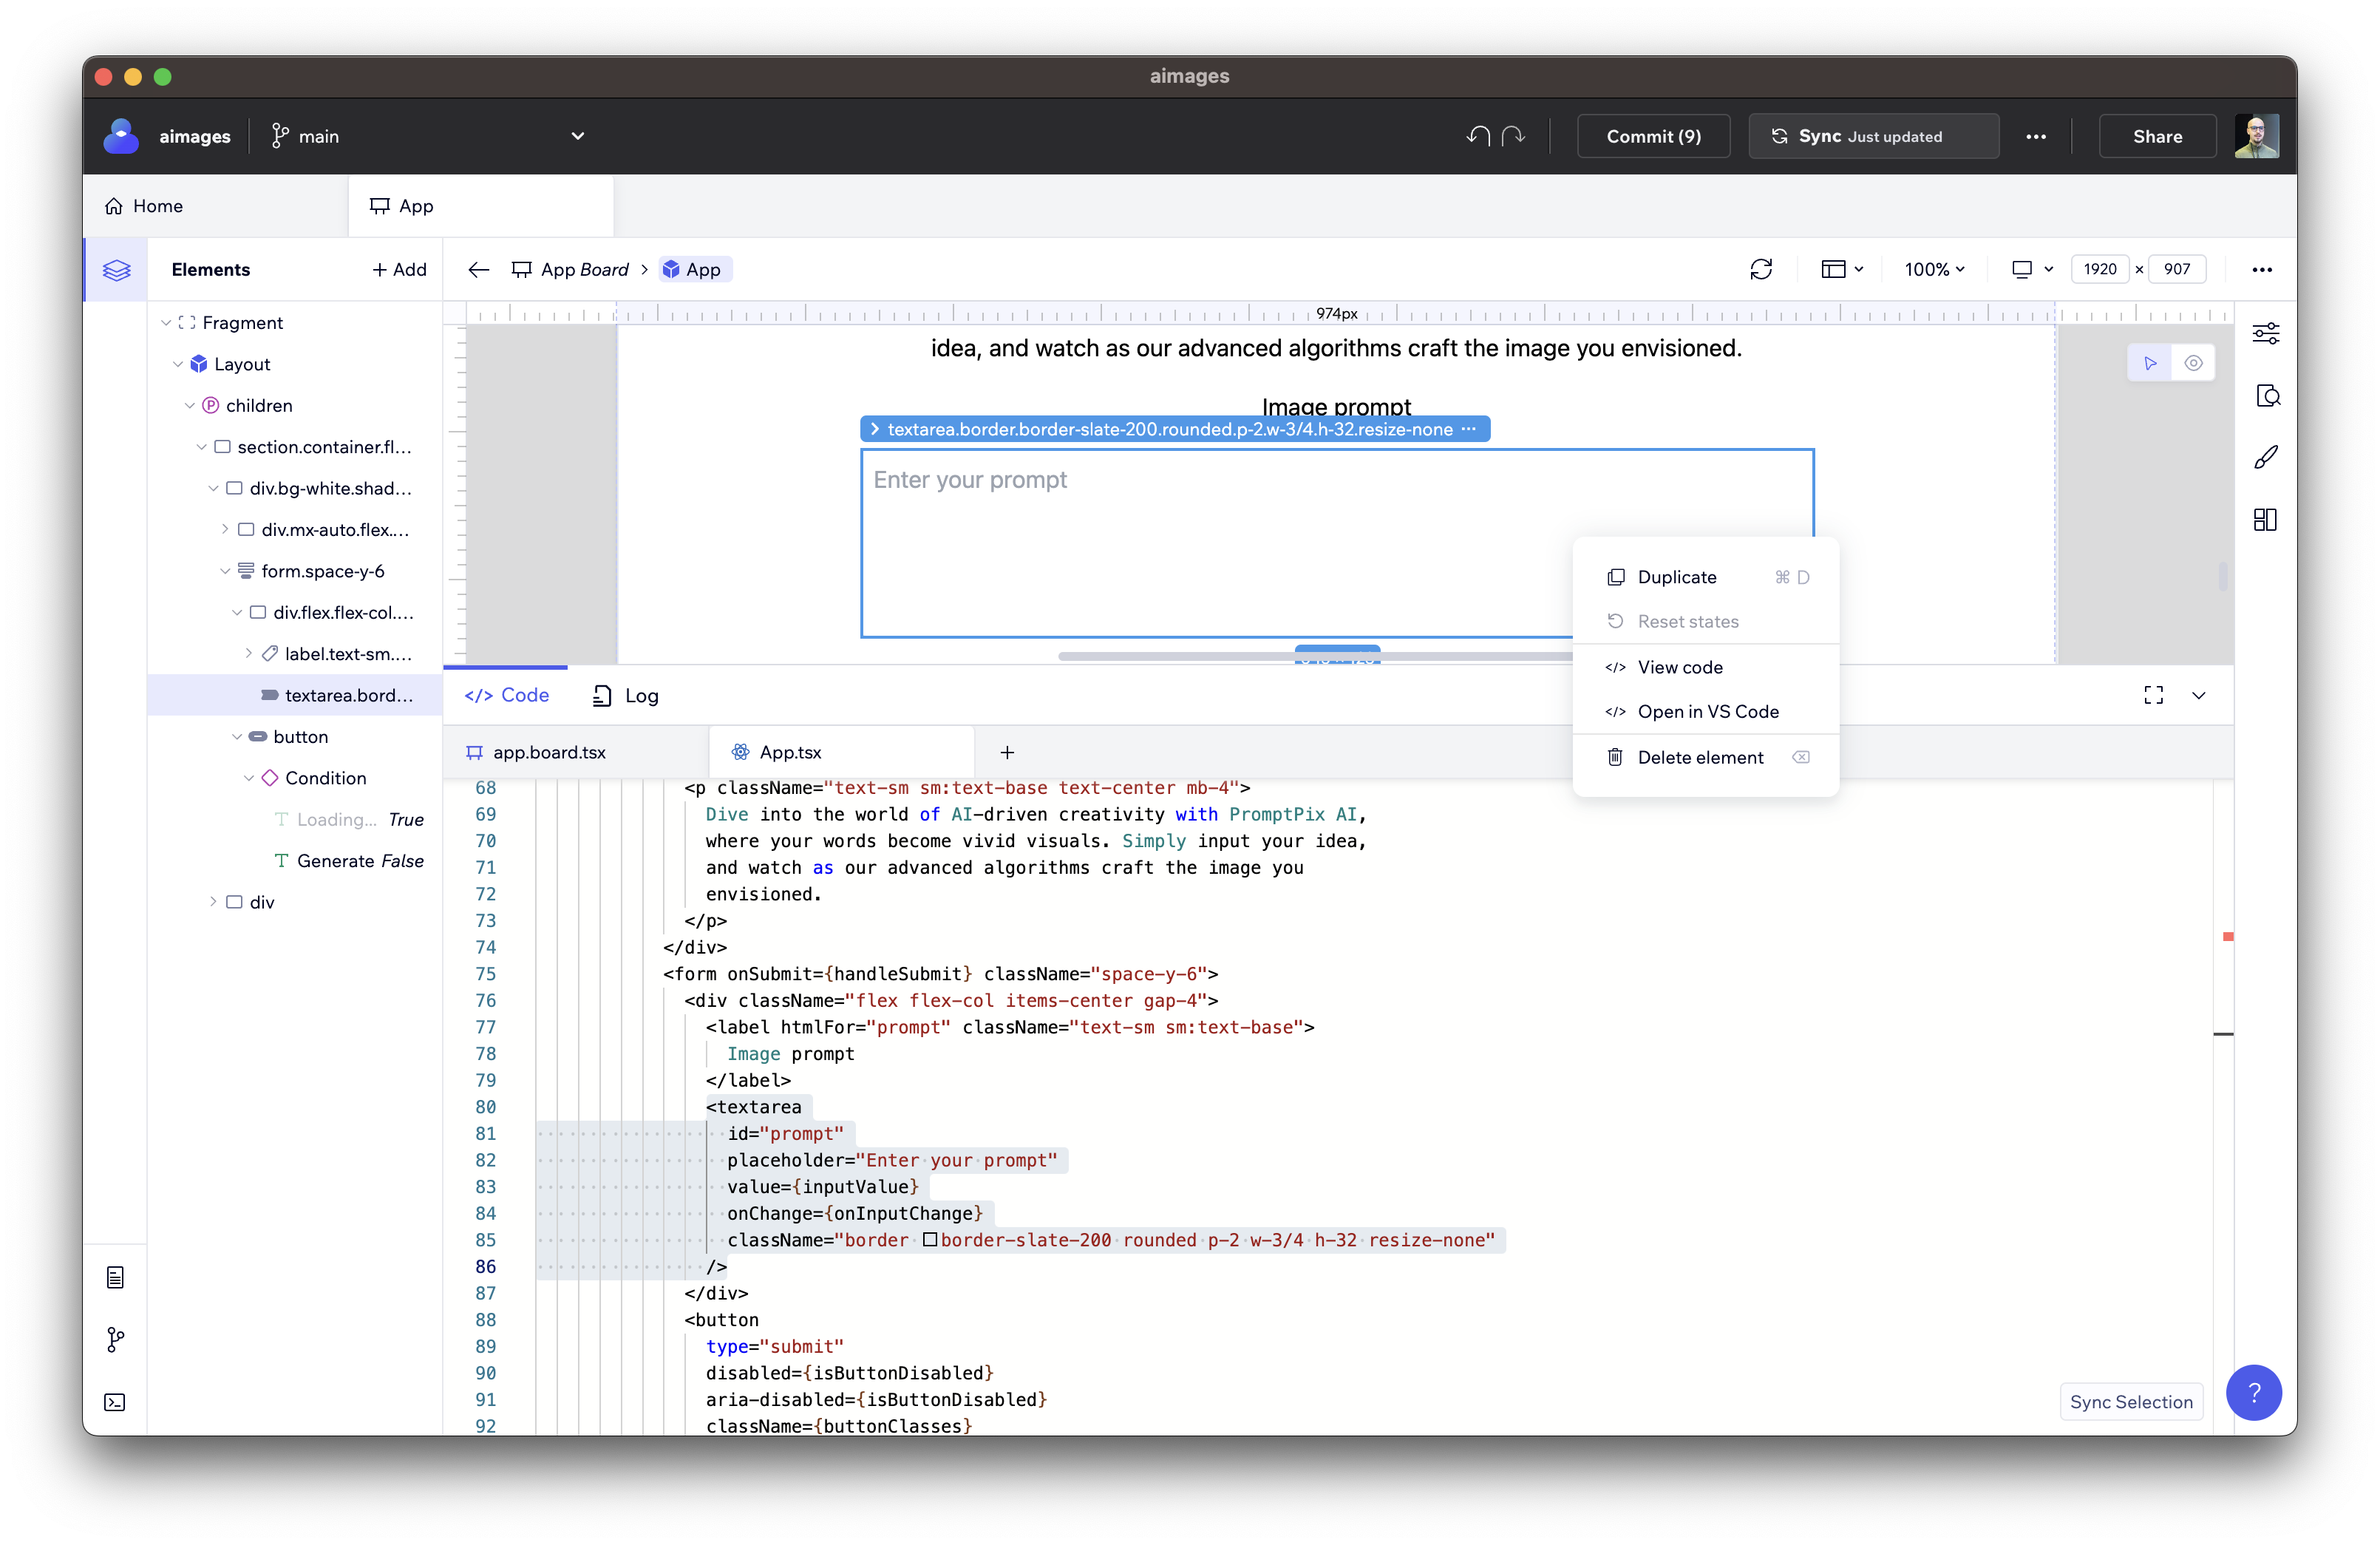
A favorite feature of mine is the ability to open the code for a specific element. You can select the particular element, right-click on it, and open it in the code editor/IDE.
The image illustrates how Codux highlights the relevant code for the selected element. Neat, right?
As you can see, there are lots of cool features in Codux. I encourage you to download it and explore it. It's free!
Some valuable resources to help you:
- Build React Apps with Codux Visual IDE for Faster UI Workflow
- Learn How to Build a Standout Portfolio Website Using Codux
- Craft a Real-Time Weather App From the Ground Up With Codux
- Learn All About Visual Component Styling, Including Class Creation and Shaping State, Variables and Computed Styles
The Backend Code for Generating the Image
You are probably using a different programming language & framework than me. Instead of wasting your time taking you through a painful process of building the backend in a technology you're not interested in, I'll share the code for the API route straightaway.
import express, { Request, Response } from "express";
import Replicate from "replicate";
import cors from "cors";

const app = express();
const port = 3030;

app.use(express.json());
app.use(cors());

app.options("/api/genimg", (req: Request, res: Response) => {
  // Pre-flight request. Reply successfully:
  res.status(200).end();
});

app.post("/api/genimg", async (req: Request, res: Response) => {
  const { value } = req.body;

  try {
    const replicate = new Replicate({
      auth: process.env.REPLICATE_API_TOKEN || "",
    });

    const result = await replicate.run(
      "stability-ai/stable-diffusion:a00d0b7dcbb9c3fbb34ba87d2d5b46c56969c84a628bf778a7fdaec30b1b99c5",
      {
        input: {
          prompt: value,
          image_dimensions: "1024x1024",
          num_inference_steps: 50,
          num_outputs: 1,
          guideance_scale: 7.5,
          prompt_strength: 0.8,
          scheduler: "KarrasDPM",
        },
      }
    );

    res.status(200).json(result);
  } catch (error) {
    console.error("Failed to generate image. Error:", error);
    res.status(500).json({ message: "Failed to generate image" });
  }
});

app.all("/api/genimg", (req: Request, res: Response) => {
  res.status(405).json({ message: "Method Not Allowed" });
});

app.listen(port, () => {
  console.log(`Server running at http://localhost:${port}`);
});
This TypeScript code sets up an Express server that listens on port 3030 and has CORS enabled. It defines three routes, all for the path "/api/genimg". The OPTIONS route is for handling pre-flight CORS requests. The POST route accepts a JSON body with a "value" property, uses it as a prompt to generate an image using the Replicate API, and returns the result. If there's an error during this process, it logs it and returns a 500 status code with a failure message. The ALL route is a catch-all that returns a 405 status code, indicating that the method used is not allowed. The server listens on the specified port and logs a message to the console when it's running.
This way, you can adapt the code to your programming language & framework of your choice.
Note: You can check the whole application code (both server and client) by accessing this GitHub link.
An ending note
Building applications comes with challenges that can slow down the development process and make collaboration difficult. One of the main challenges is the constant need to switch between different tools. That takes up considerable time and can break your concentration and flow. Moreover, collaborating with others is cumbersome, often requiring several steps before others can test your work.
This is where Codux steps in to make the whole process smoother and more efficient. Codux enables you to visualize changes as you make them without constantly switching between multiple tools. Moreover, it offers a visual user interface that makes it easier to build applications by allowing you to create things with a couple of clicks. But perhaps most importantly, it allows for real-time collaboration, enabling people to work together seamlessly.
Before closing, I want to mention again that Codux is not here to replace your IDE and other tools you might use. Think of Codux as another tool in your developer toolbox.